We have written this article to our all beloved Bees to maintain WordPress security. We understand you may not have time to update WordPress, its plugins, and themes regularly. However, a WordPress user must keep updated their WordPress and its essential assets which make it more super-powered ( Generally known as plugins and themes ).
In this short guide, we will try to assist you. How to enable Auto-update for WordPress core, plugin and themes. Both WordPress Manager tools are expressed in the following WP Toolkit and Softaculous WordPress Manager.
How much it’s important?
Updating WordPress core, themes, and plugins is vital because:
- Security: Updates protect against attacks and fix vulnerabilities.
- Bug fixes: Updates improve stability and performance.
- Compatibility: Updates ensure alignment with new web technologies.
- New features: Updates introduce enhancements and functionality.
- Support: Up-to-date versions receive better assistance and troubleshooting.
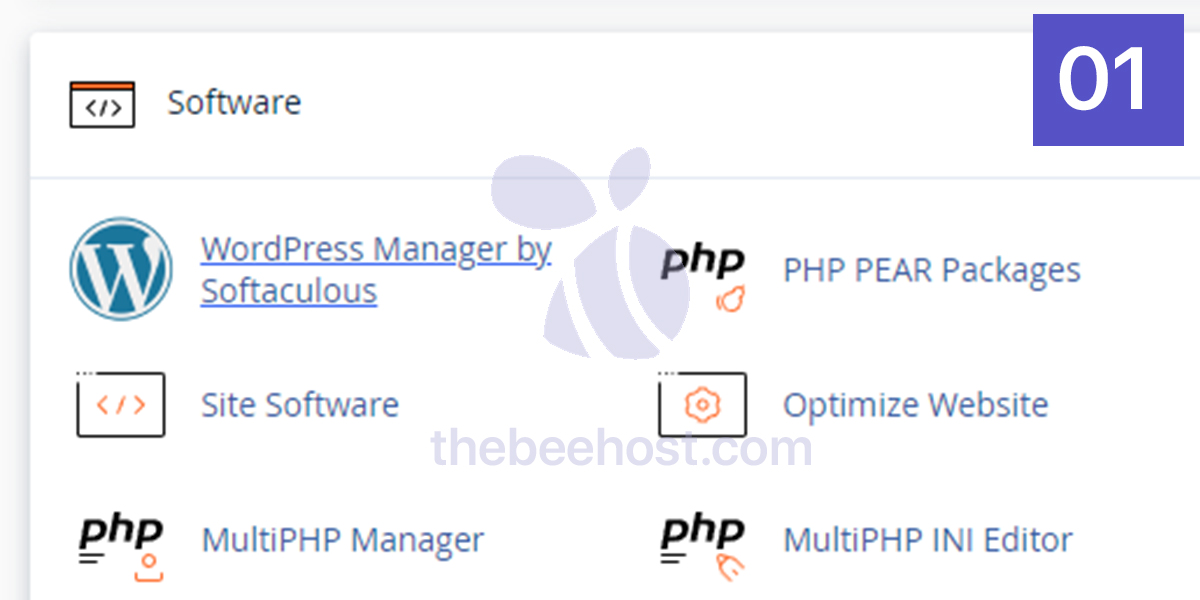
WordPress Manager by Softaculous:
Usually, It’s located under the Software section of cPanel.
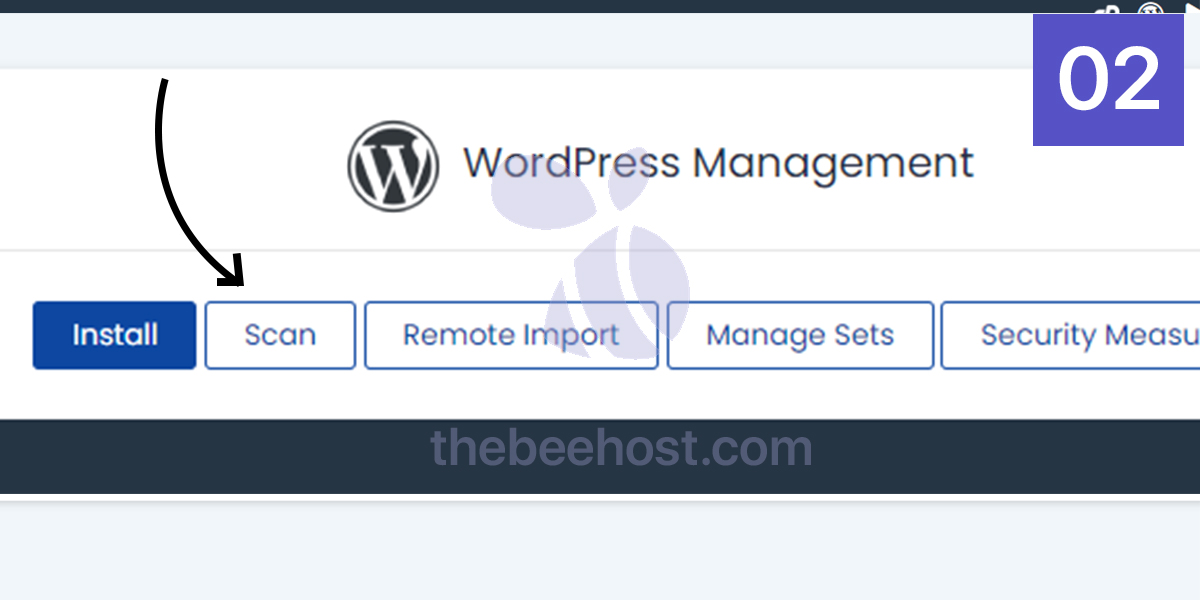
Scanning File System for WordPress Installations :
If your WordPress installations are not listed in Softaculous WordPress Manager. Then you should obey the below-listed point otherwise you may skip it.
- In WordPress Manager by Softaculous interface. Click on Scan.
- Switch to Manual installations and then click over ‘ Start Scanning for installations’.
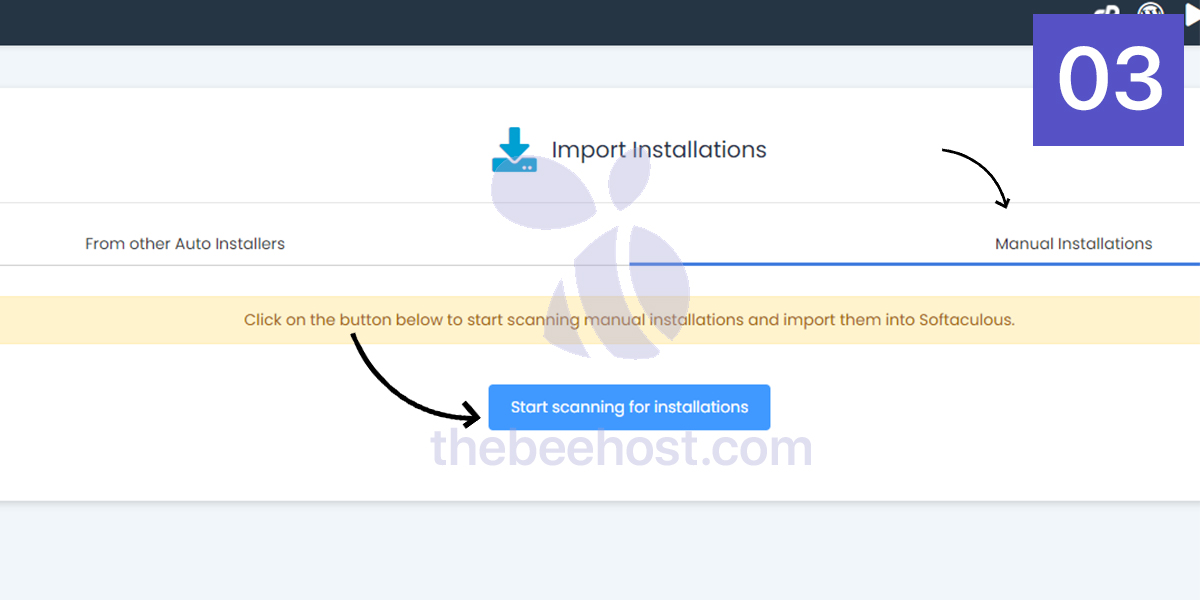
- Scanning time will vary on the number of manual installations you have.
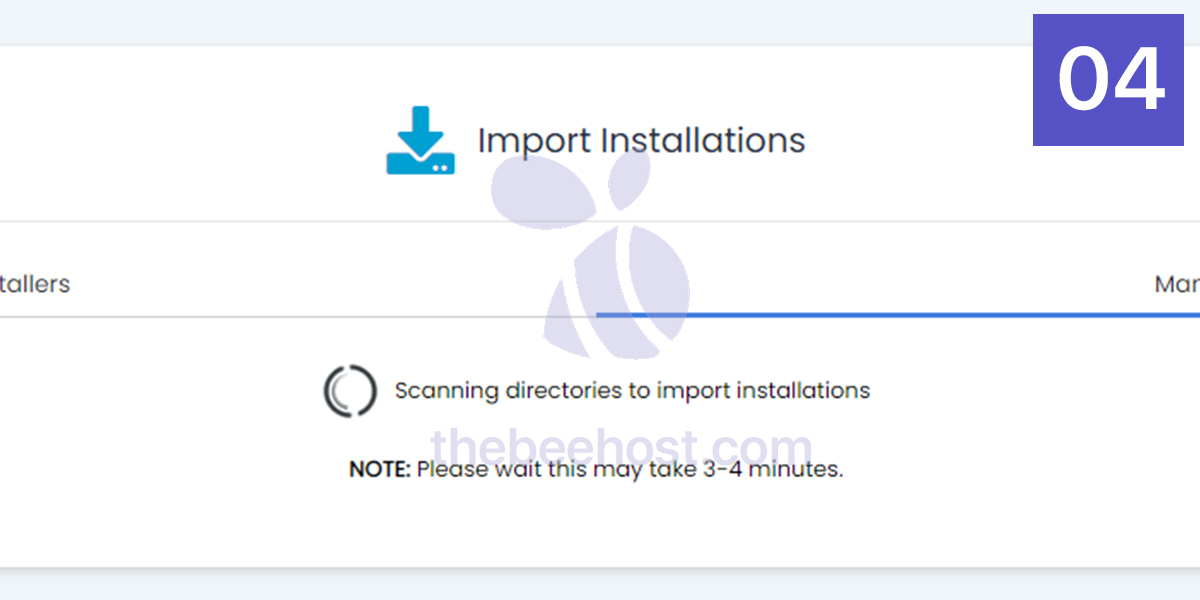
- Afterwards, it will show you the output if there is any or else will be back with the message “No installations found !”.
Enabling Auto Update :
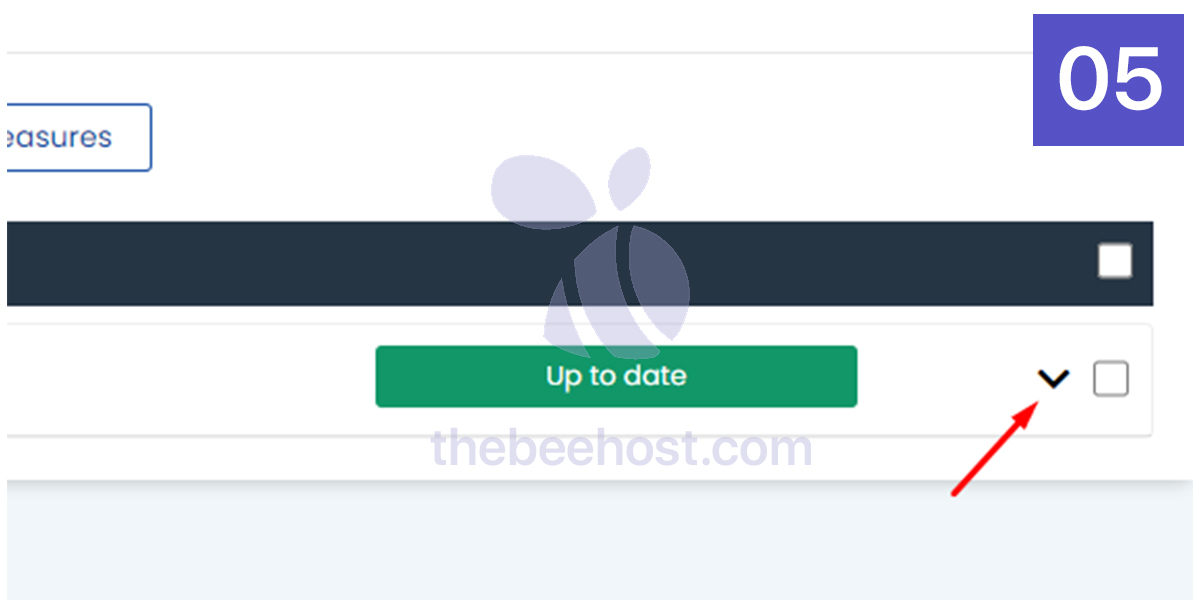
- First, you have to click on the drop-down arrow right after the Green ” Up to date ” button.
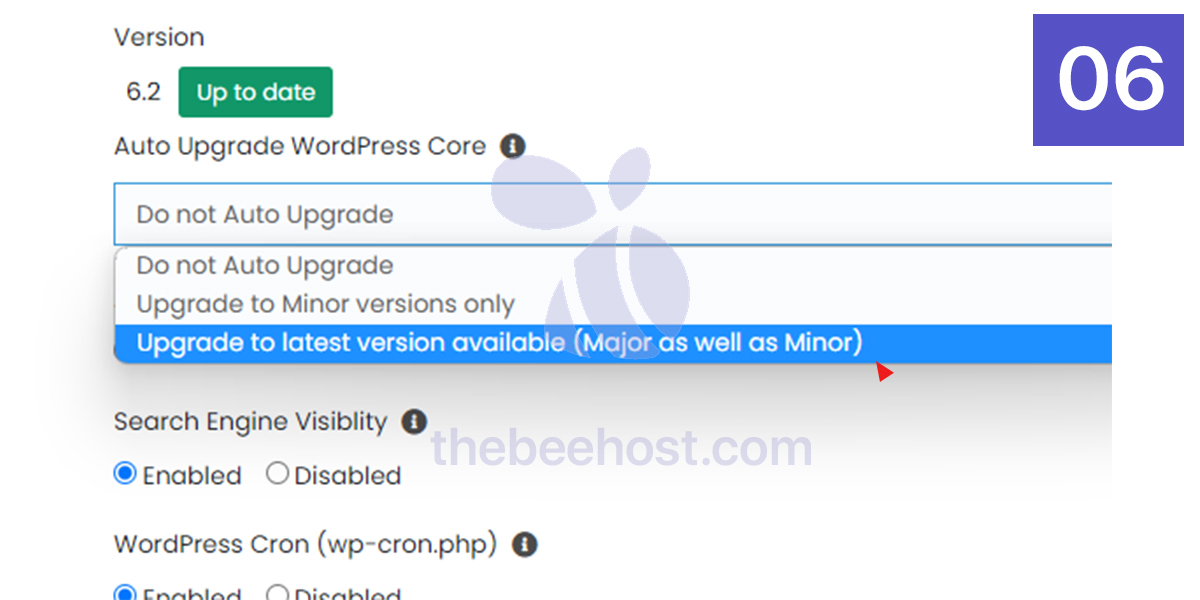
- Switch Auto Upgrade WordPress Core from ” Do not Auto Upgrade ” to ” Upgrade to the latest version available “
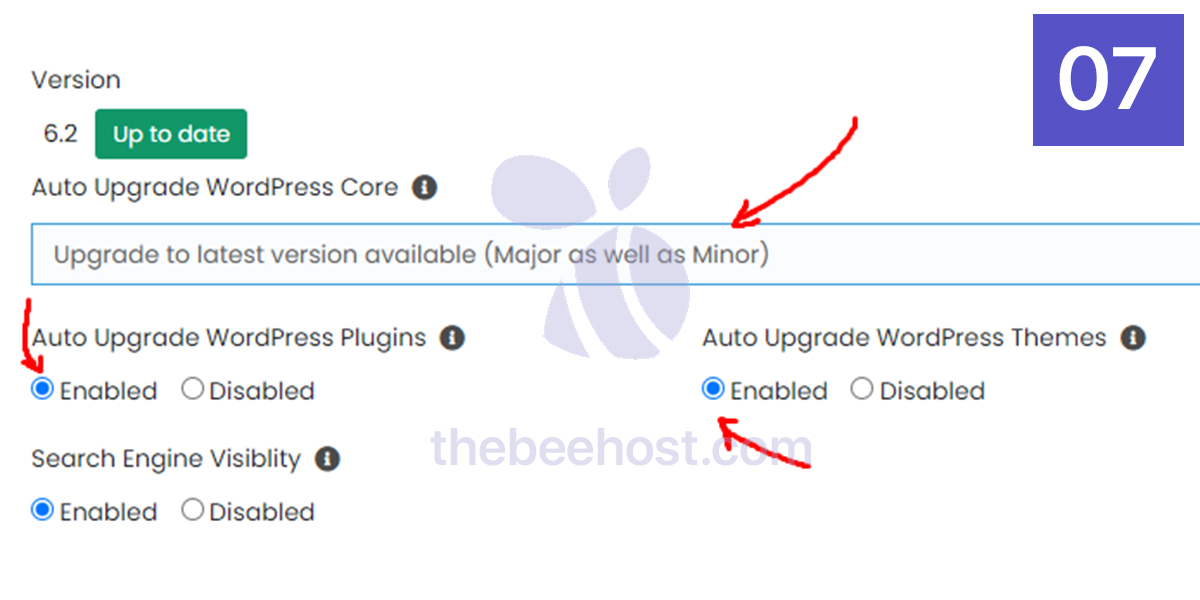
- Another step remains to enable Auto-Upgrade for Plugins and themes.
- Check mark the Enabled circle beneath Auto Upgrade WordPress Plugins and Auto Upgrade WordPress Themes.
- Apply the same process to all other wp installations as well.
WordPress Toolkit:
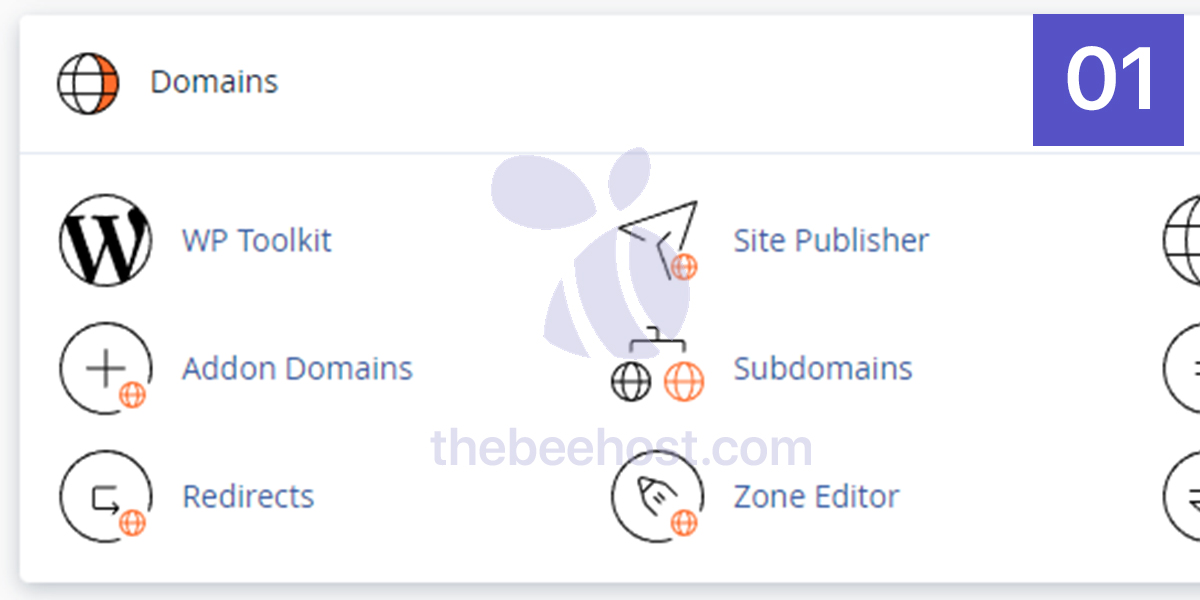
- Login into cPanel.
- Scroll down a bit under the ‘Domains‘ section. You will find WP Toolkit. Navigate into it.
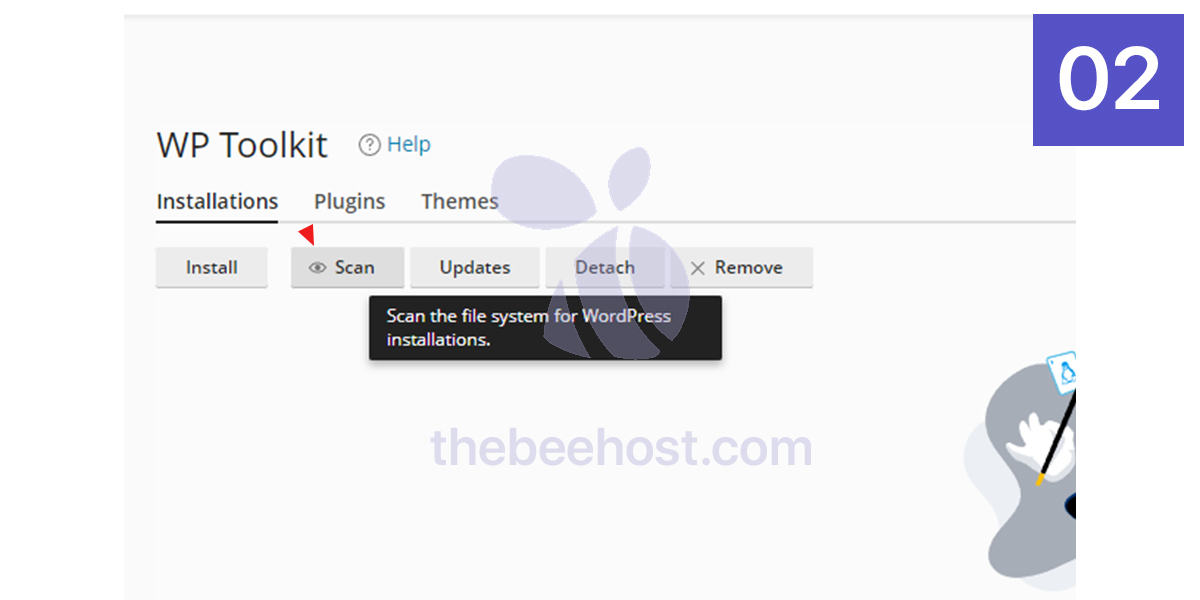
Scanning File System for WordPress Installations:
If your WordPress installations are not listed in the WP Toolkit then apply the below-listed point otherwise you may skip it.
To fetch/bring all manual WordPress installations in the WordPress Toolkit. Please follow the following point.
- In the WP Toolkit. You can see a ‘Scan’ button right after ‘Install’. Hit the ‘Scan’ button.
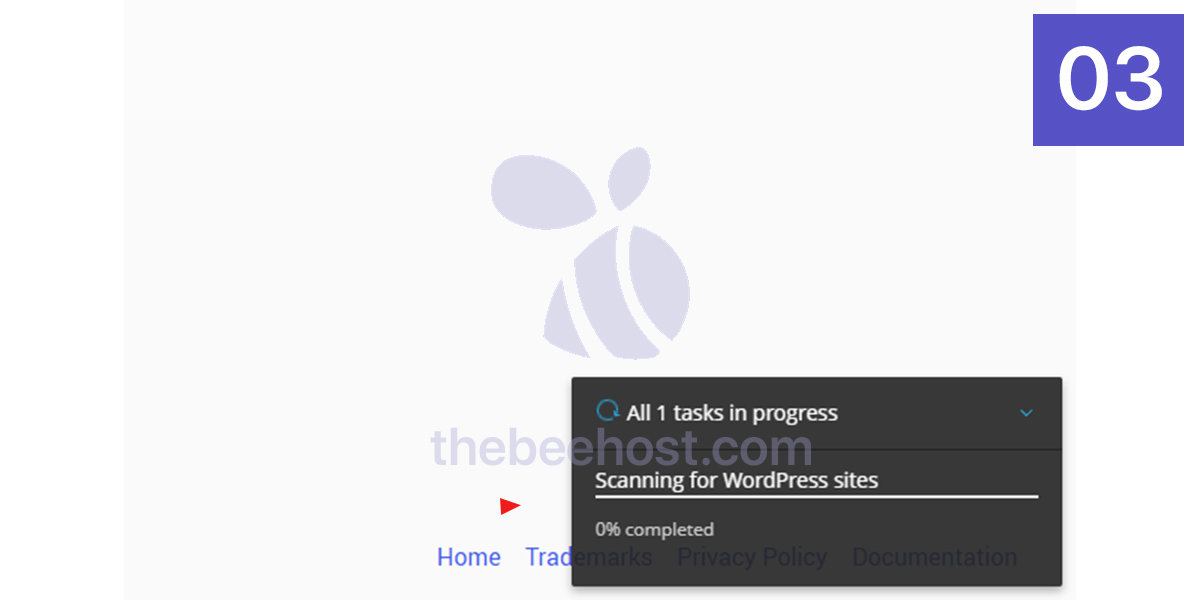
- Even then a pop will appear at the right bottom corner “ Scanning for WordPress sites”.
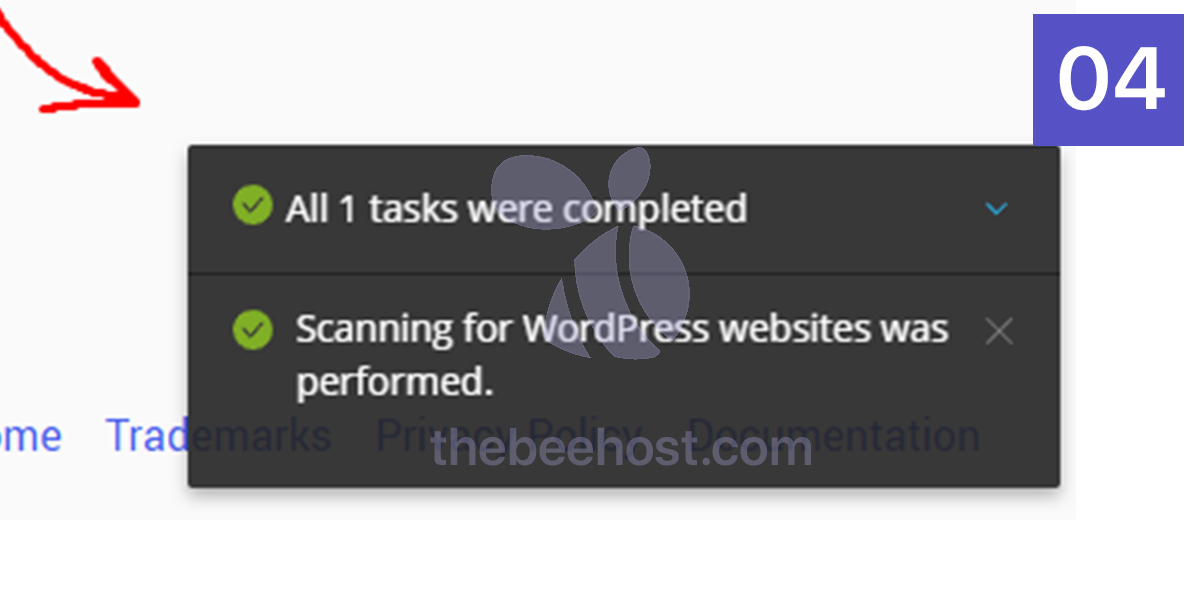
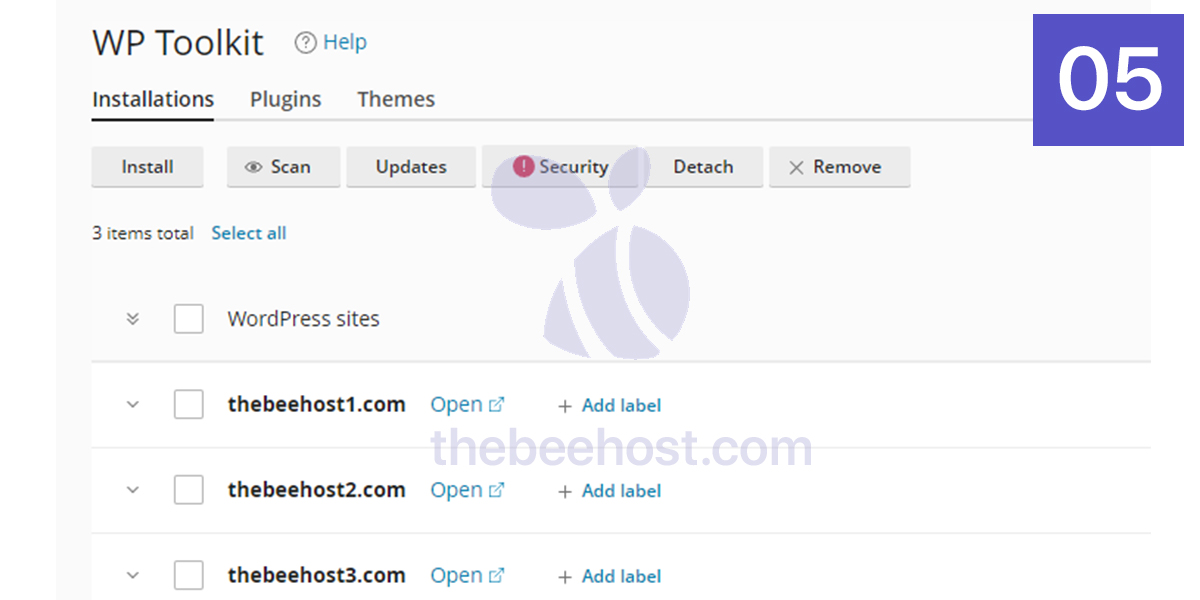
- When the scan is completed. your manual installations will be listed.in front of you within WP Toolkit.
Enabling Auto Update:
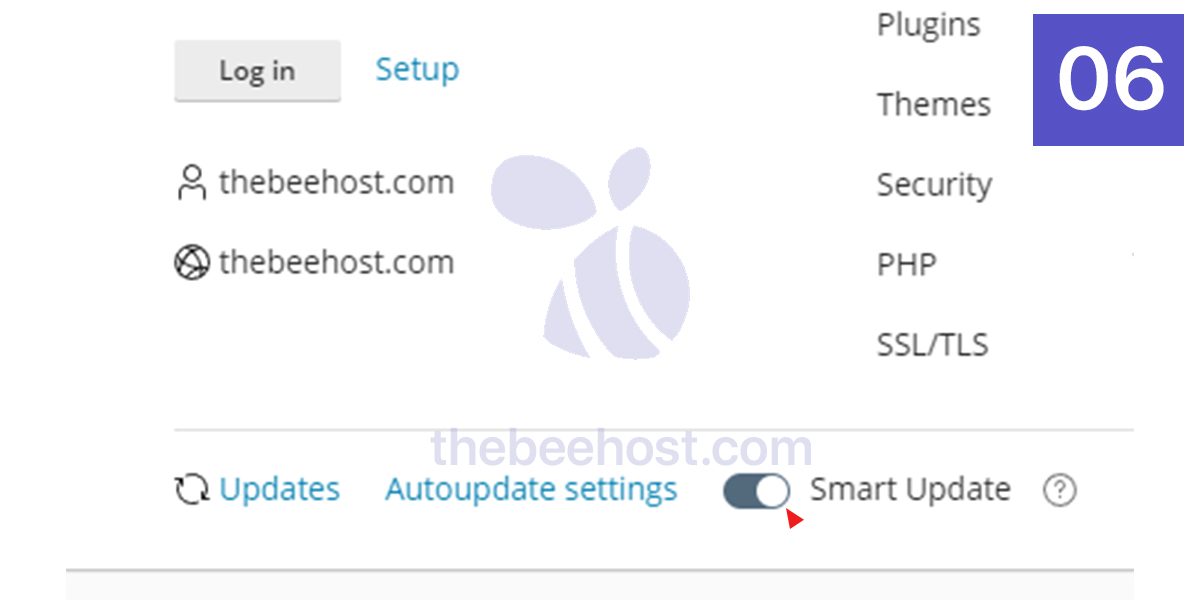
- To show more options for installation, Click on the drop-down arrow at the head of the installation box.
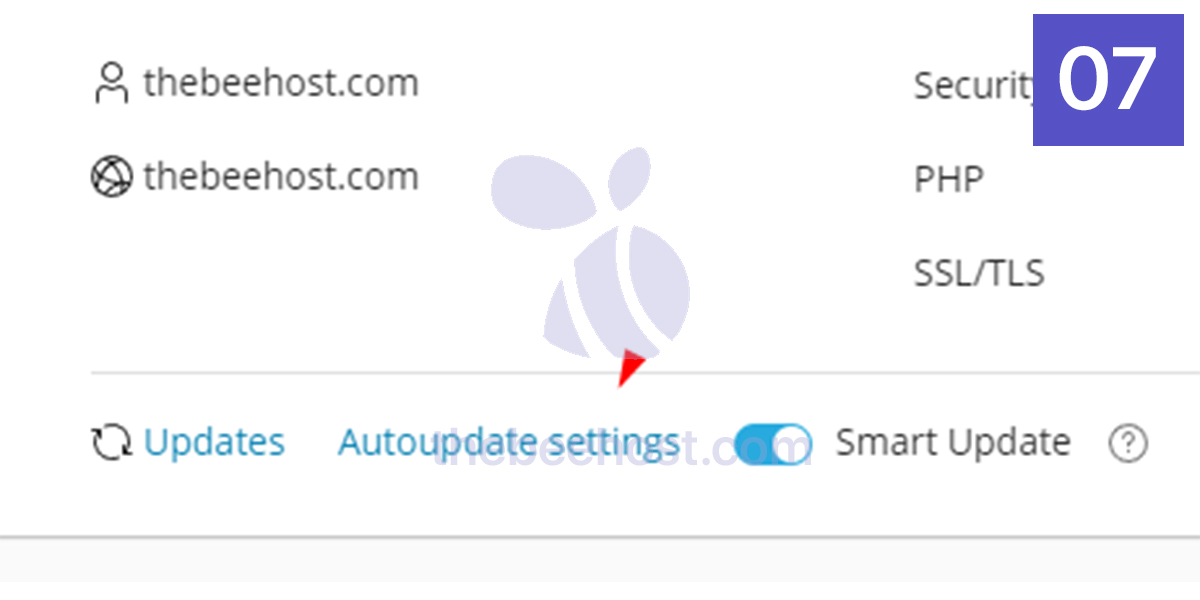
- Afterwards, you will see the Smart Update option. You will find it disabled. Here you need to Enable it by Toggling the Switch to the Right Side.
- Next, you have to do. Enable Auto Update for plugins and themes.
How will we do that? - Simply get into Autoupdate Settings.
- Select the Force option next to Update plugins and themes automatically.
e.g Update plugins automatically = Force
Update plugins automatically = Force
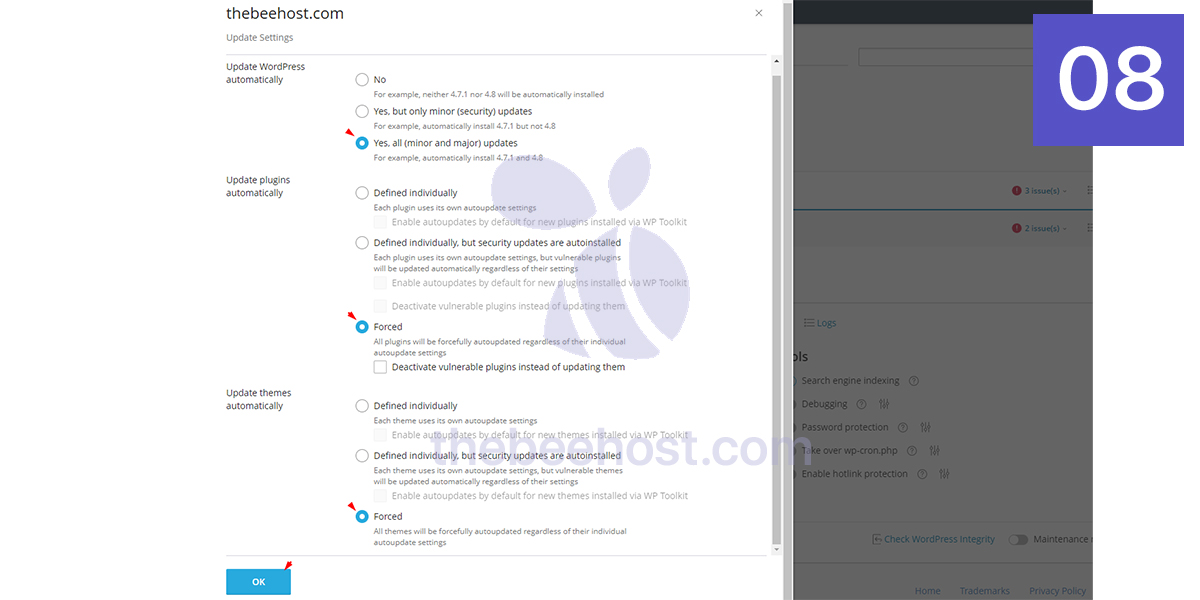
- That’s it. Press an OK button to save the Changes.
We would greatly appreciate it if you could take a moment to rate our efforts in creating this helpful guide. Your feedback will help us continue providing valuable information to assist you and others.
Thank you for your support!
