In today’s digital age, having a professional email address is essential for establishing credibility and professionalism in your online communications. Gmail, with its user-friendly interface and powerful features, offers a convenient way to manage your professional email alongside your personal inbox. In this guide, we’ll walk you through the step-by-step process of setting up your professional email address in Gmail, ensuring seamless integration and efficient email management.
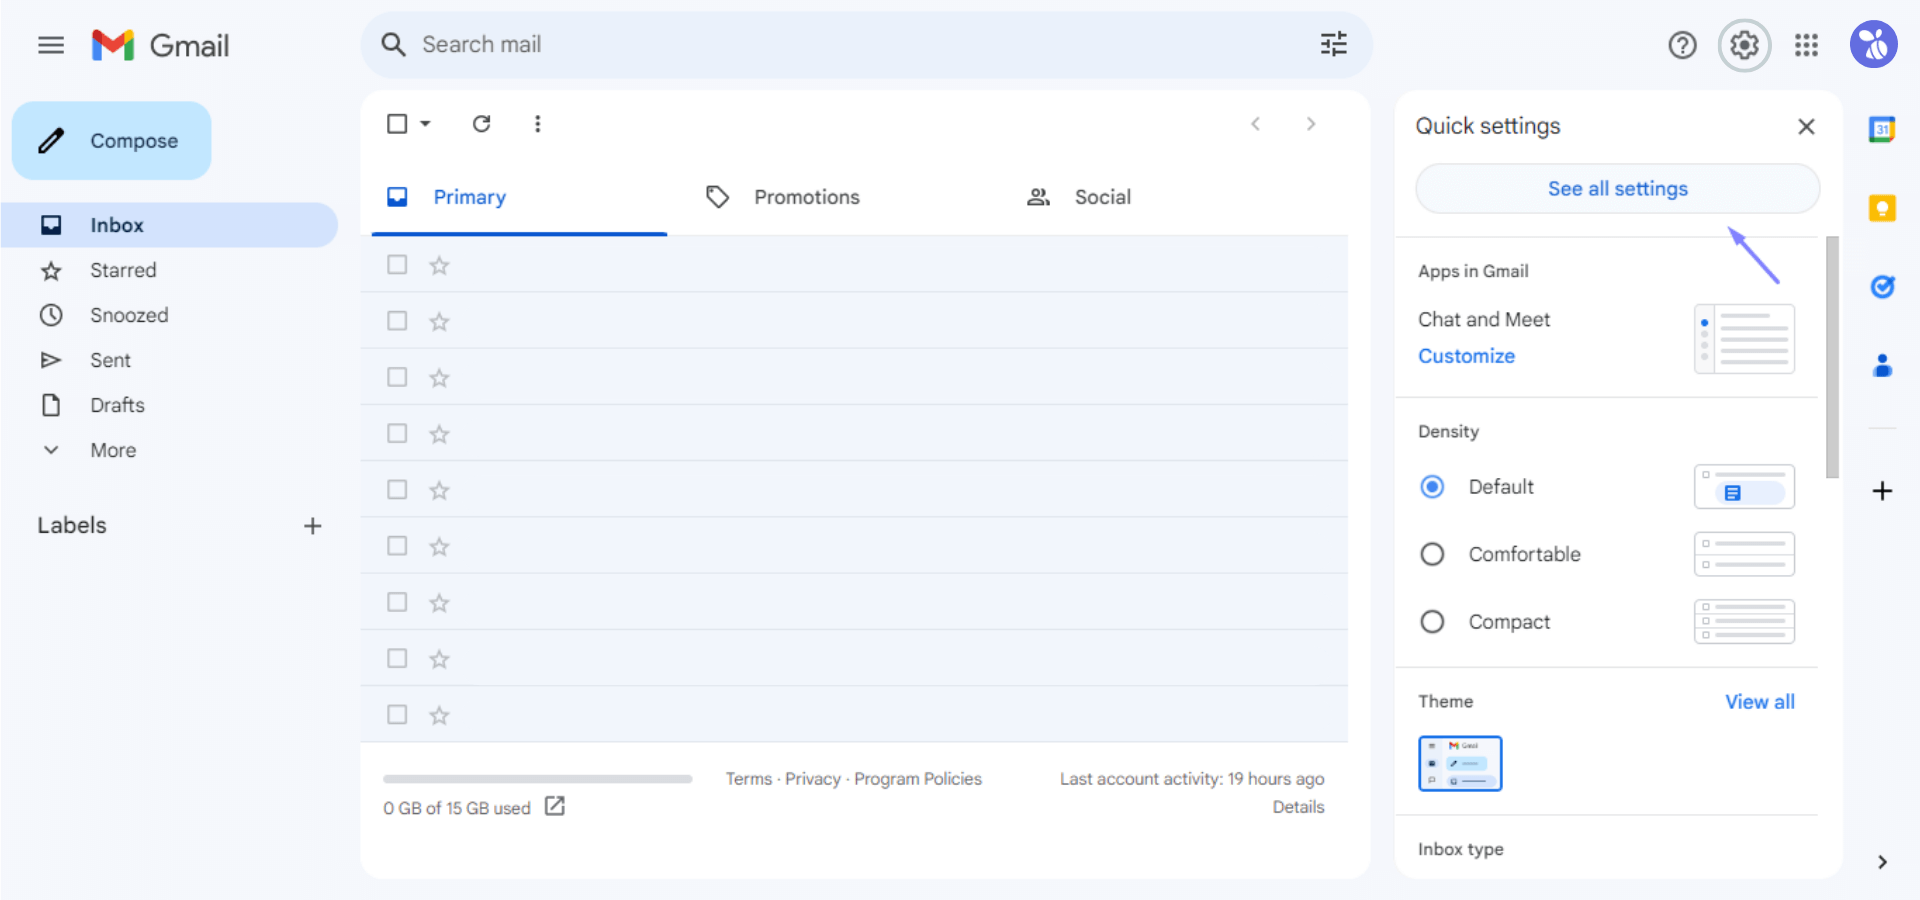
Access Gmail Settings
- Log in to your Gmail account.
- Click on the gear icon located in the upper right corner of the Gmail interface.
- Select “See all Settings” from the drop-down menu.
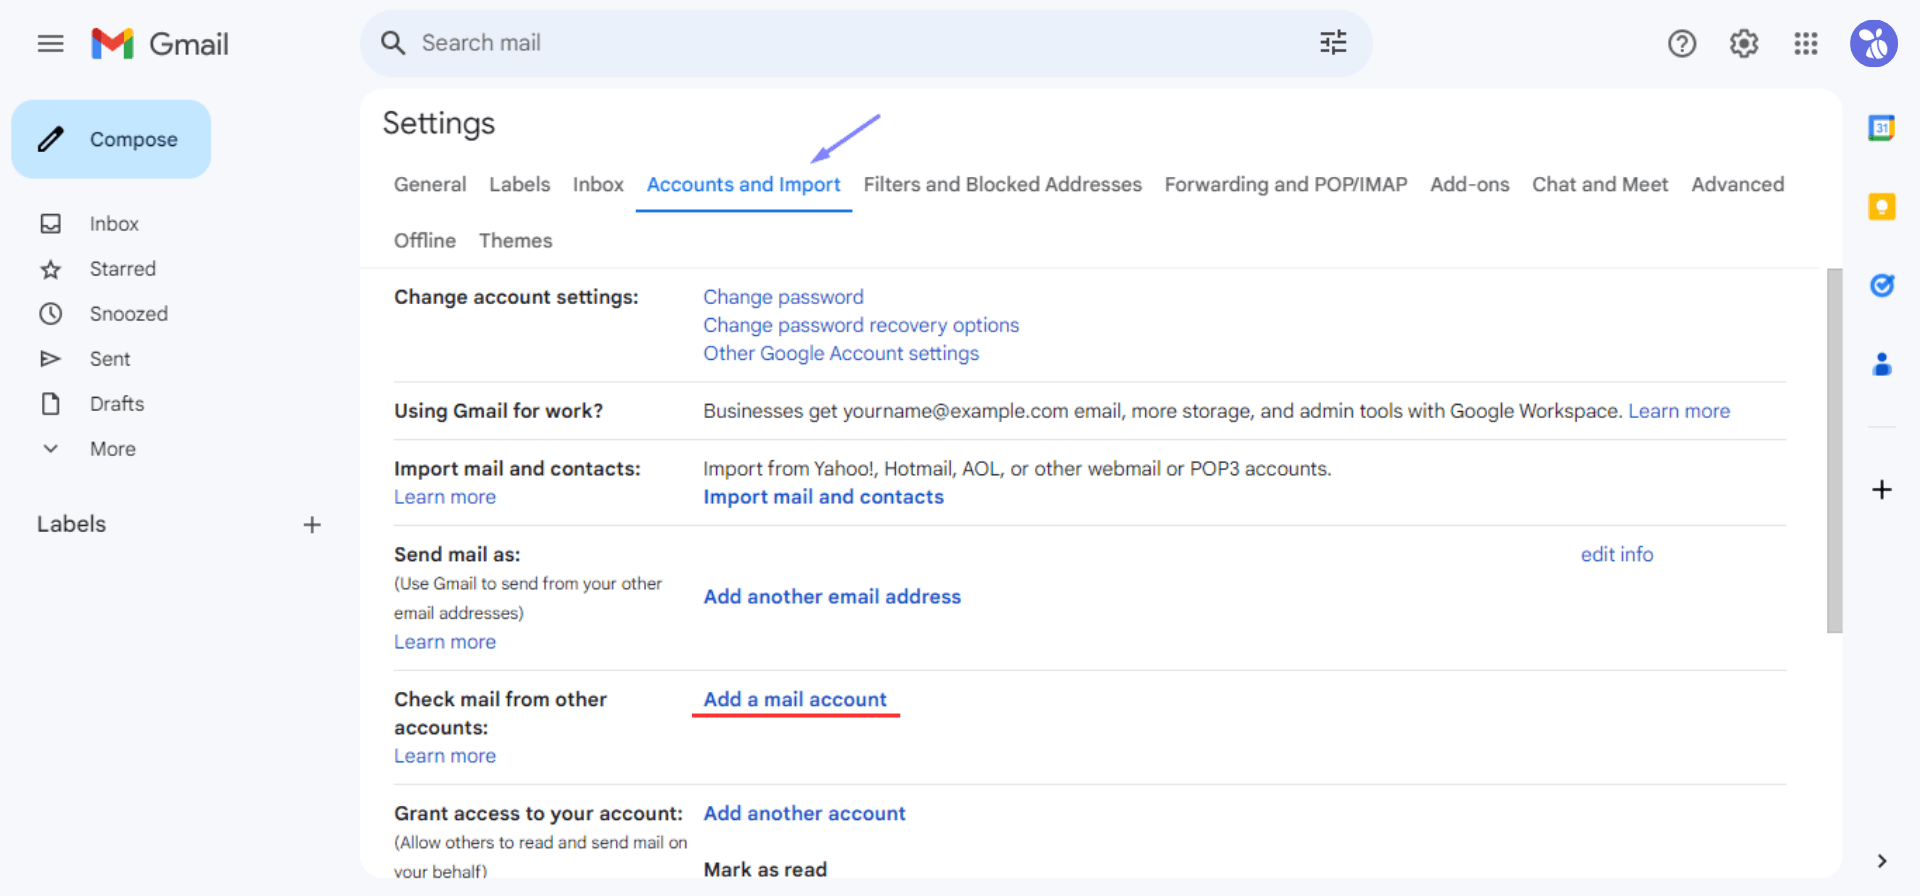
Navigate to Accounts and Import
- Within the Settings menu, click on the “Accounts and Import” tab.
- Locate and click on the “Add a mail account” link.
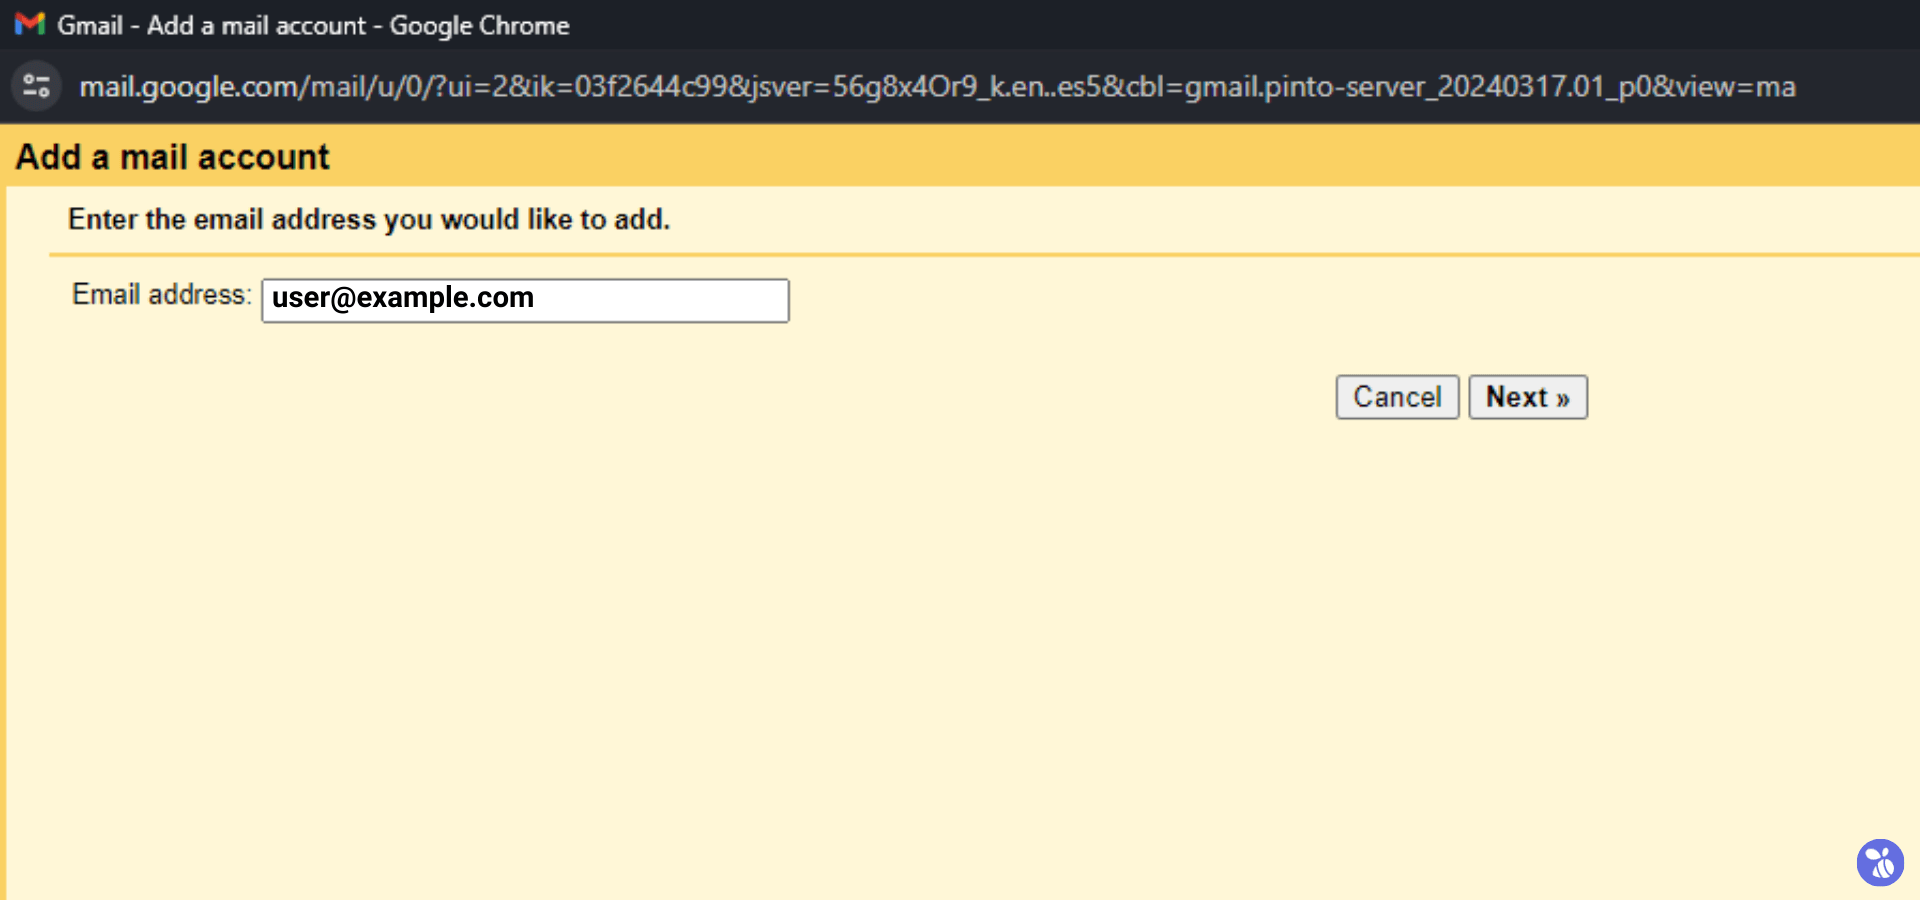
Input Professional Email Details
- In the pop-up window, enter your professional email address in the provided field.
- Click “Next” to proceed.
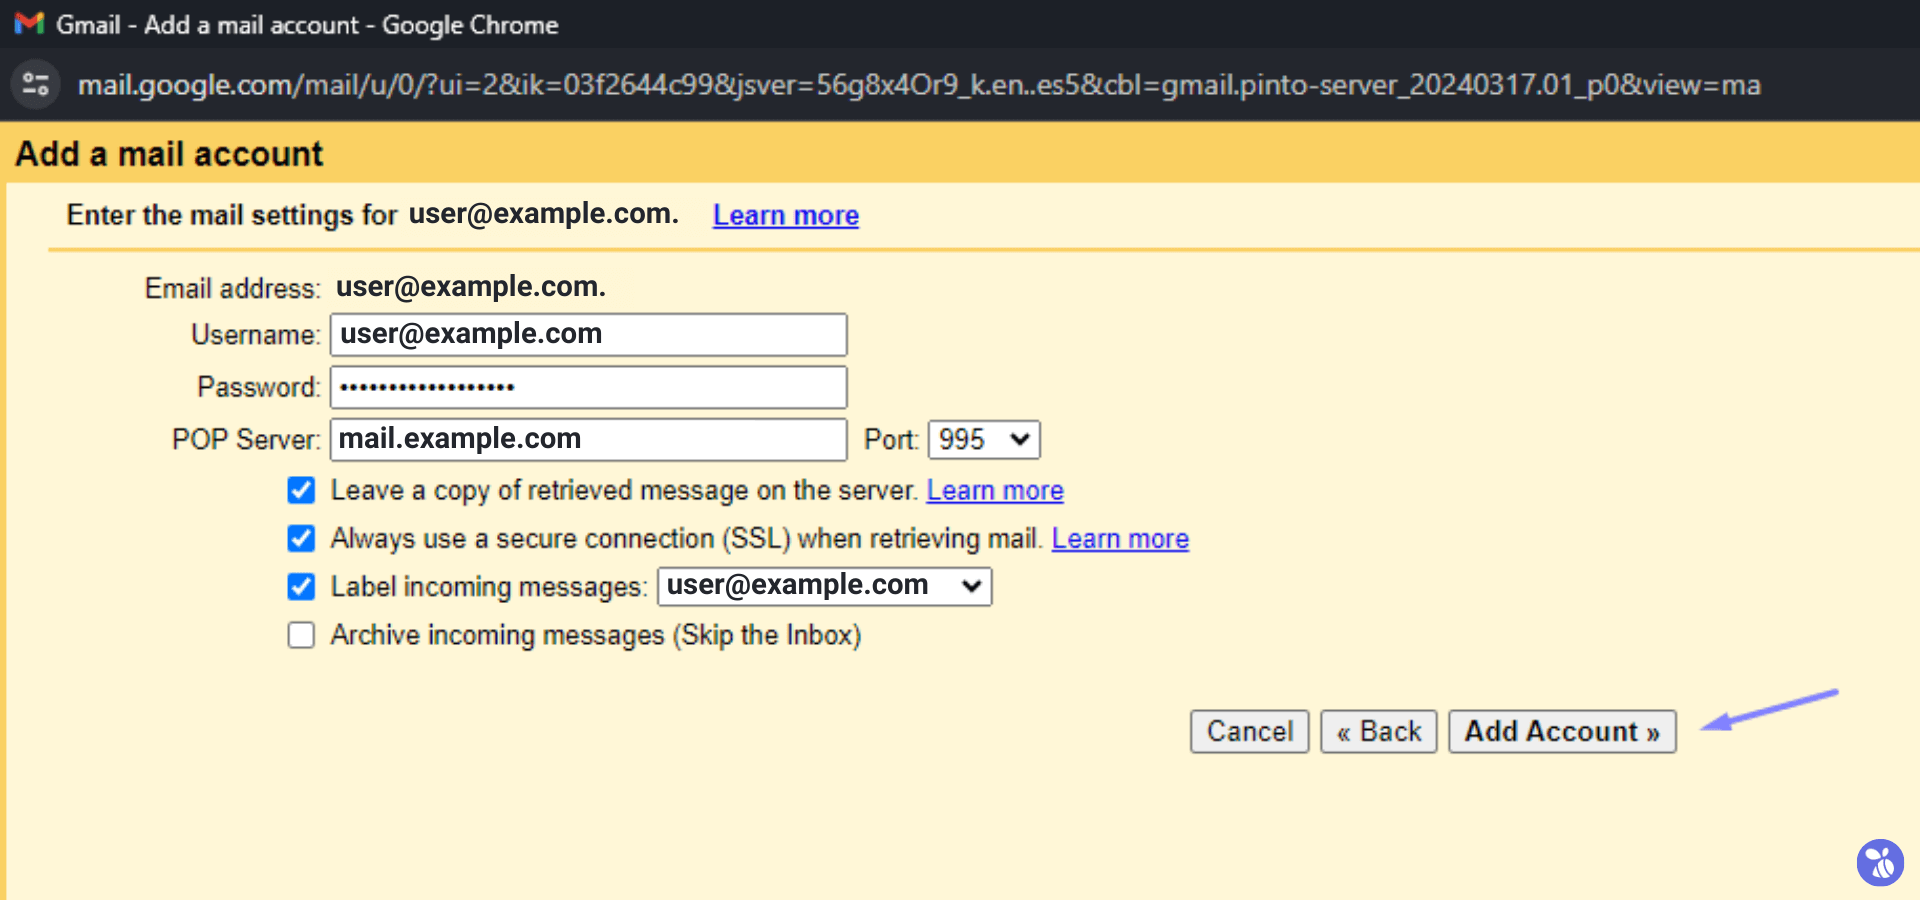
Enter POP3 Settings
- Enter the POP3 settings, including server, port (995), username, and password.
- Click “Add Account” to continue.
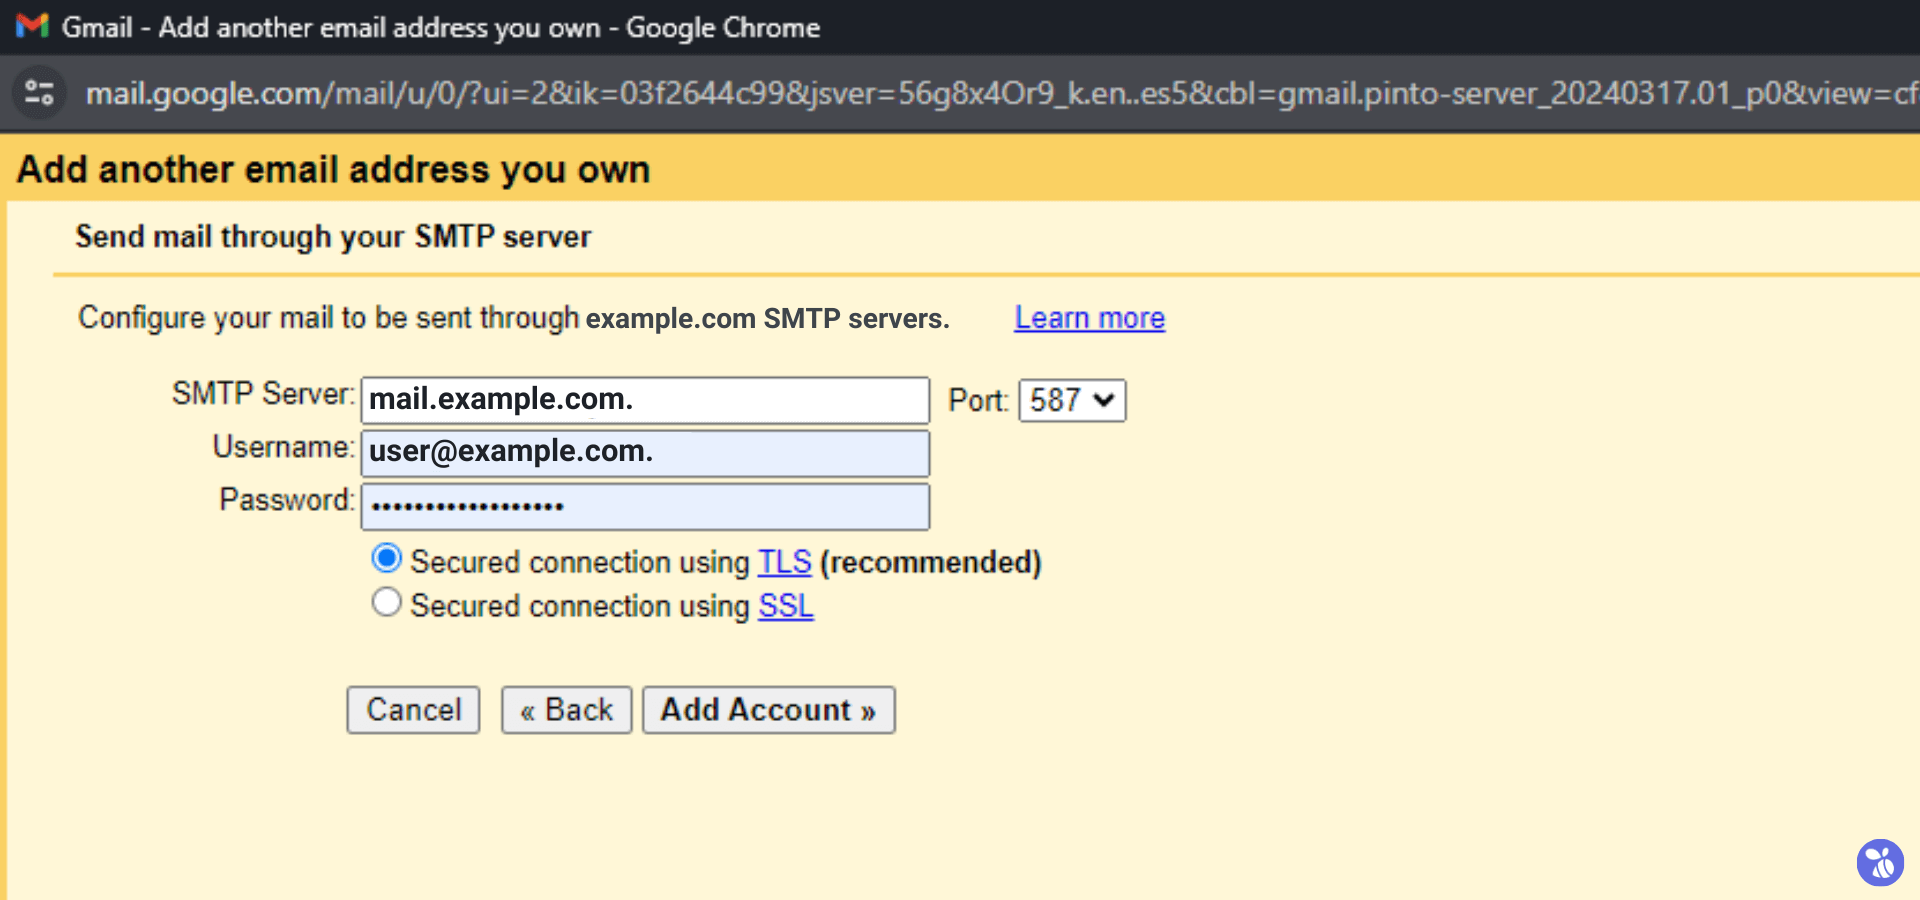
Provide SMTP Server Settings
- Gmail will prompt you for SMTP server settings for your professional email.
- Enter the SMTP server, username, and password provided with your email account.
- Choose the port (587 for TLS/STARTTLS or 465 for SSL) and select the appropriate security protocol.
- Click “Add Account” to proceed.
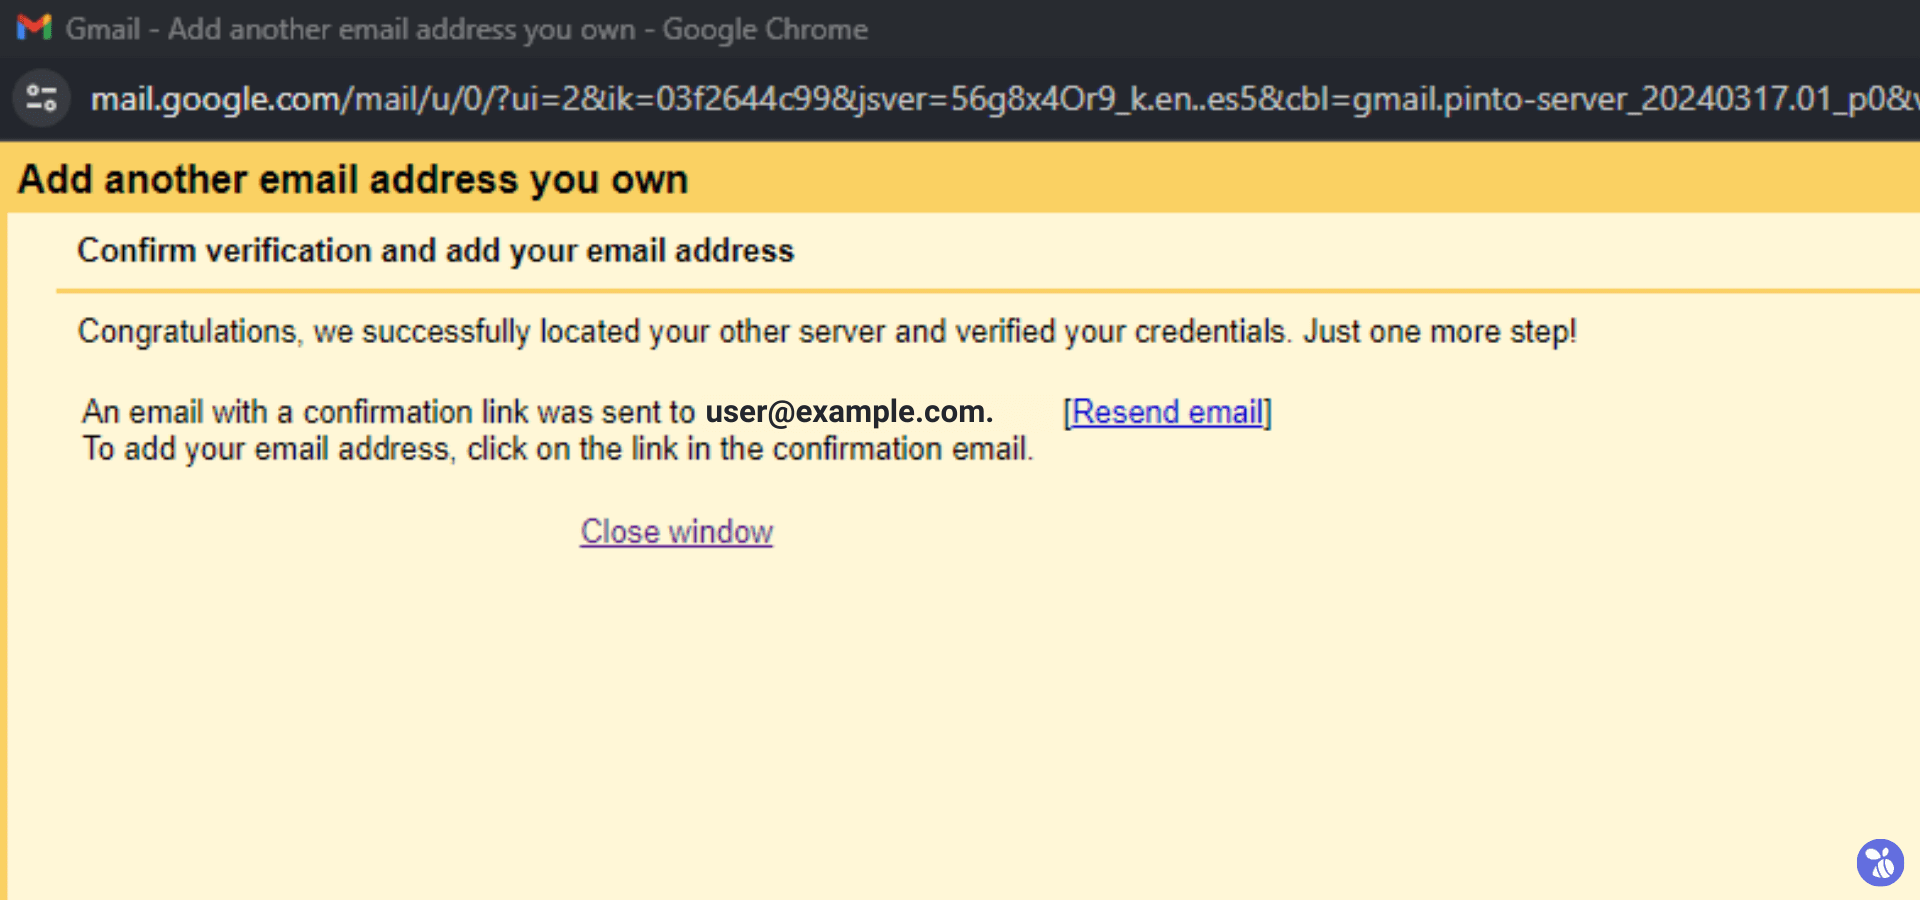
Verify Ownership
- Gmail will send a verification email to your professional email address.
- Access your professional email inbox and locate the verification email.
- Follow the provided instructions to verify ownership of the email address.
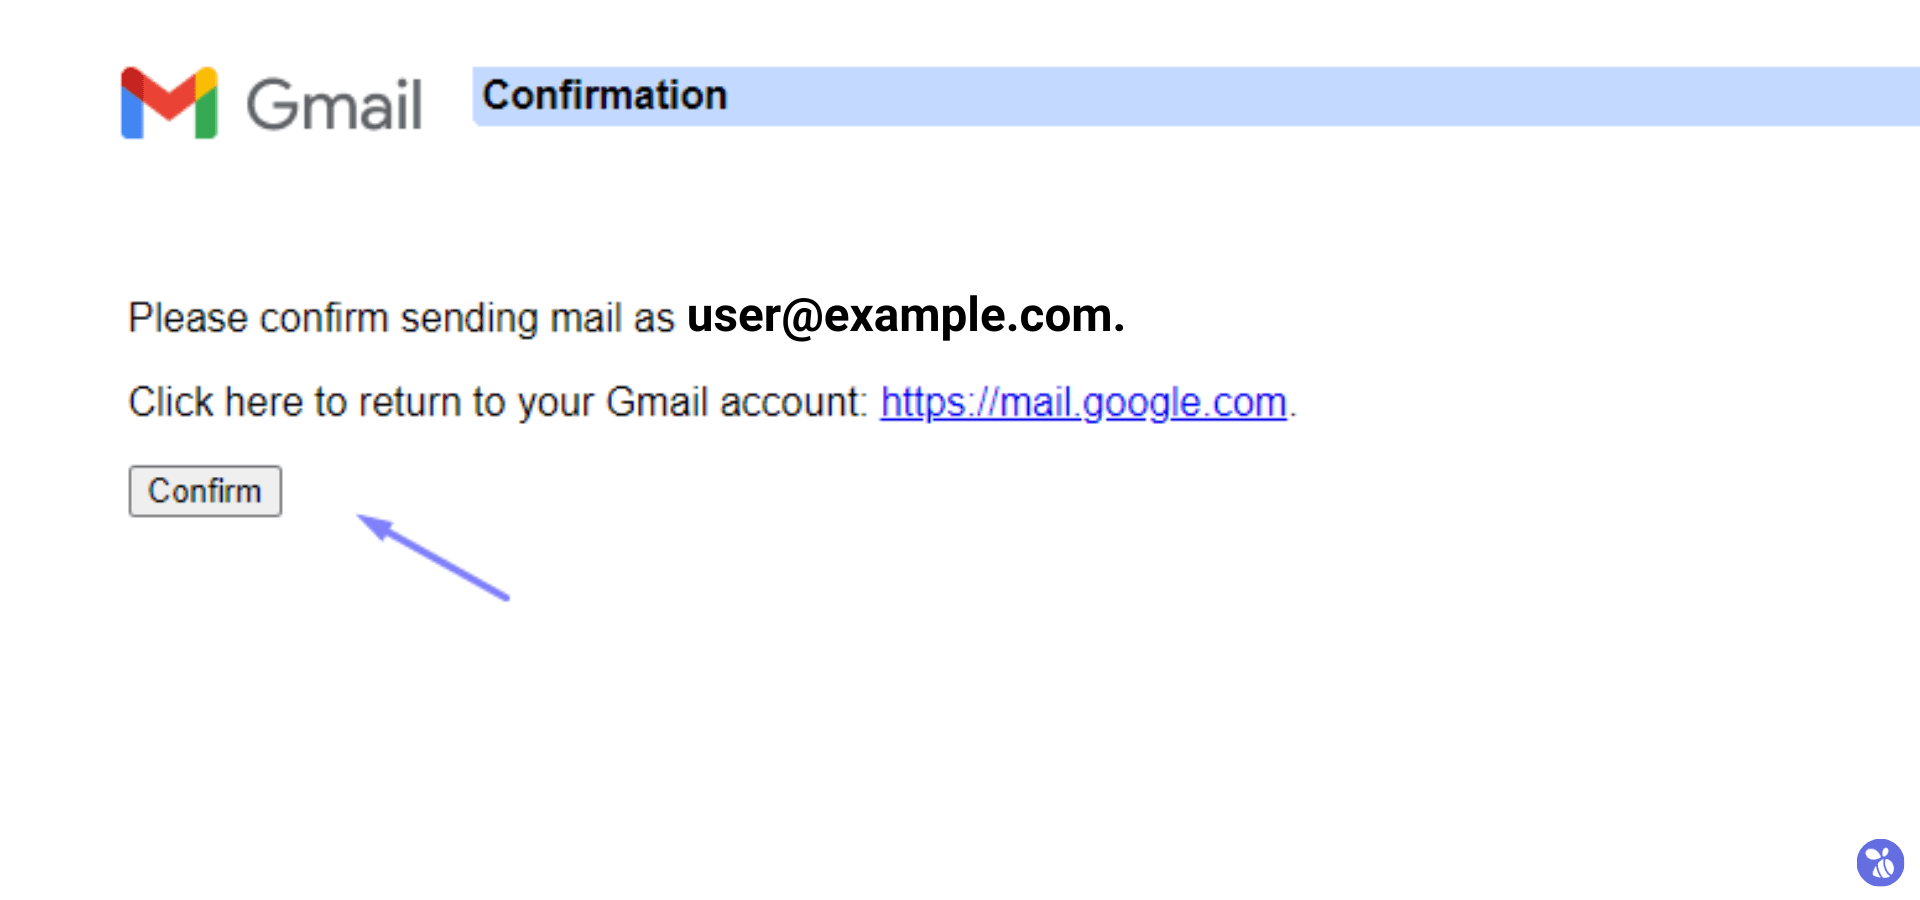
Access Professional Email Inbox
- Navigate to the “Webmail: Roundcube” within your hosting Control Panel.
- Enter your email account credentials to access the inbox.
- Click on the confirmation link to confirm your request.

On the Confirmation Page, Click “Confirm”.
You will get a “Confirmation Success” message.
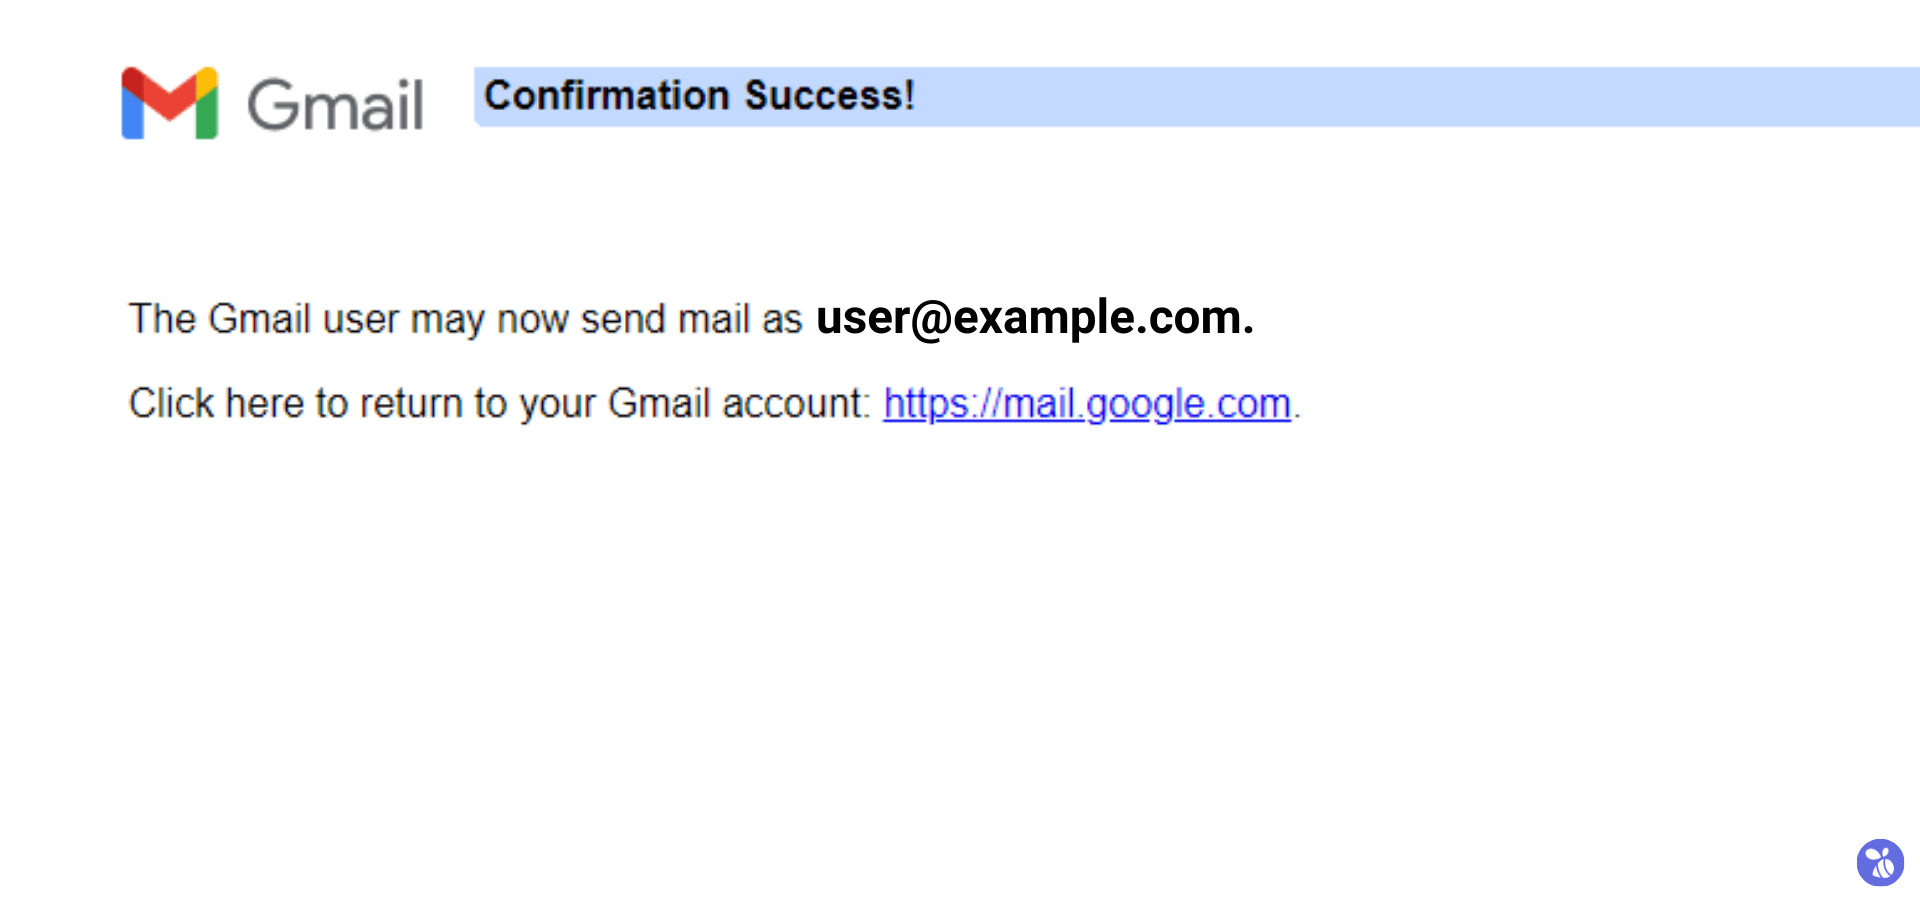
Congratulations! You’ve set up your professional email address in Gmail.
Should you encounter any issues during the setup process, feel free to reach out to our Technical Support team for further assistance.
Thank you for choosing TheBeeHost!