Must Read This Guide Carefully
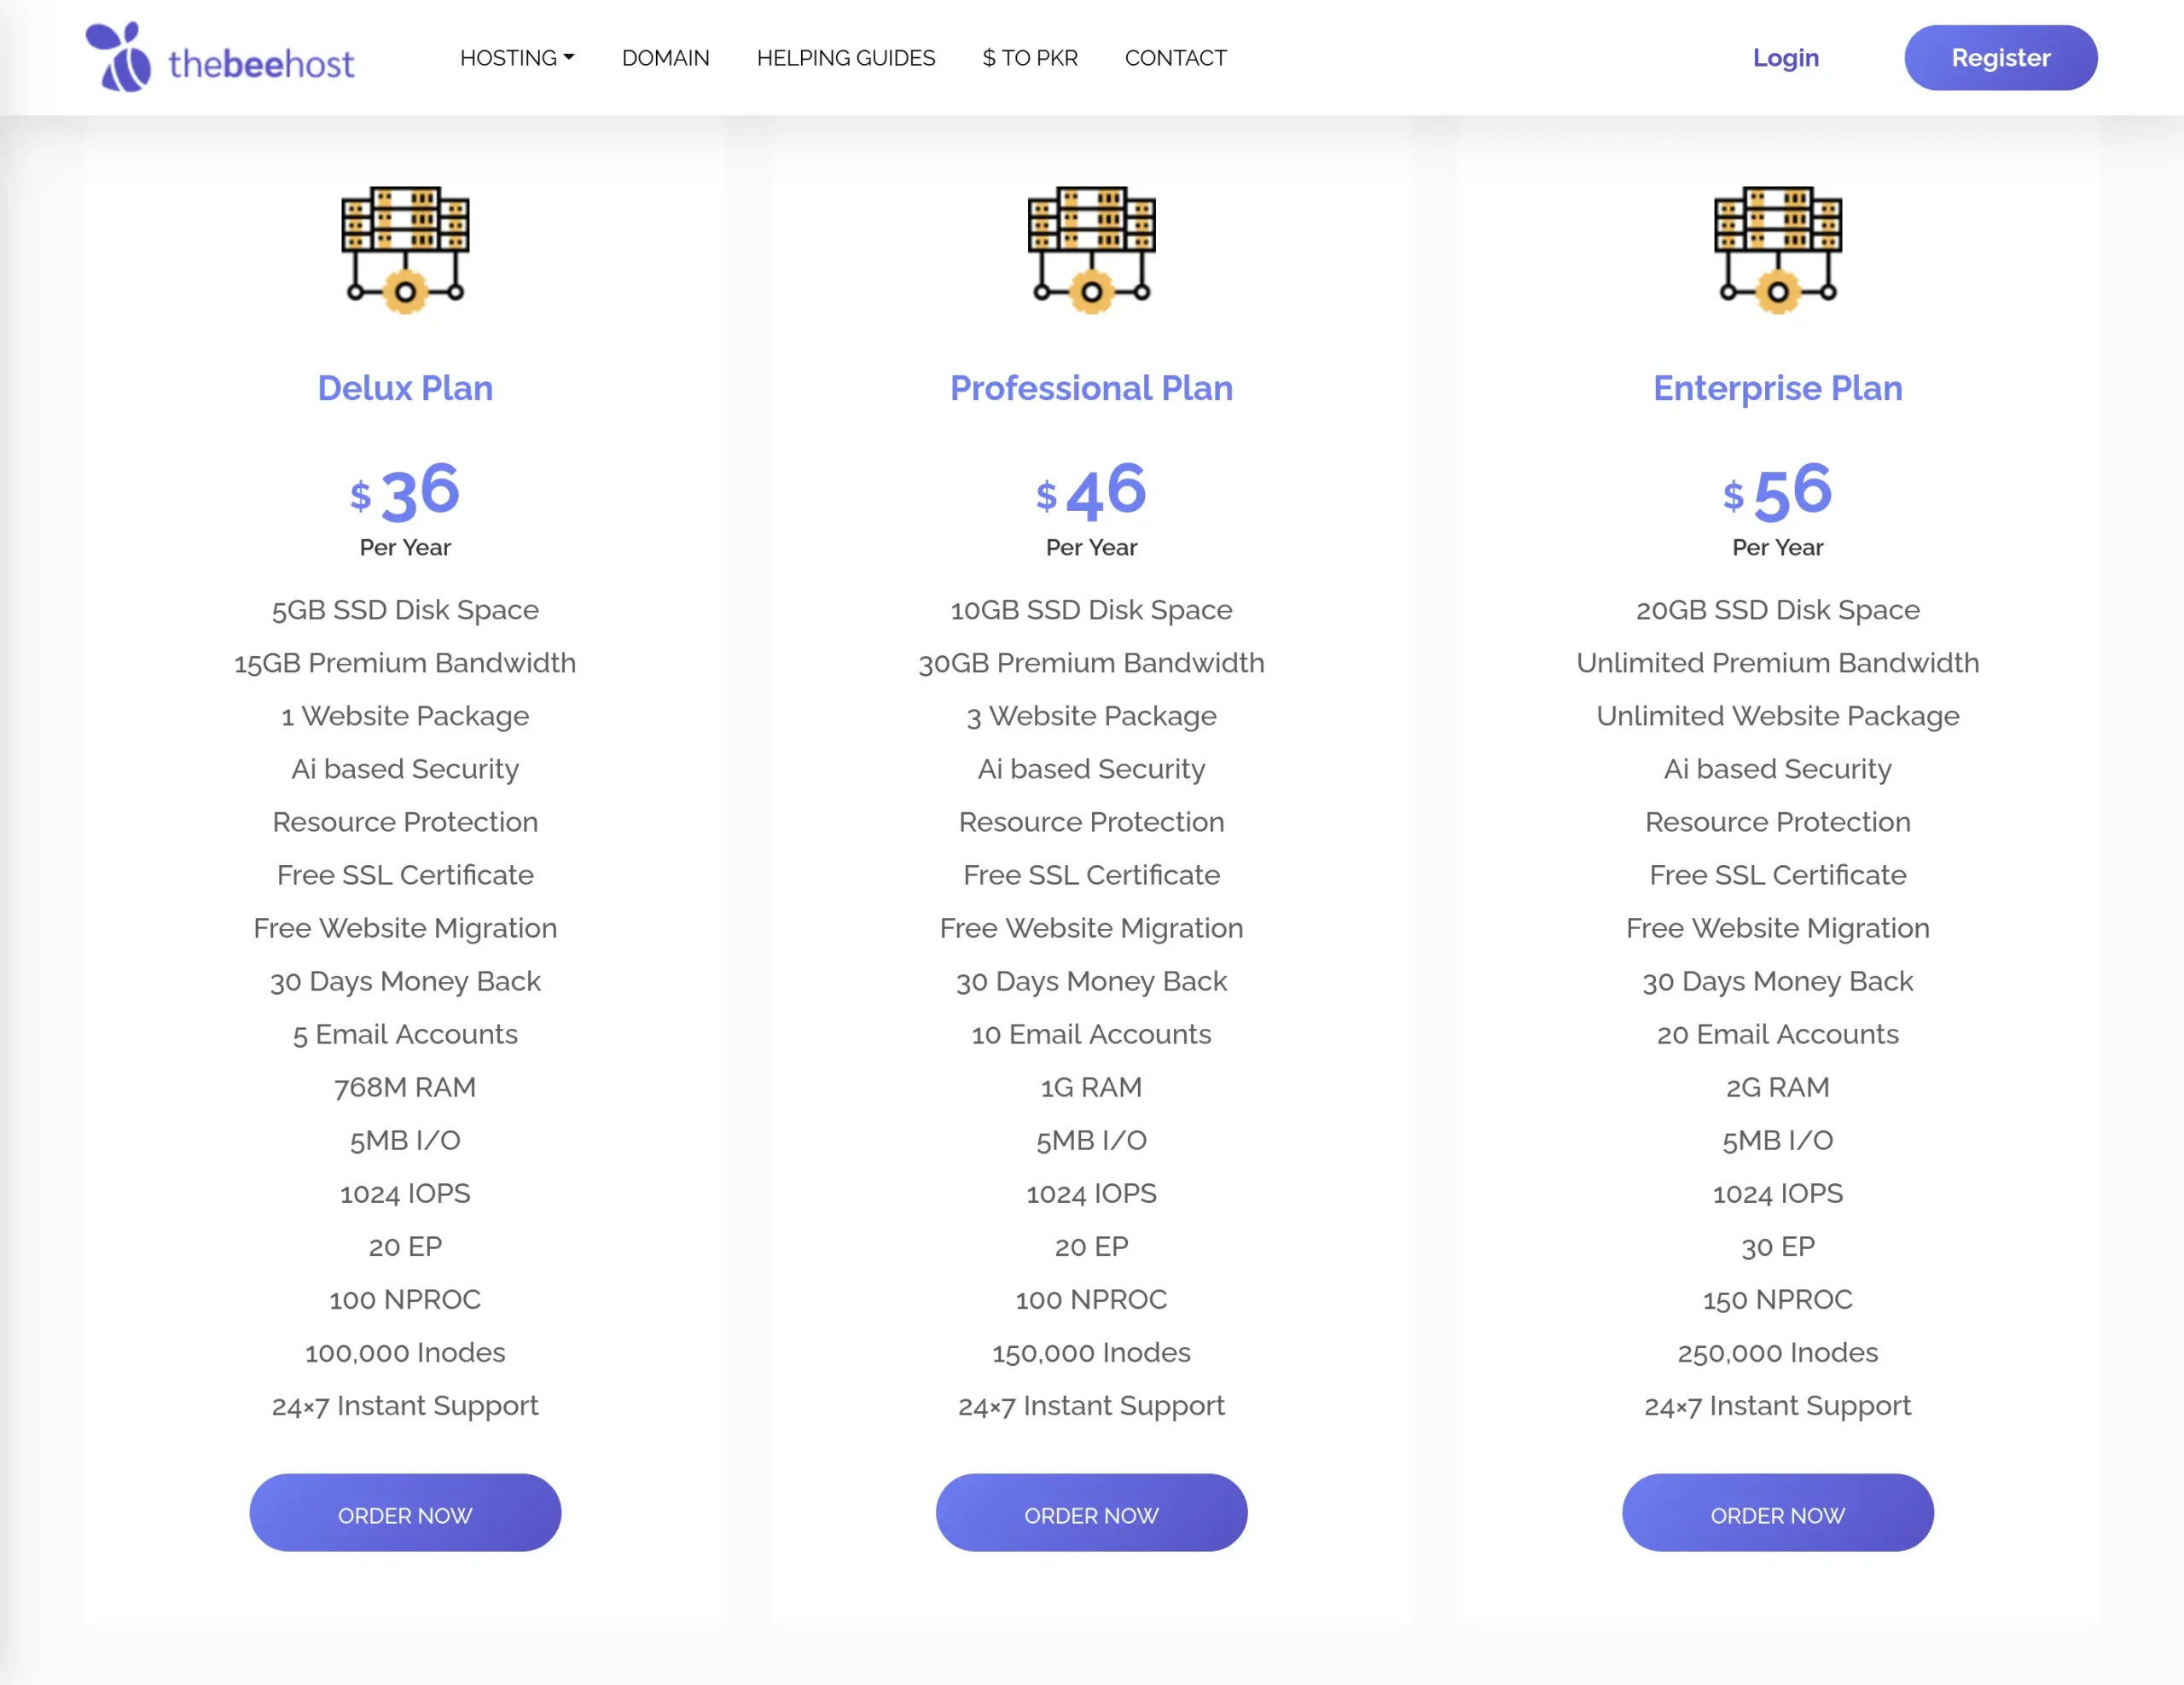
Before getting started, it’s important to explore our hosting plans to find the one that best suits your needs. Here’s a quick overview of our shared hosting plans:
Click Here to View Hosting Plans
Choose Your Hosting Plan
Once you’ve reviewed the available plans, select the one that meets your requirements. Click on the “Order Now” button to begin the purchasing process.
 You will be redirected to the Client Area with your chosen hosting package pre-selected.
Step 2: Configuration
After selecting your package, you’ll configure the following options:
Term and Price
Choose your billing cycle (e.g., 1 Year, 2 Years, or 3 Years).
Domain
In the Domain section, enter the domain name you want to use with your hosting service.
You can:
- Register a new domain
- Use an existing domain
- Transfer a domain
Simply type the full domain name (e.g., yourdomain.com) in the Domain field and continue.
Apply Discount Promo Code
If you have a discount promo code, enter it in the provided field and click Redeem.
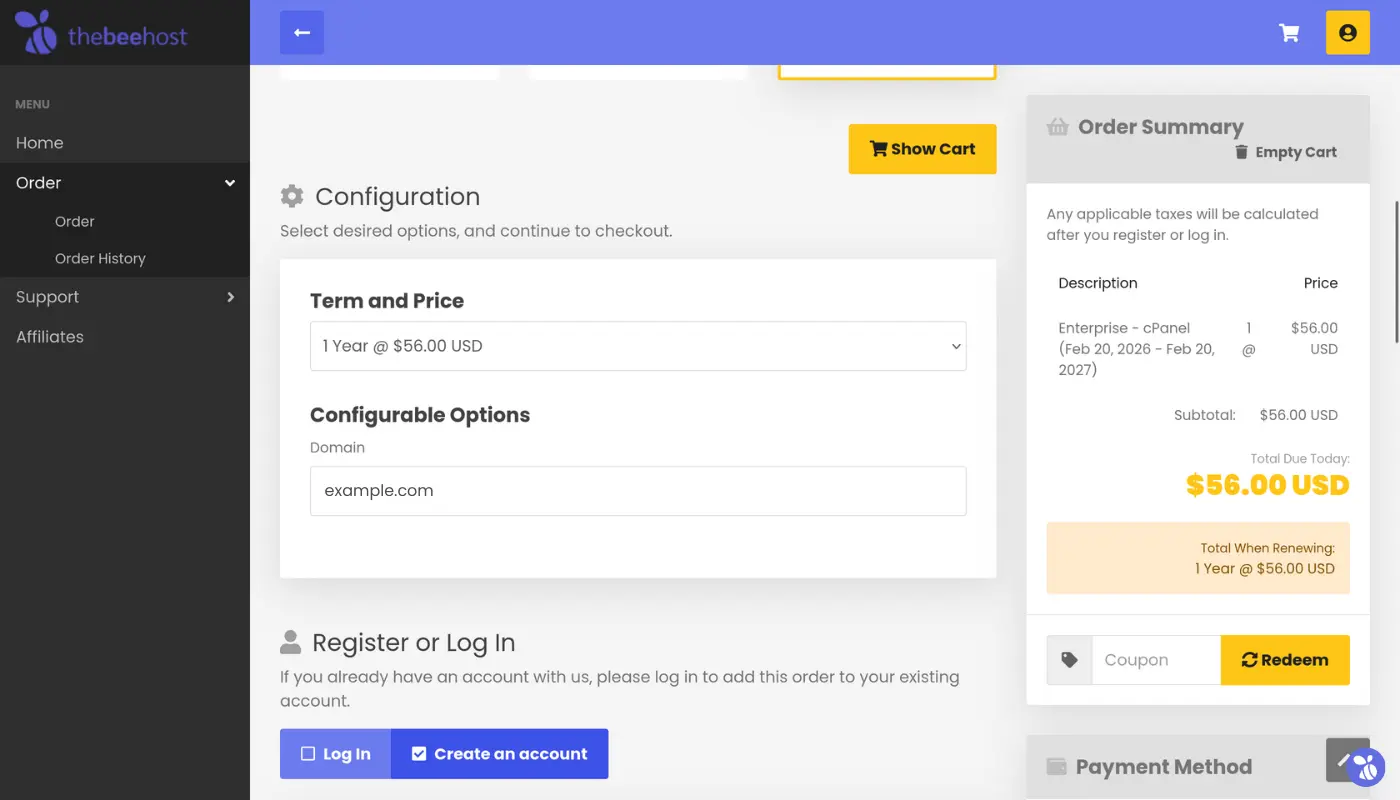
Afterward, scroll down to create your account.
Step 3: Register or Log In
If you already have an account with TheBeeHost:
- Log in to add this order to your existing account.
If you are a new customer:
- Fill in the required information to create your account.
Enter Contact Information
Provide accurate details, including:
- First Name & Last Name
- Address
- City
- Country
- State/Province
- ZIP/Postal Code
- Phone Number
- Email Address
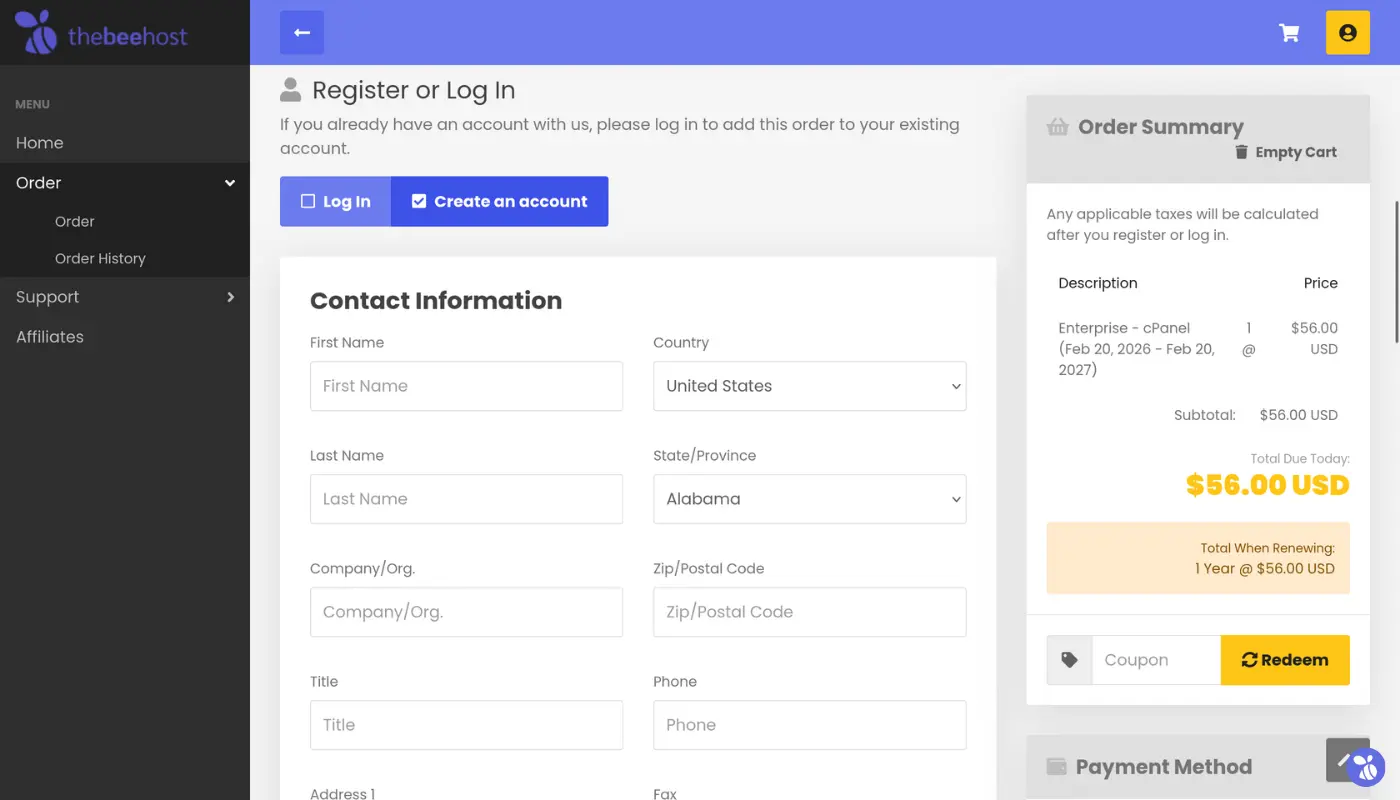
Please make sure your email address is correct, as all service details and invoices will be sent there.
Billing Information
If applicable, enter Tax ID / VATIN
Additional Settings
You may see the following options:
- Who referred you to TheBeeHost?
- Account verification question (e.g., simple math question)
Complete the verification to proceed.
Authentication
Choose how you want to log in:
- Use email as username
OR - Specify a custom username
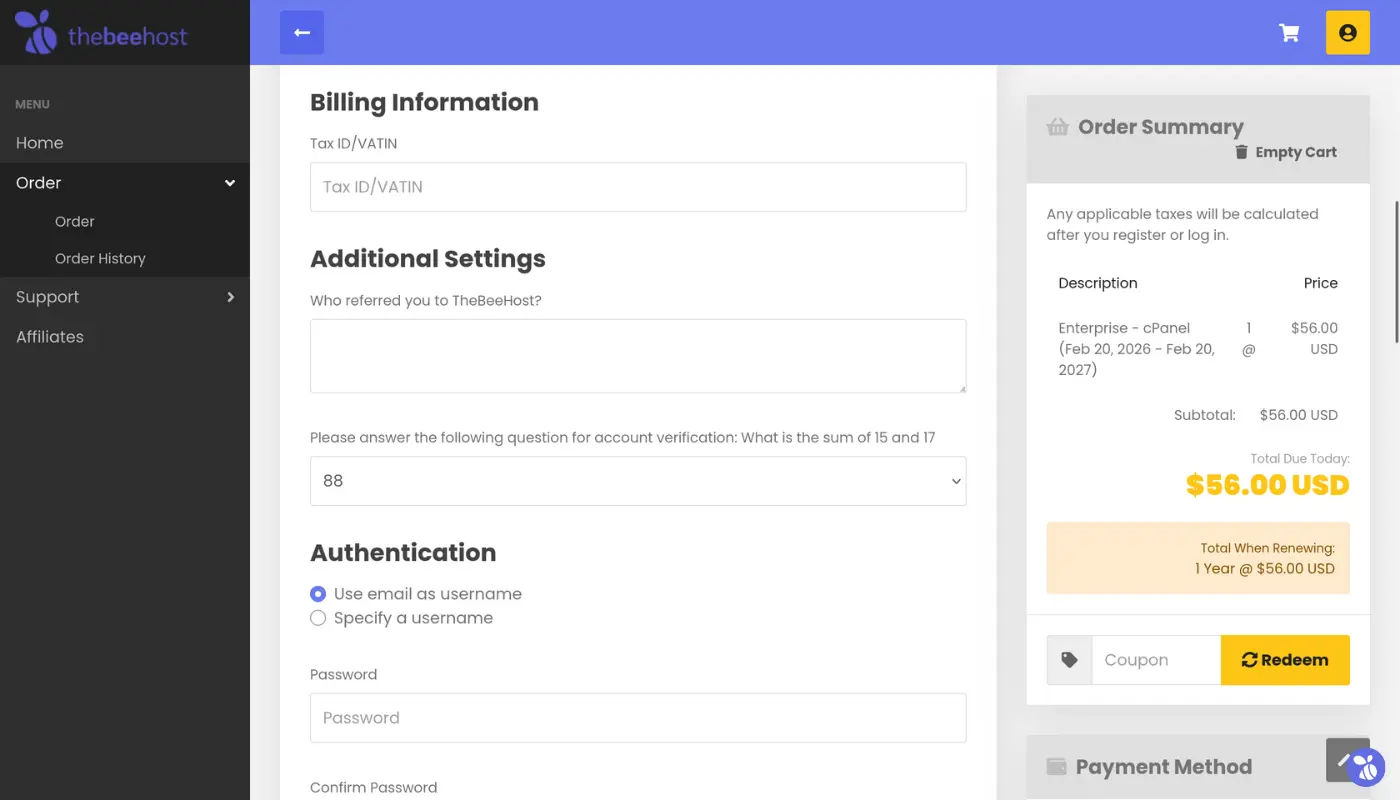
Then:
- Create a strong password
- Confirm your password
Click Create Account.
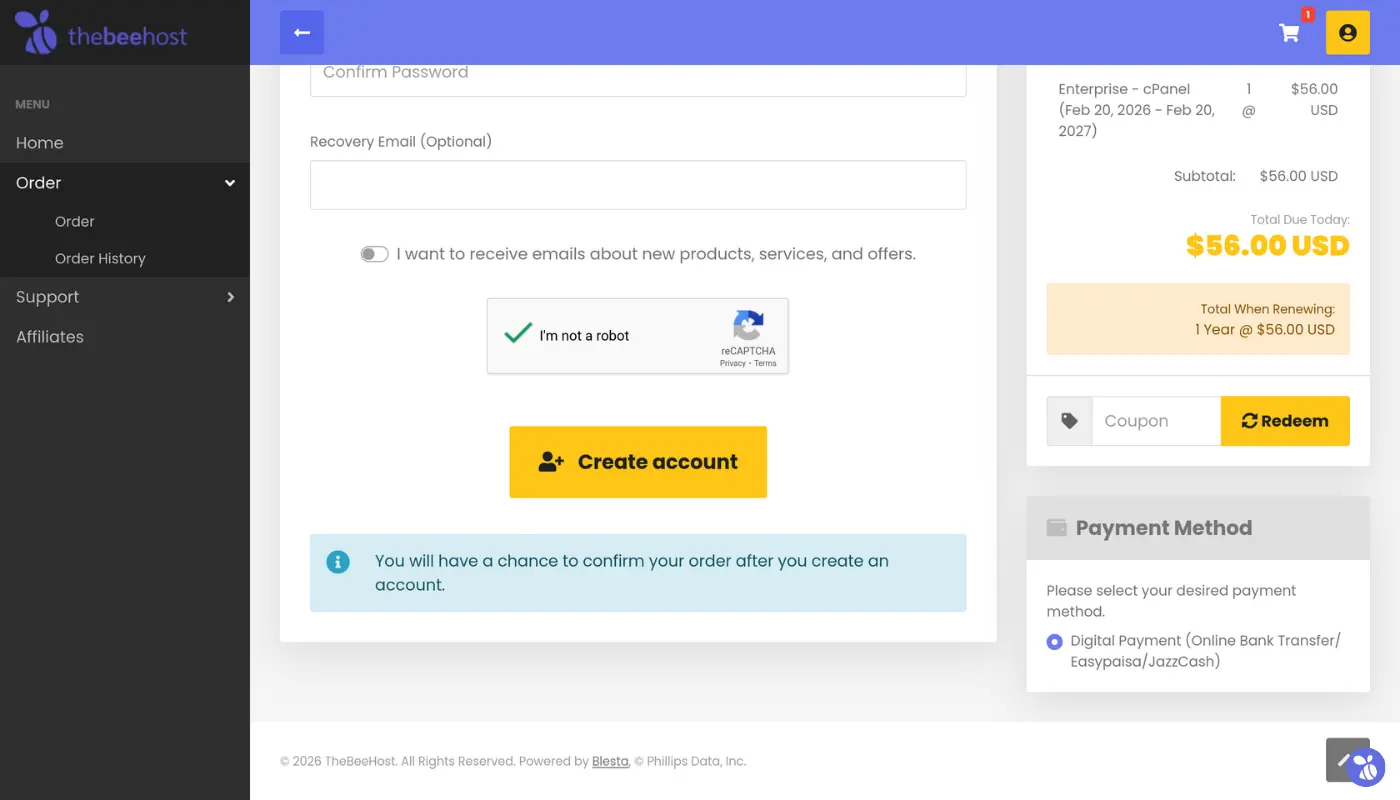
You will have a chance to review and confirm your order before final payment.
Final Step: Payment
Select your preferred payment method:
Digital Payment:
(Online Bank Transfer / Easypaisa / JazzCash)
Follow the payment instructions provided to complete your order.
Once payment is confirmed, your hosting account will be automatically provisioned.
Need Help?
If you have any further questions or need assistance, don’t hesitate to contact us via Live Chat or email us at [email protected].