 Ever wondered why some websites load in a flash while others seem to drag their feet? Well, It’s not just about having good hosting or a sleek design, it’s also about how efficiently your site handles the information it needs to display. In an age where speed is everything, having a slow website can be a major setback.
One of the most effective ways to enhance your website’s performance is by implementing object caching. Object caching can significantly speed up your WordPress site by reducing the amount of time it takes to load pages. But what is object caching, and how can it benefit your site? Let’s break it down step by step, so you can understand the power of this tool and how to set it up on your WordPress site.
What is Caching?
At its core, caching is a method of storing data so that future requests for that data can be served faster. For example: when you frequently visit a website, your browser starts to remember certain elements like images, scripts, and stylesheets. Instead of downloading everything from scratch each time you visit, your browser loads some of the content from its local storage—this is a form of caching.
But caching isn’t just about browsers; it also happens on the server side. When a WordPress site is visited, the server has to process PHP scripts, query the database, and assemble the final page. This can be resource-intensive and time-consuming, especially if the same data is requested repeatedly. Caching helps by storing the results of these processes so that the next time a similar request is made, the server can skip some of the steps and deliver the page faster.
Different Types of Caching
Several layers of caching can be implemented to make your website run more efficiently.
Here’s a quick overview:
- Browser Caching: This type of caching happens on the user’s device. When a visitor lands on your site, their browser saves certain elements like images, CSS files, and JavaScript. The next time they visit, the browser can load these elements from its cache rather than downloading them again, which speeds up the loading process.
- Page Caching: This involves storing a fully rendered HTML page in a cache. When a user requests a page, instead of running the entire process of database queries and PHP script execution, the server delivers the stored HTML file. This is particularly useful for pages that don’t change often, like a blog post or a static homepage.
- Database Caching: Every time a page is loaded, WordPress often needs to query the database to retrieve content. Database caching stores these queries in the cache so that the next time the same data is requested, the server can quickly deliver it without querying the database again. This can significantly reduce server load and improve page load times.
- Object Caching: This type of caching focuses on storing pieces of data or objects in memory so that they can be reused without reprocessing. Object caching can be particularly effective for reducing the load on your database by keeping frequently accessed data readily available.
What is Object Caching?
Object caching refers to the process of storing certain pieces of data (known as objects) in memory so they can be quickly retrieved when needed. In WordPress, these objects might be database query results, API responses, or any other data that takes time to generate. By caching these objects, you avoid having to recreate them every time they’re needed, which can drastically speed up your site.
For example, a WordPress site displays the latest blog posts in a widget. Normally, every time someone visits a page with that widget, WordPress would need to query the database to fetch the latest posts. With object caching, the results of that database query are stored in memory. The next time a page is loaded, WordPress can simply retrieve the data from the cache rather than querying the database again, saving time and resources.
Built-in Object Caching in WordPress
WordPress includes a built-in object caching system that works right out of the box. However, by default, this caching is non-persistent, meaning the cached data is cleared after each page load. While this does offer some performance improvements, the benefits are limited because the cache isn’t saved between page requests.
You might have noticed this when checking your Site Health screen, where WordPress often flags the absence of persistent object caching as a potential issue.
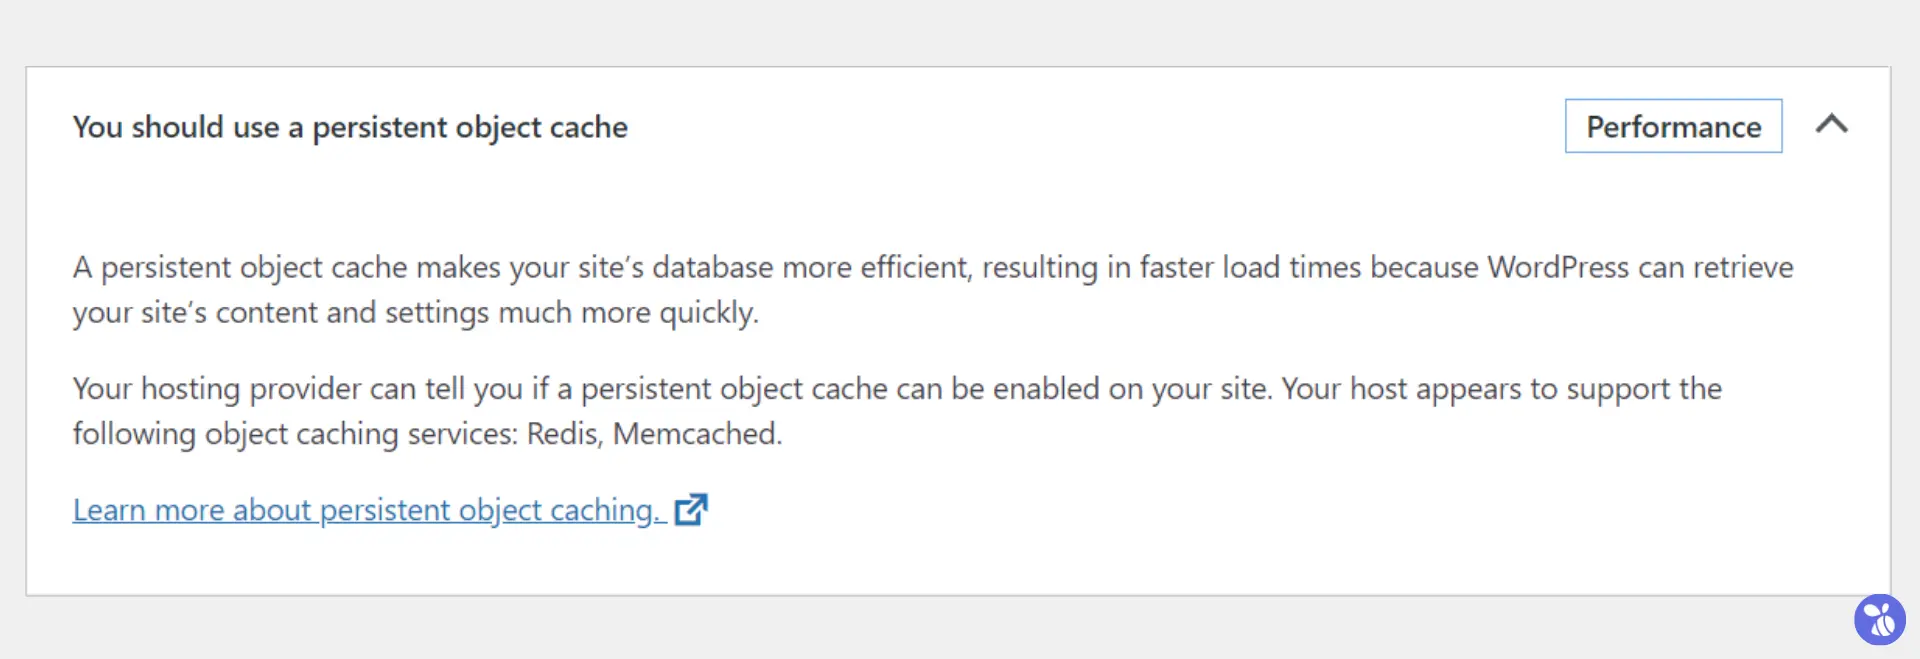 The non-persistent nature of the built-in cache means that while it can reduce load times on a single page request, it doesn’t do much for returning visitors or users who navigate through multiple pages on your site.
Non-Persistent vs. Persistent Object Caching
Non-Persistent Object Caching: As mentioned earlier, non-persistent caching stores data temporarily, clearing it after each request. It’s like taking a snapshot that gets deleted after one use. While it can help with individual page loads, it doesn’t provide ongoing benefits for subsequent visits.
Persistent Object Caching: Persistent caching, on the other hand, keeps data stored across multiple requests. It’s like storing a snapshot in a folder that you can access anytime you need it. This type of caching is particularly useful for high-traffic sites where the same data is requested frequently.
What are Redis and Memcached?
To implement persistent object caching, two of the most popular solutions are Redis and Memcached.
Redis
Redis is an open-source, in-memory data structure store that functions as a database, cache, and message broker. Its versatility and performance make it a popular choice for WordPress sites that need a robust caching solution.
Memcached
 Memcached is another high-performance, distributed memory caching system. It’s simple and efficient, ideal for caching results of database queries, API calls, and more.
Both Redis and Memcached are excellent choices for enhancing your WordPress site’s performance through object caching.
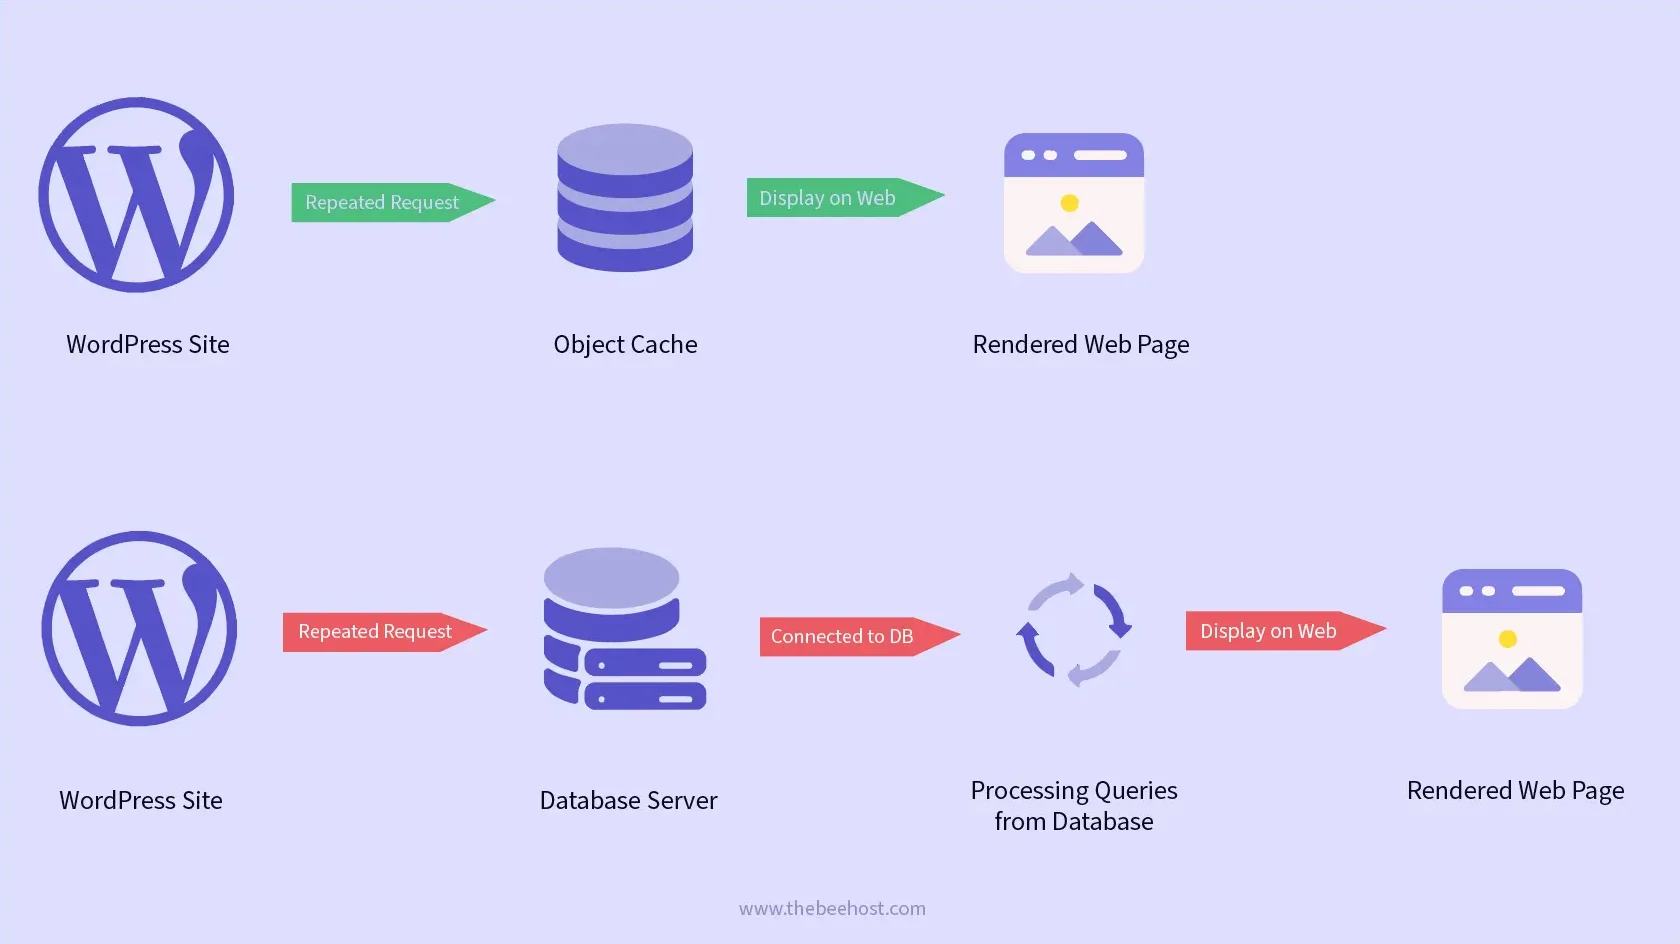
How Object Cache Works on a WordPress Site?
- When someone visits your WordPress site, a request is made to load the page.
- WordPress starts building the page by fetching necessary data like posts, pages, and settings from the database.
- Before accessing the database, WordPress checks if the needed data is already stored in the object cache.
- If the data is found in the cache (a “cache hit”), it’s used directly from there.
- If the data isn’t in the cache (a “cache miss”), WordPress retrieves it from the database.
- After retrieving the data from the database, WordPress saves it in the cache for faster access next time.
- WordPress then uses the data (whether from the cache or database) to create and serve the HTML page to the user.
- On future visits to the same page, the cached data speeds up the response time.
Comparison: WordPress with Object Cache Enabled vs. No Object Cache
| Aspect | With Object Cache | Without Object Cache |
|---|---|---|
| Database Queries | Fewer queries, as cached data is reused | More queries, as data is fetched each time |
| Page Load Time | Faster due to reduced database load | Slower, especially on larger sites |
| Server Load | Lower, as repetitive data retrieval is minimized | Higher, due to repeated database queries |
| Scalability | Better, can handle higher traffic efficiently | Less scalable, as more traffic increases database load |
| Memory Usage | Slightly higher to store cached data | Lower, but with higher CPU and database load |
| Performance on Dynamic Content | Improved, with dynamic content benefiting from caching | Slower, as each request needs fresh data retrieval |
How to Activate Redis or Memcached in cPanel?
Activating Redis or Memcached through cPanel is a straightforward process. Here’s how you can do it:
- Login to your cPanel account using your credentials.
- Scroll down until you see the Software section, then click on Object Cache Manager.
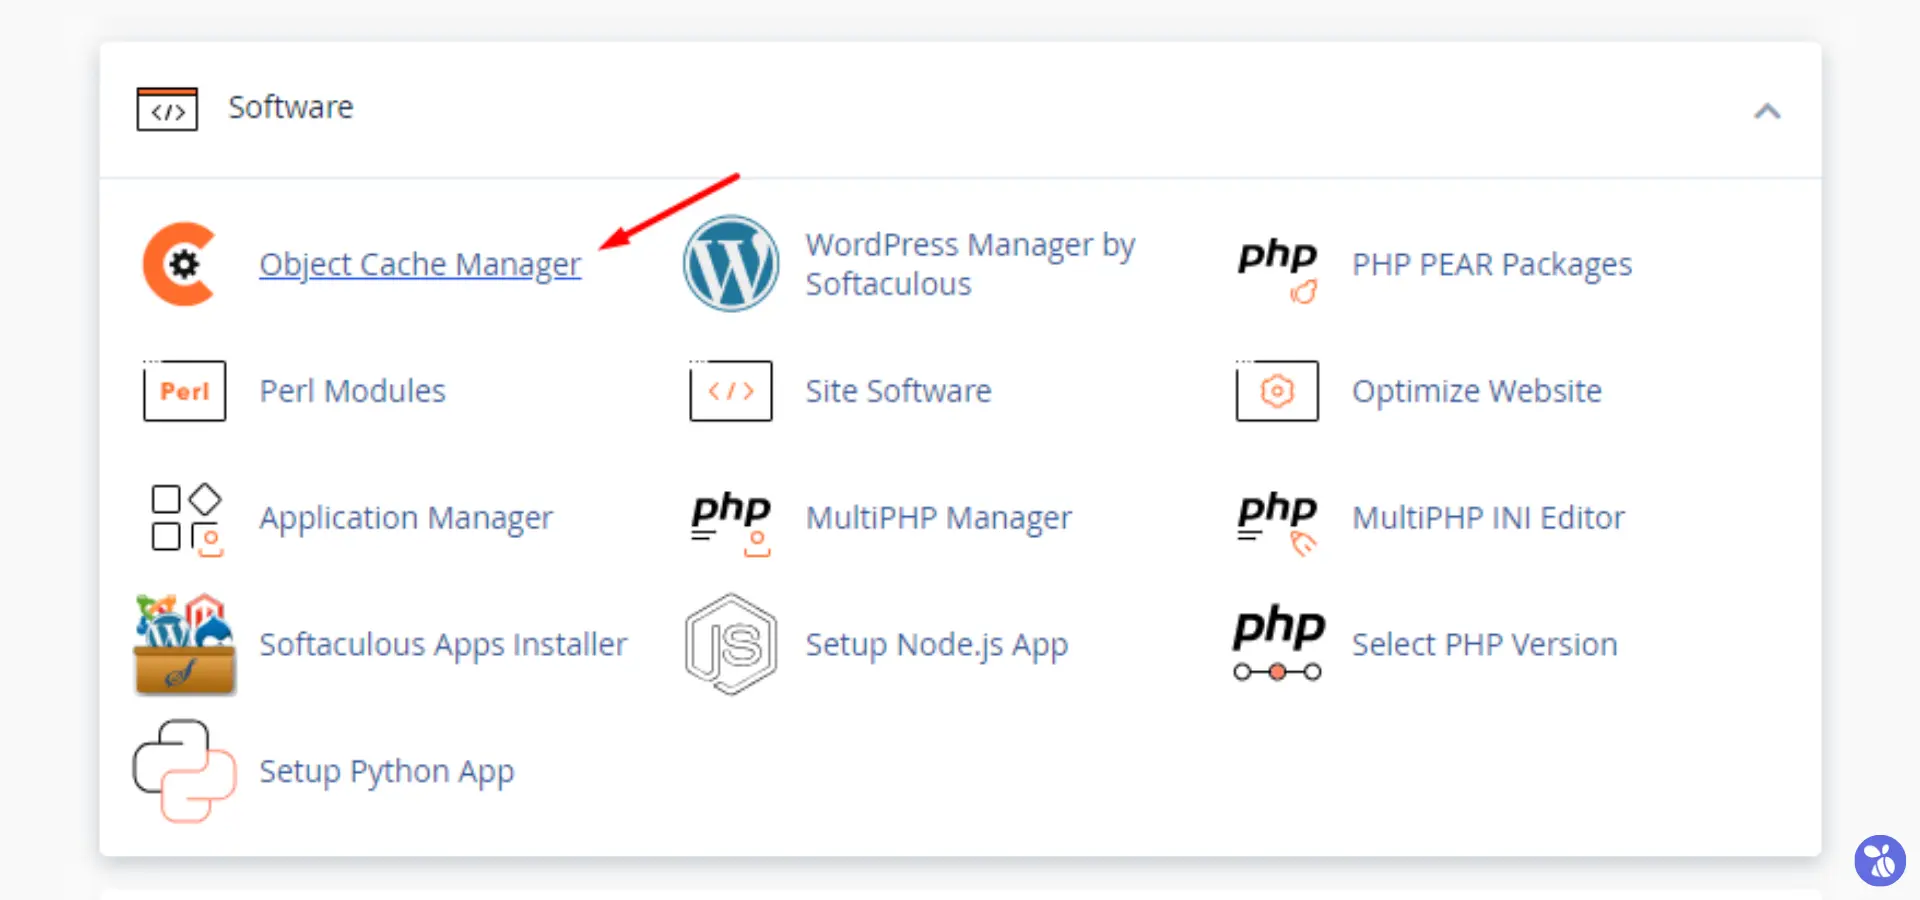
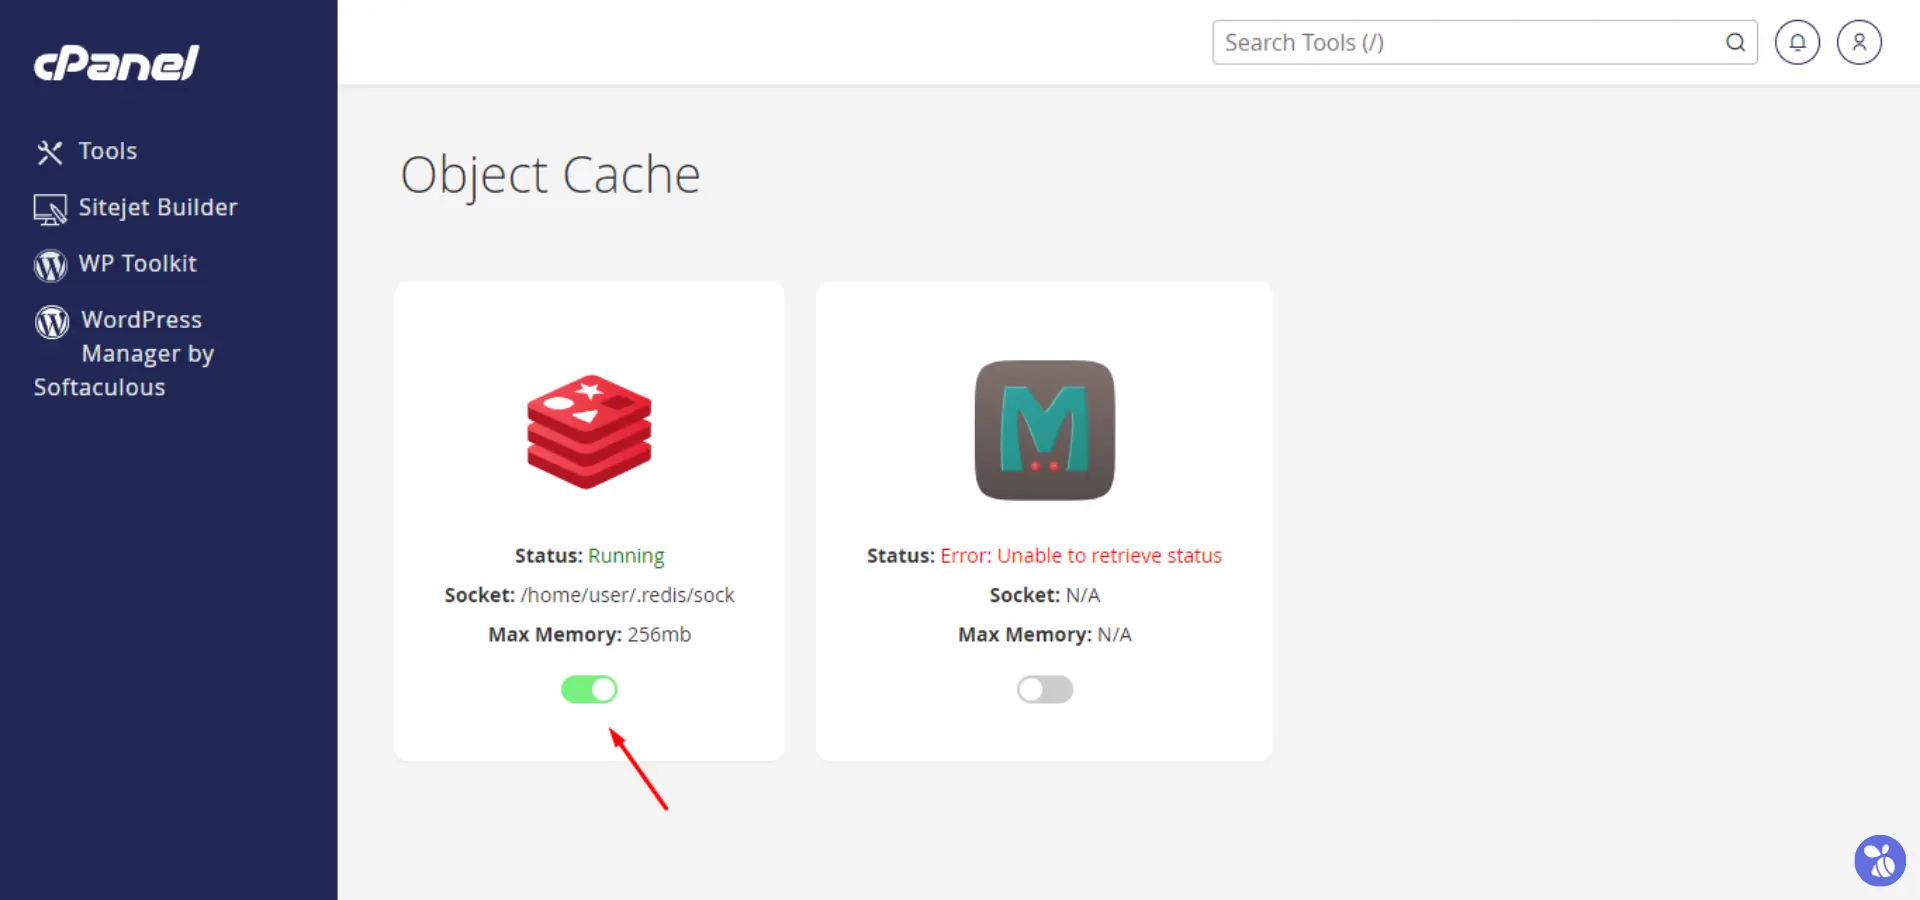
- In the Object Cache Manager, you’ll see options to enable either Redis or Memcached. Toggle the one you want to use, and it will be activated on your server.
How to Activate Redis in DirectAdmin?
If you’re using DirectAdmin instead of cPanel, enabling Redis for object caching is also straightforward. Here’s how to do it:
- Login to your DirectAdmin account with your credentials.
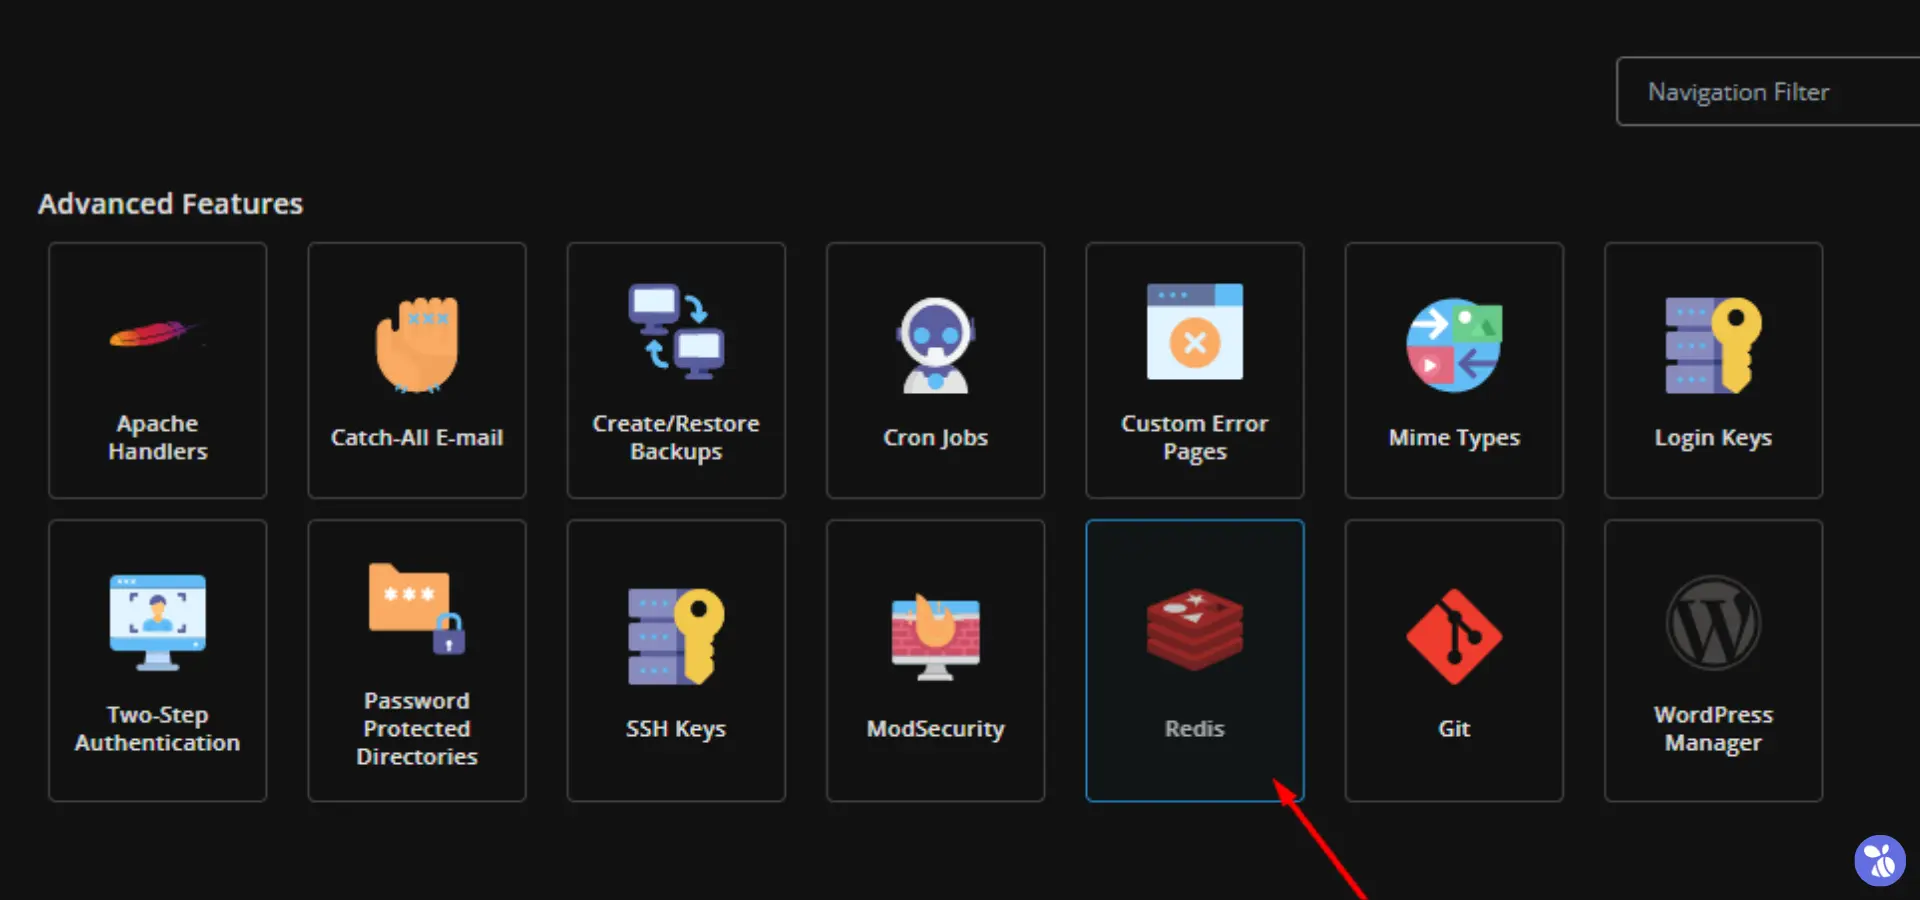
- Navigate to the Advanced Features section, and click on Redis. This will take you to the Redis management page.
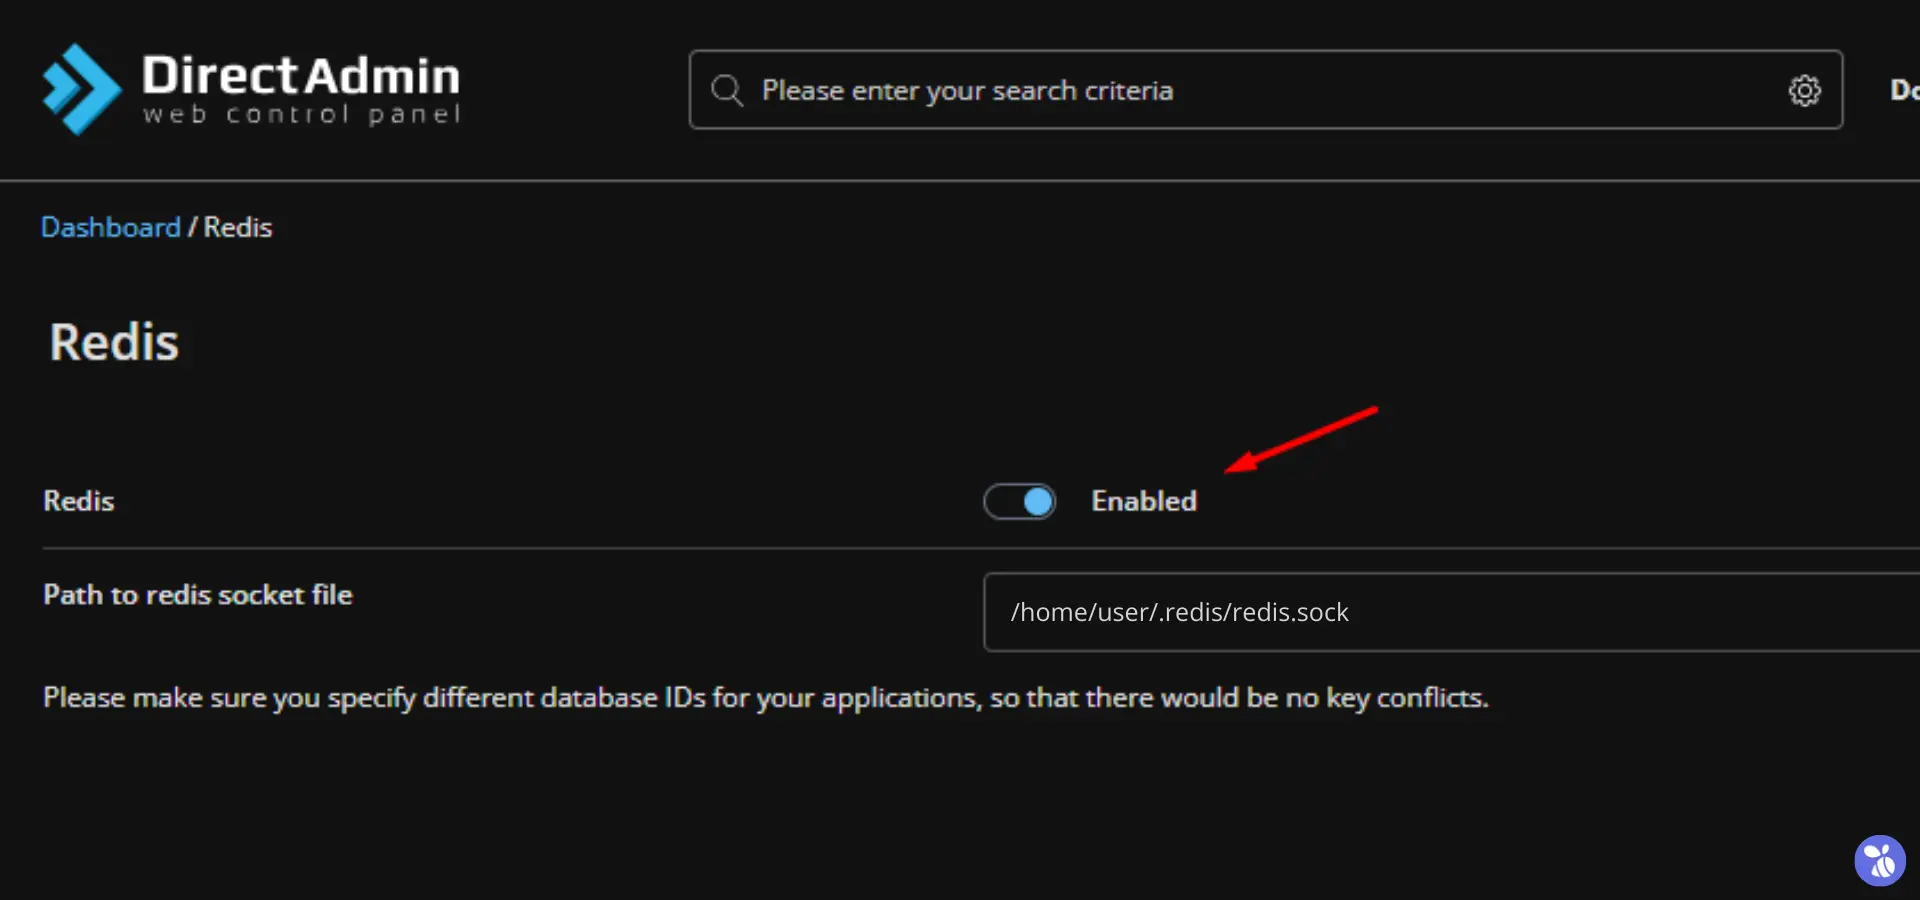
- Simply switch on the Redis Object Cache to enable it.
Adding Redis Configuration to wp-config.php
Once you’ve enabled Redis in either cPanel or DirectAdmin, you need to install the Redis Object Cache plugin in WordPress, the last step is to configure WordPress to work with Redis. This configuration is crucial to ensure that WordPress communicates effectively with Redis.
- Open your site’s wp-config.php file located in the public_html directory by using the Control Panel’s File Manager tool.
- In the wp-config.php file, Add the following lines before the comment
/* That's all, stop editing! Happy publishing. */
define( 'WP_REDIS_SCHEME', 'unix' );
define( 'WP_REDIS_PATH', '/home/user/.redis/redis.sock' );
define( 'WP_REDIS_PREFIX', 'mysite' );
define( 'WP_REDIS_DATABASE', 0 );
What Do These Lines Mean?
WP_REDIS_SCHEME: This line specifies the connection scheme to use for Redis. By setting it to ‘unix‘, you’re telling WordPress to connect via a Unix socket rather than a TCP connection. Unix sockets can be faster than TCP connections because they bypass the network stack, making this an optimal choice if Redis is installed on the same server as your WordPress site.WP_REDIS_PATH: Here, you define the actual path to the Redis socket. This tells WordPress where to find Redis on your server. You’ll need to replace ‘/home/user/.redis/redis.sock’ with the actual file path to the Redis socket, which you can typically find in your server’s Redis configuration.WP_REDIS_DATABASE: Redis allows for multiple databases within a single instance, numbered from 0 to 15. This line tells WordPress which specific Redis database to use for storing its cache. The default is 0, but you can choose any number depending on your configuration and needs.WP_REDIS_PREFIX: This sets a unique prefix for all cache keys created by your WordPress site in Redis. By defining a prefix, such as ‘mysite_‘, you avoid any potential conflicts with other applications that might be using the same Redis instance. This is particularly useful in environments where multiple websites or applications share the same Redis server.
Please make sure you specify the actual path, different prefixes and database IDs for your websites so that there will be no key conflicts.
Adding Memcached Configuration to wp-config.php
If you want to configure WordPress to use Memcached, add the following lines to your wp-config.php file, just before the comment /* That's all, stop editing! Happy publishing. */:
define('WP_CACHE', true);
define('WP_MEMCACHED_SERVERS', array(
    'default' => array(
        '/home/user/.memcached/sock'
    ),
));
// Define a unique prefix for your cache keys to avoid collisions
define('WP_CACHE_KEY_SALT', 'your_unique_prefix_'); // Replace 'your_unique_prefix_' with something unique
Once these settings are added to your wp-config.php, WordPress will start using Memcached to store and retrieve cache data.
Installing Object Cache on a WordPress Site
With Redis or Memcached activated and configured on your server, the final step is to enable it on your WordPress site. Here’s how:
- Log in to Your WordPress Admin Dashboard.
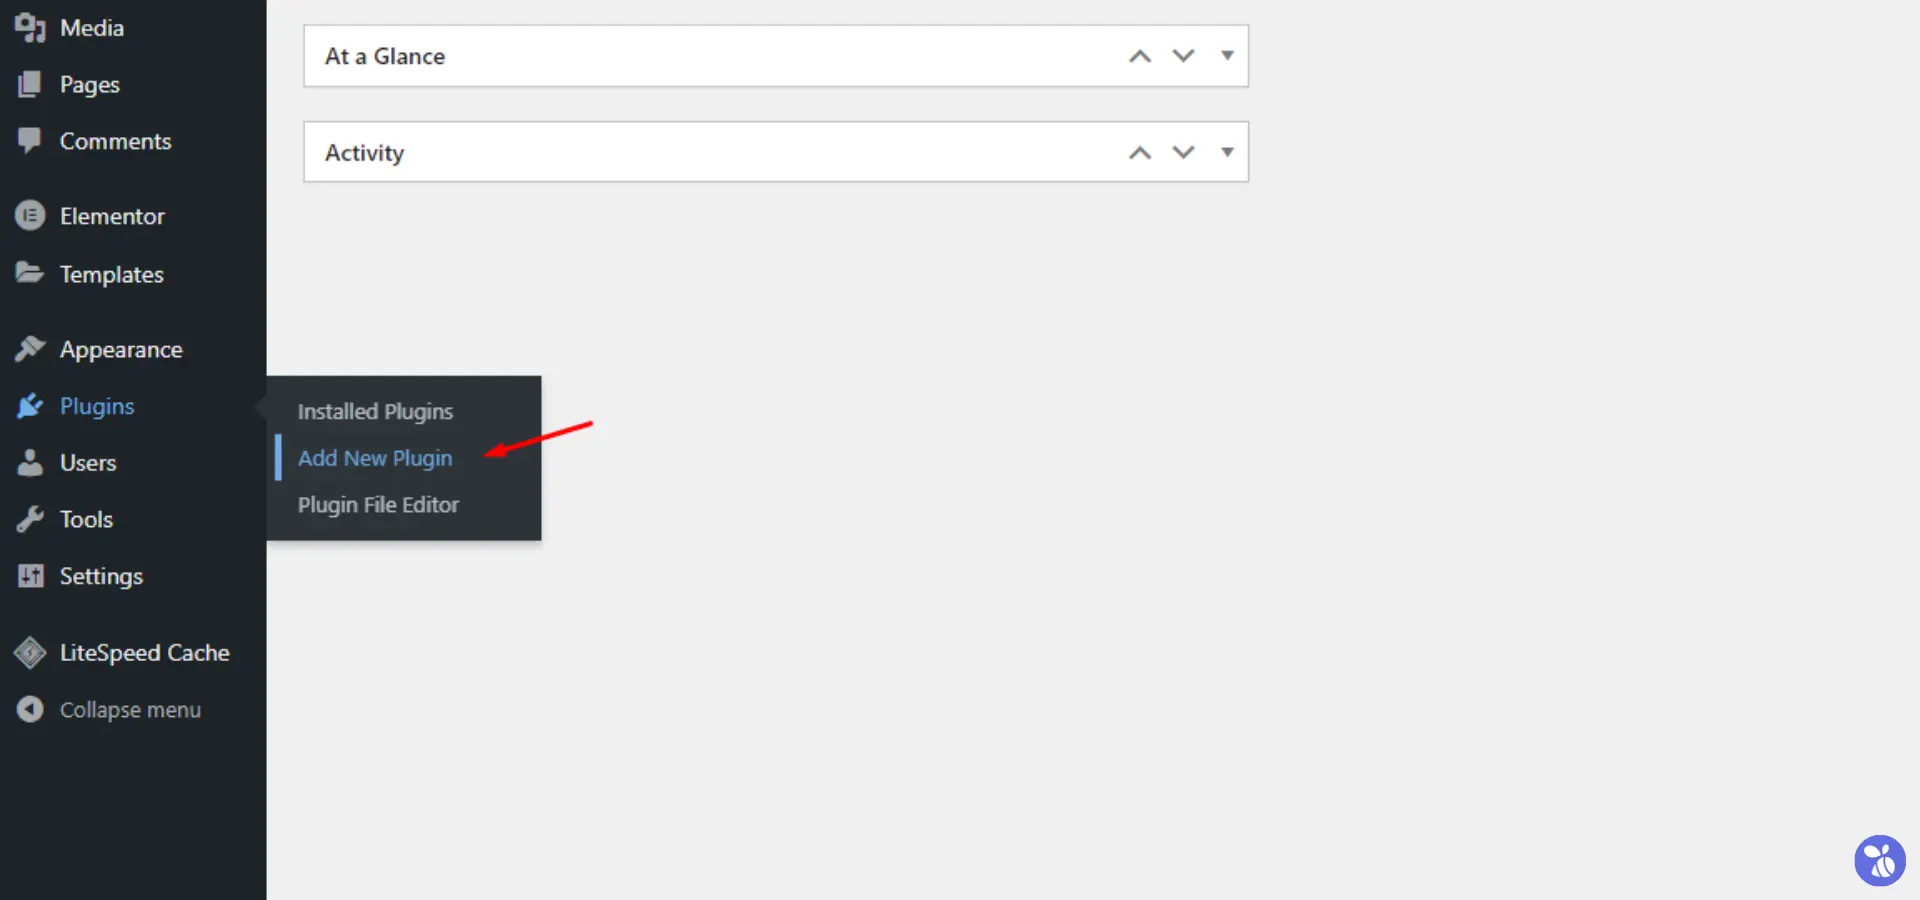
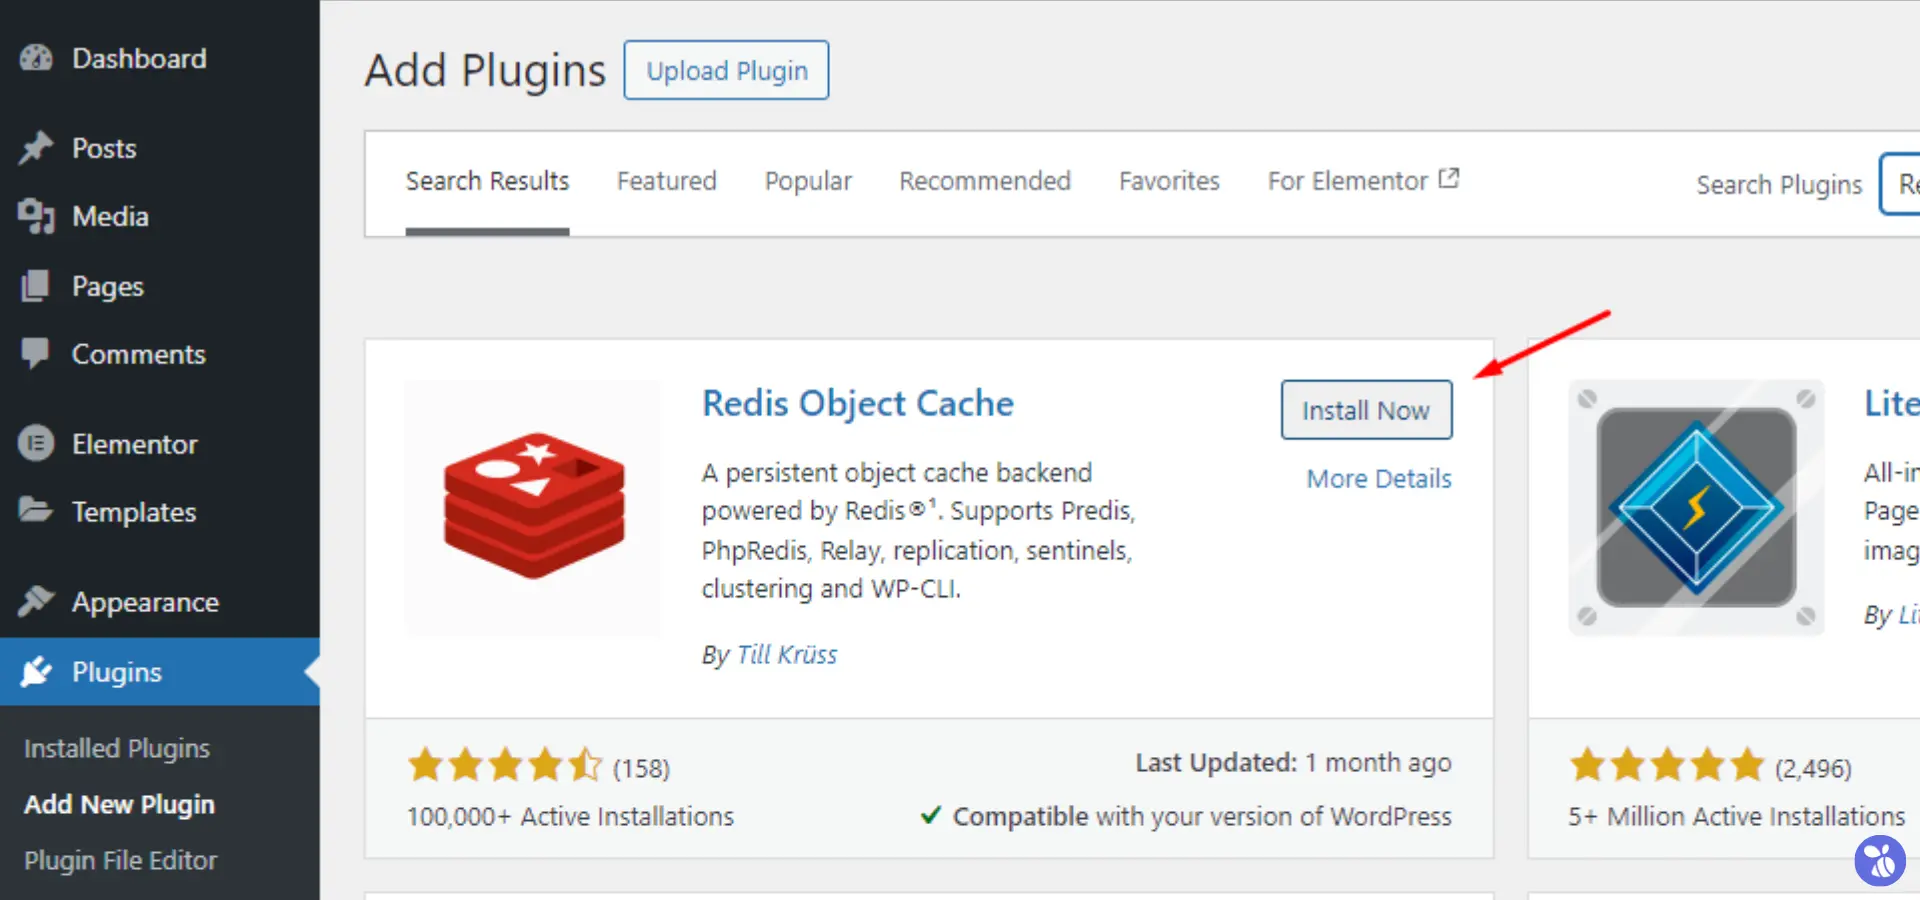
- Navigate to the Plugins section and click on Add New.
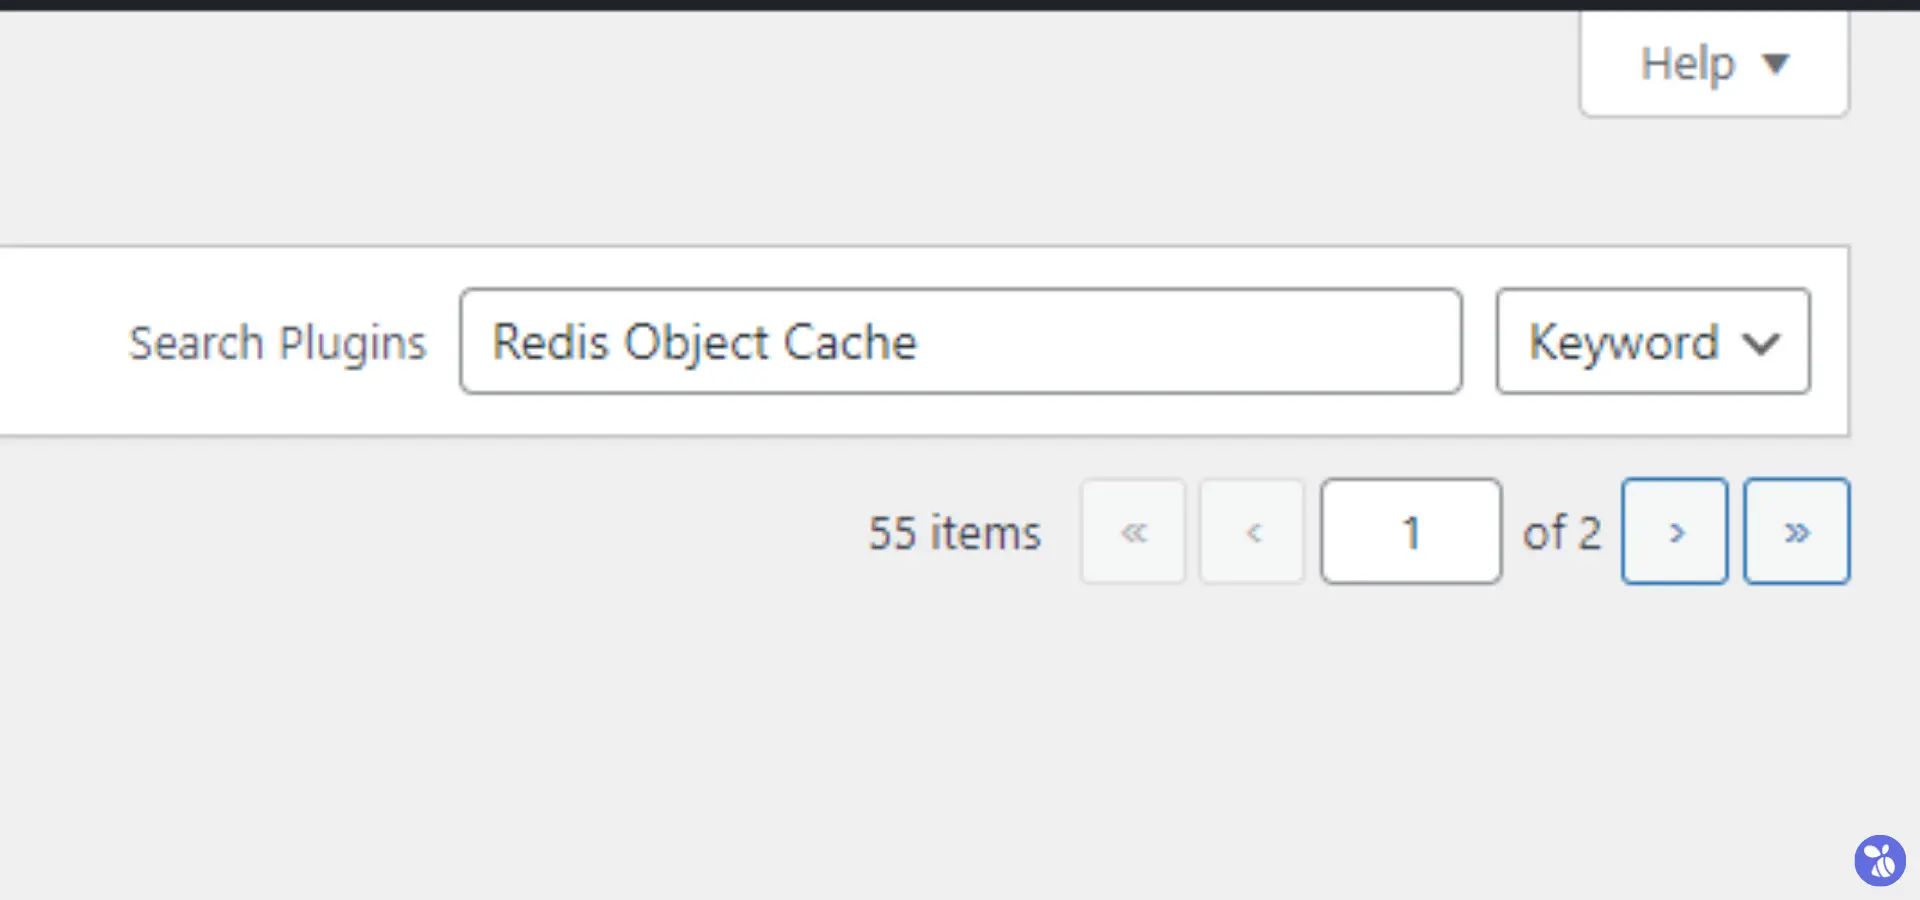
- In the search bar, type in Redis Object Cache or another plugin that supports Memcached.
- Click the Install Now button.
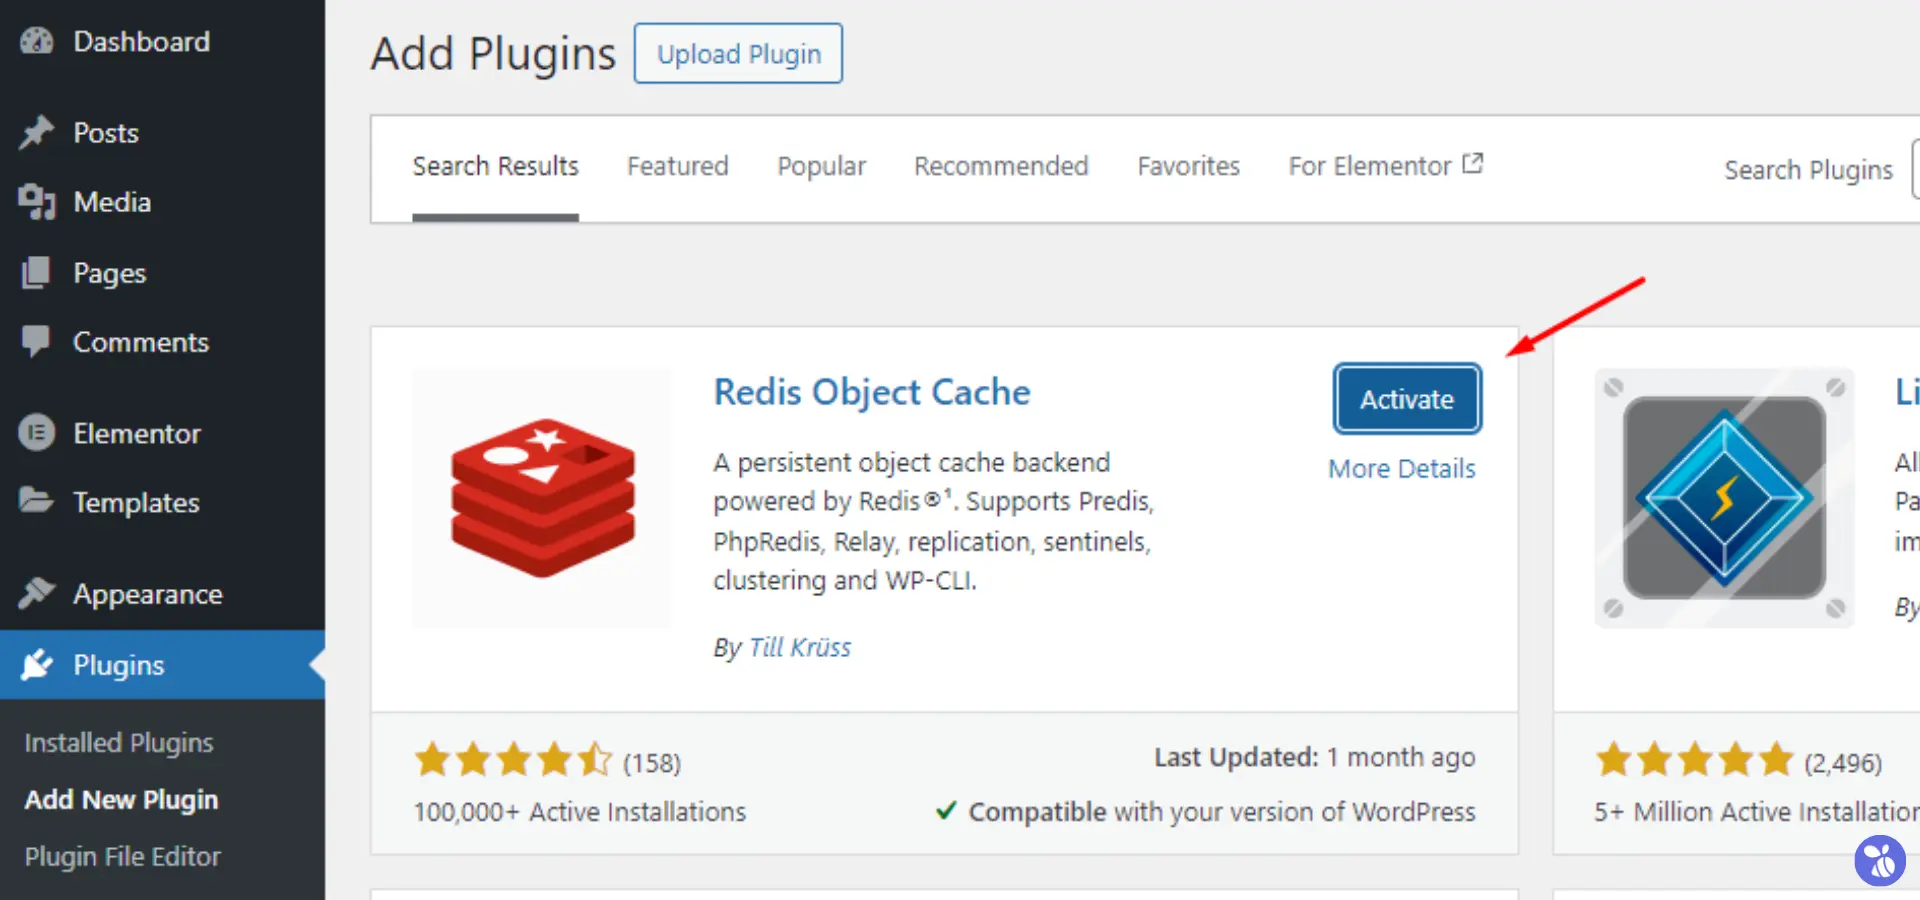
- After the installation is complete, click the Activate button.
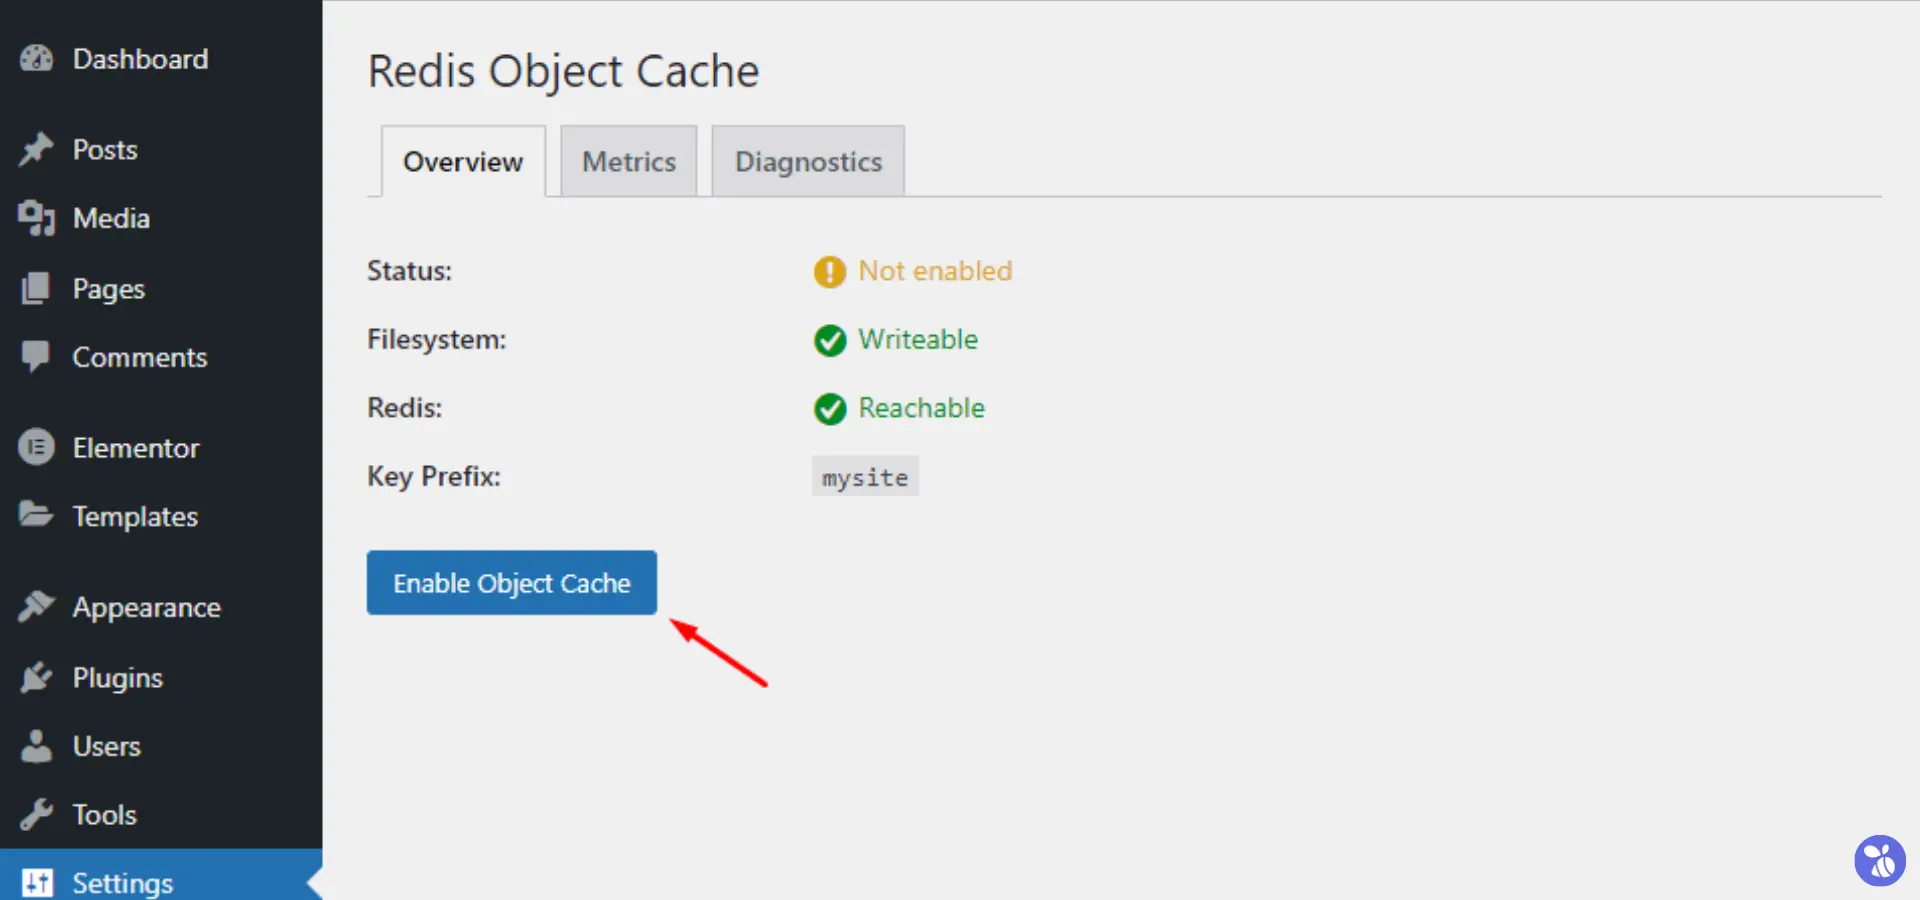
- Navigate to Dashboard > Settings > Redis.
- Click on the Enable Object Cache button to enable it on your site.
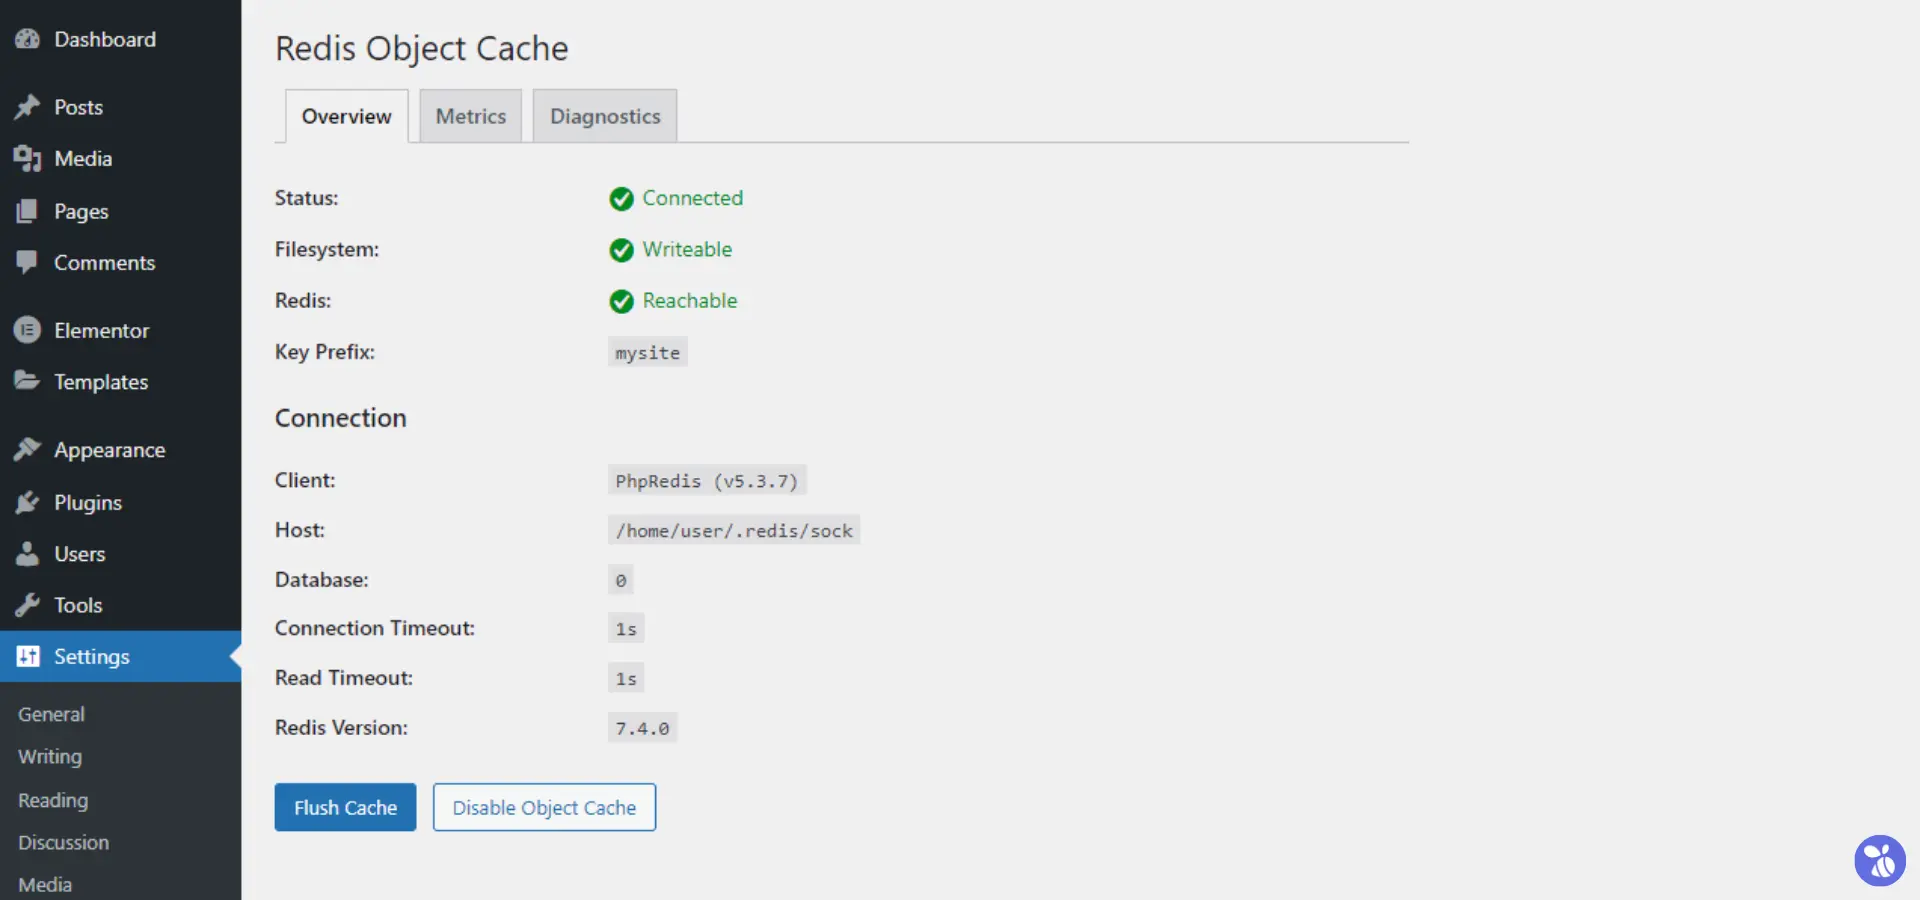
- That’s it! Your WordPress site should now be fully configured to use Redis for object caching, leading to significant performance improvements.
Setting Up Object Cache in LiteSpeed Cache
LiteSpeed Cache (LSCache) is a powerful caching plugin designed specifically for websites hosted on LiteSpeed servers. If you’re using LiteSpeed Cache, enabling object caching is a great way to further optimize performance.
Below are the steps to set up object caching in each of these popular plugins:
-
-
- Log into your WordPress admin area.
- In the left-hand menu, click on Settings > LiteSpeed Cache.
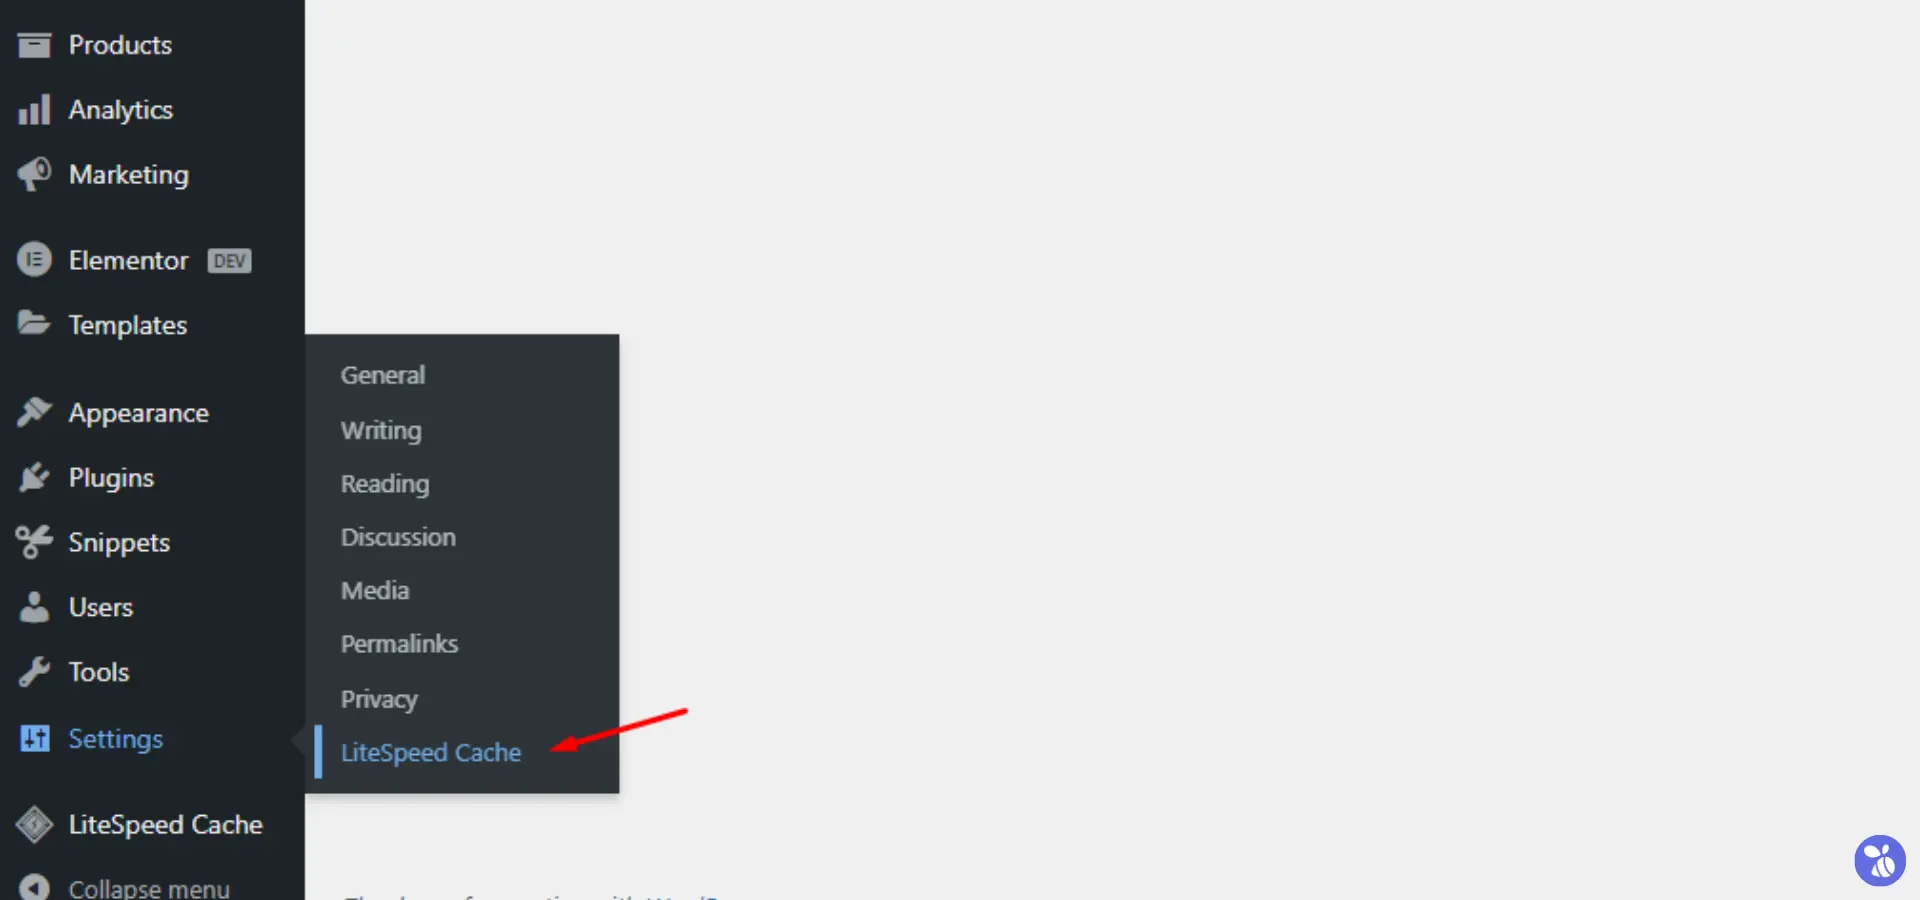
- Click on the (6) Object Cache tab and toggle the switch to ON next to Object Cache.
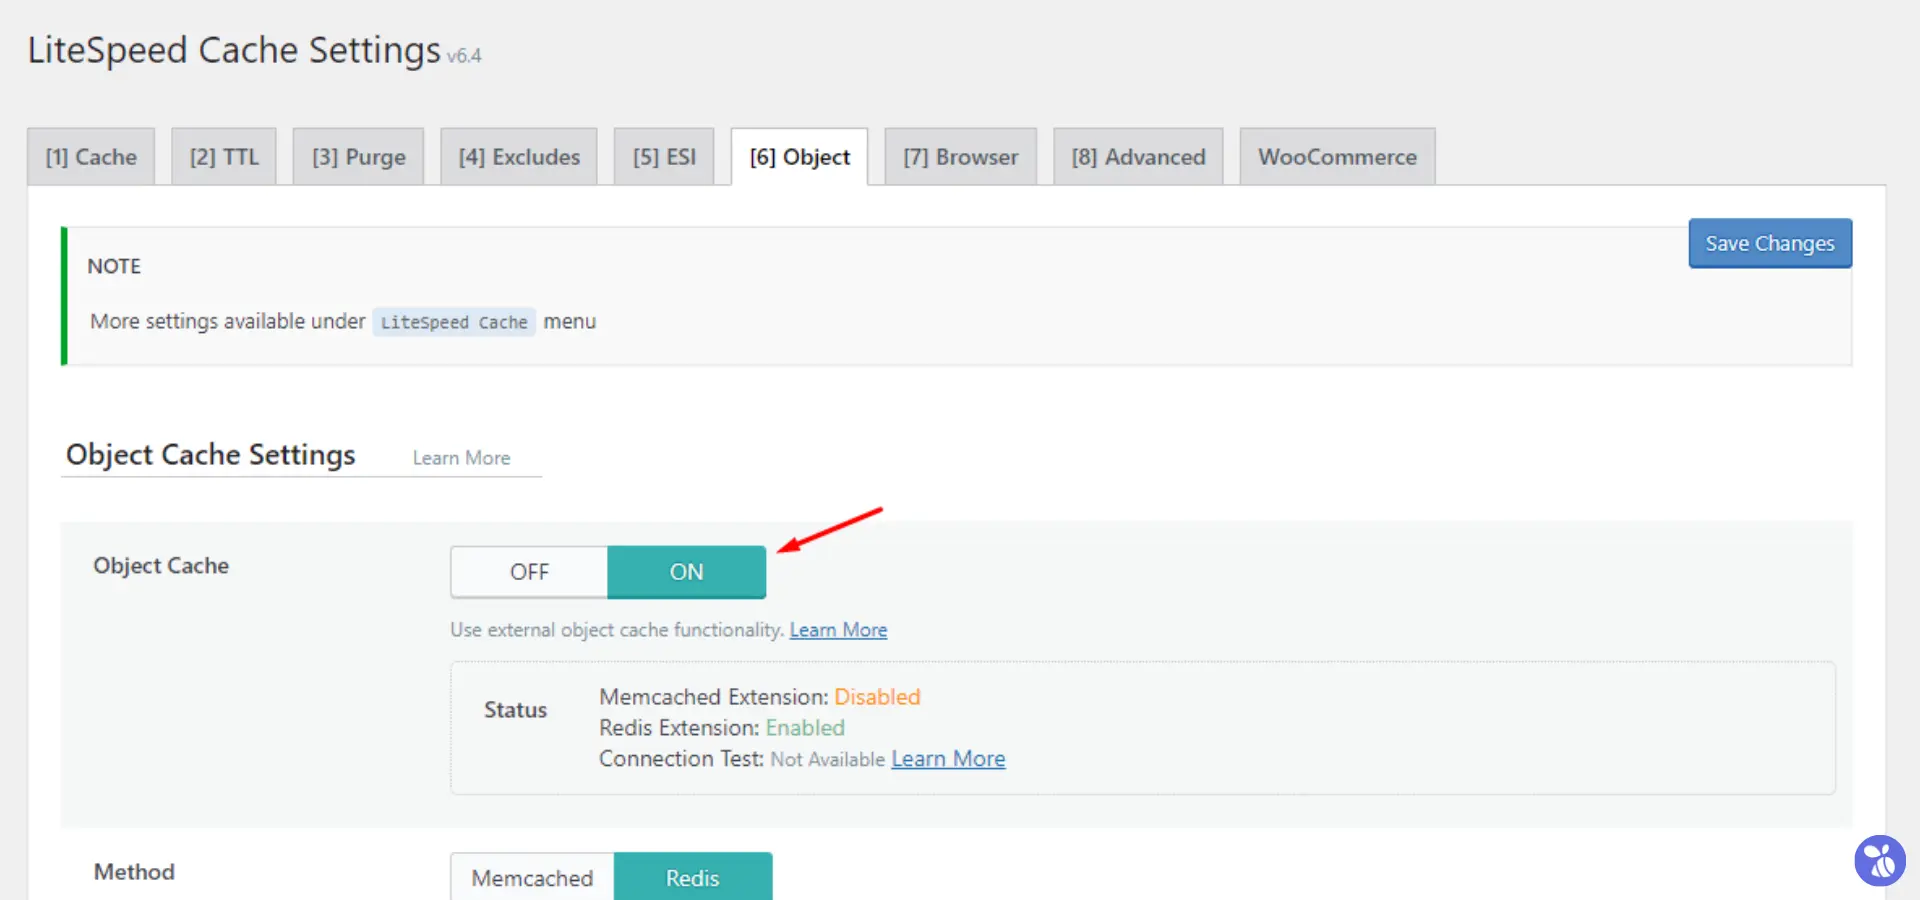 4. After enabling object caching, you’ll encounter settings for the cache method, server host, port, and database. For Redis, select it as your cache method; for Memcached, choose Memcached. Follow the on-screen prompts and ensure that your settings align with your Redis or Memcached server.
- Host:
/path/to/socket/file/ - Port:
0(using a Unix socket connection) - Redis Database ID:
0(ranges from 0 to 15)
- Host:
Ensure each WordPress installation has a unique Redis ID to prevent caching conflicts.
-
 5. After configuring the settings, click on the Save Changes button to apply them.
 6. To ensure everything is working correctly, return to the LiteSpeed > Dashboard.
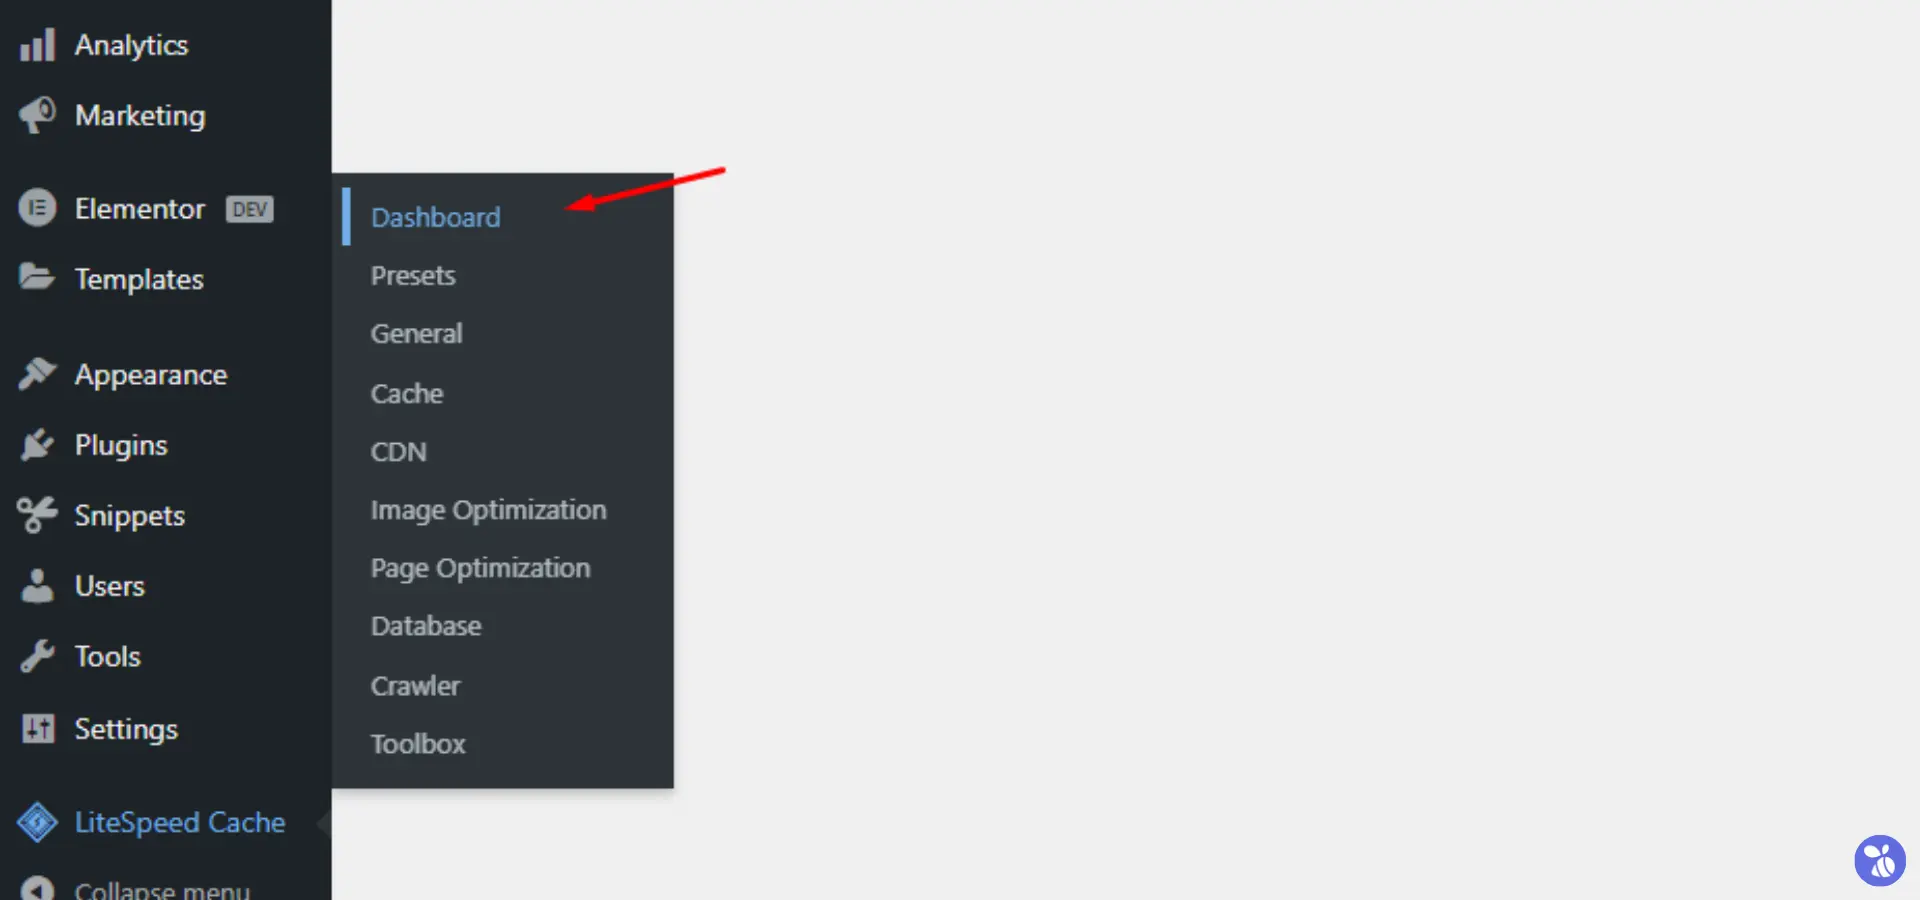 7. Look for any status messages or performance data indicating that object caching is active.
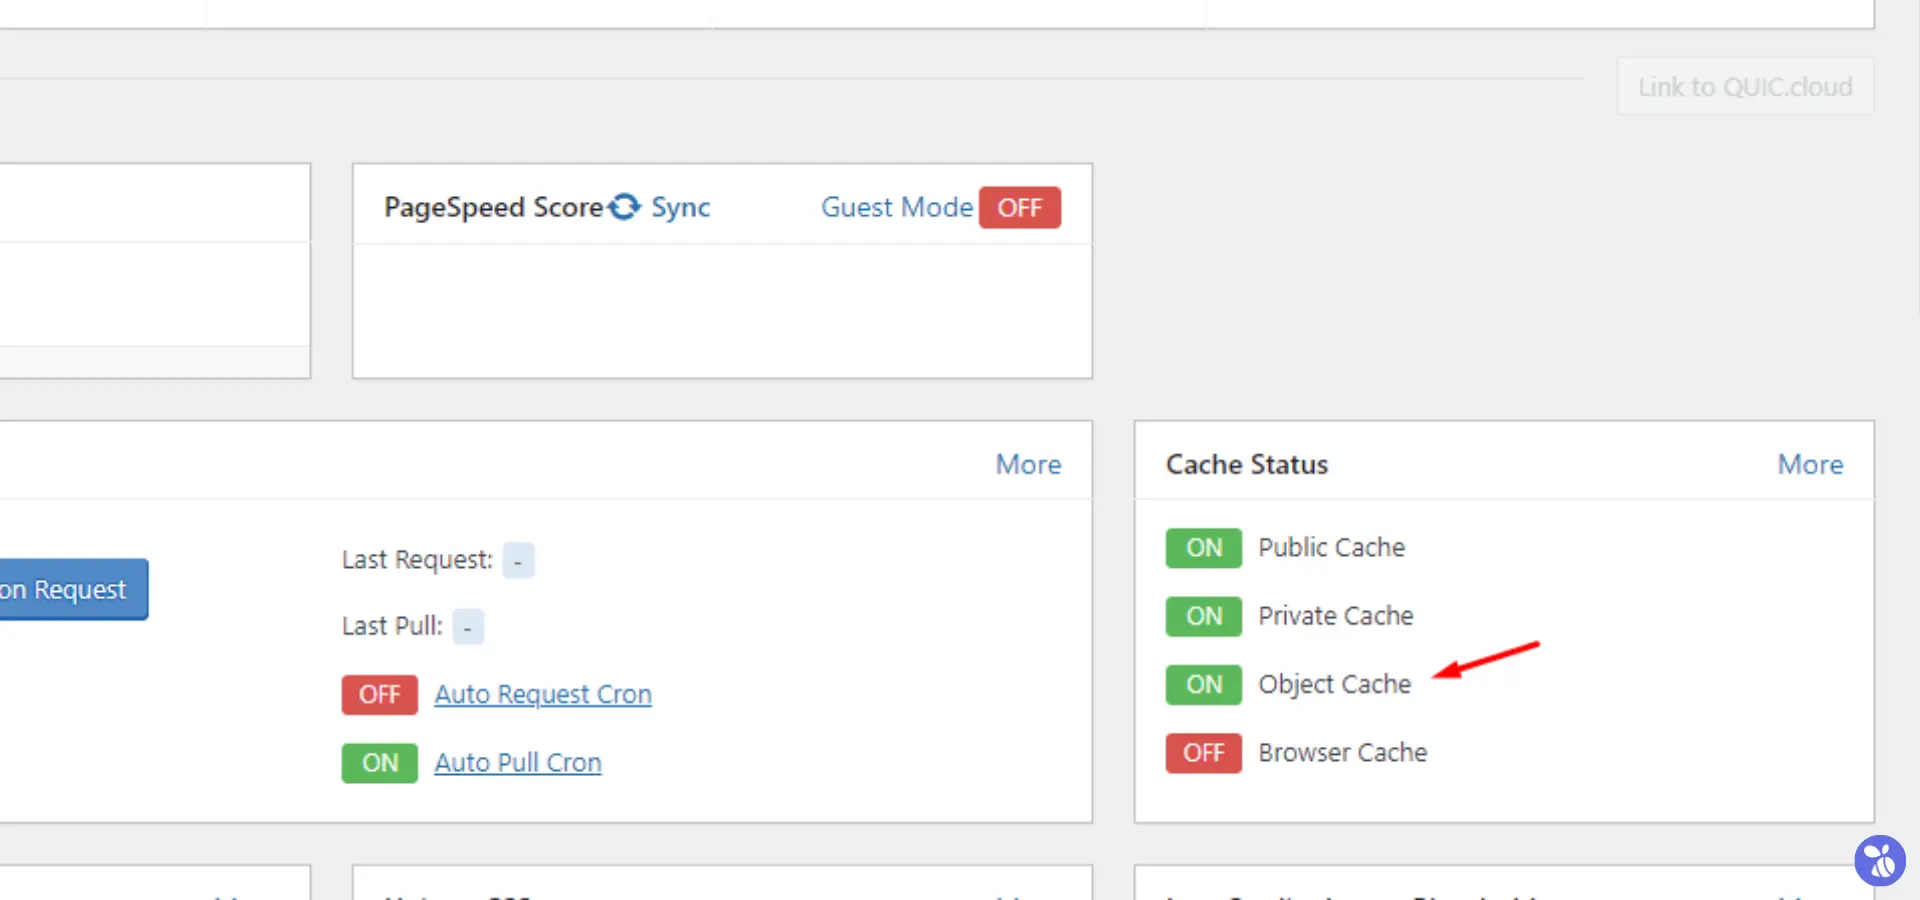 Following this, you can enjoy the benefits of a faster, more responsive website.
Wrapping Up
Enabling object caching on your WordPress site is a smart way to improve its performance and deliver a faster, smoother experience for your visitors. Whether you choose Redis or Memcached, the benefits of persistent object caching are clear—reduced server load, faster page loads, and a better overall user experience. By following the steps outlined in this guide, you can quickly and easily set up object caching on your site and start reaping the rewards.
If you encounter any issues during the setup process or need further assistance, do not hesitate to reach out to TheBeeHost Technical Support. Our team is here to help you optimize your website and ensure everything runs smoothly.