If you’re unable to find the DNS Records option for your domain in TheBeeHost Client Area, it simply means that DNS Management is not enabled yet for that domain.
Follow the steps below to enable DNS Management (along with other useful domain options) and access your DNS records.
Step 1: Access Client Area
Log in to your registered TheBeeHost Account.

Step 2: Domains Section
From the My Account page, click on Domains.

Step 3: Domain Management
On the Domains page, locate the domain you want to manage and click the Manage button under the Options column.

Step 4: Configurable Options
On the Manage Domain page, scroll down to the Actions section and click Change Configurable Options.

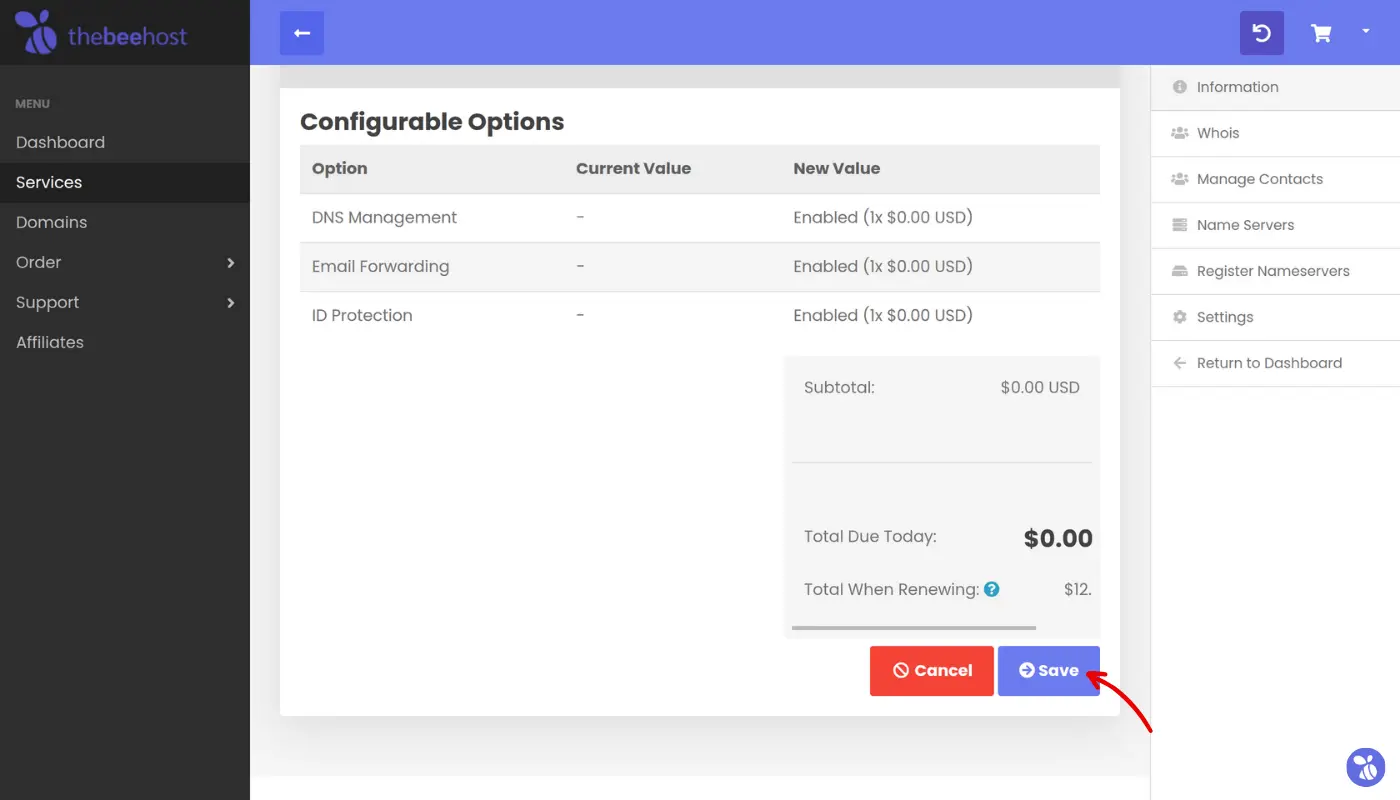
Step 5: Check & Review Domain Options
You will now see a list of configurable options. Please enable/check the following options:
- DNS Management
- Email Forwarding
- ID Protection
After selecting the required options, click Review.

Step 6: Apply Changes
Review your selections and click Save to apply the changes.
Step 7: DNS Management Enabled
Once saved, you will see a confirmation message. After this, the DNS Records option will appear in the right sidebar of your account dashboard.
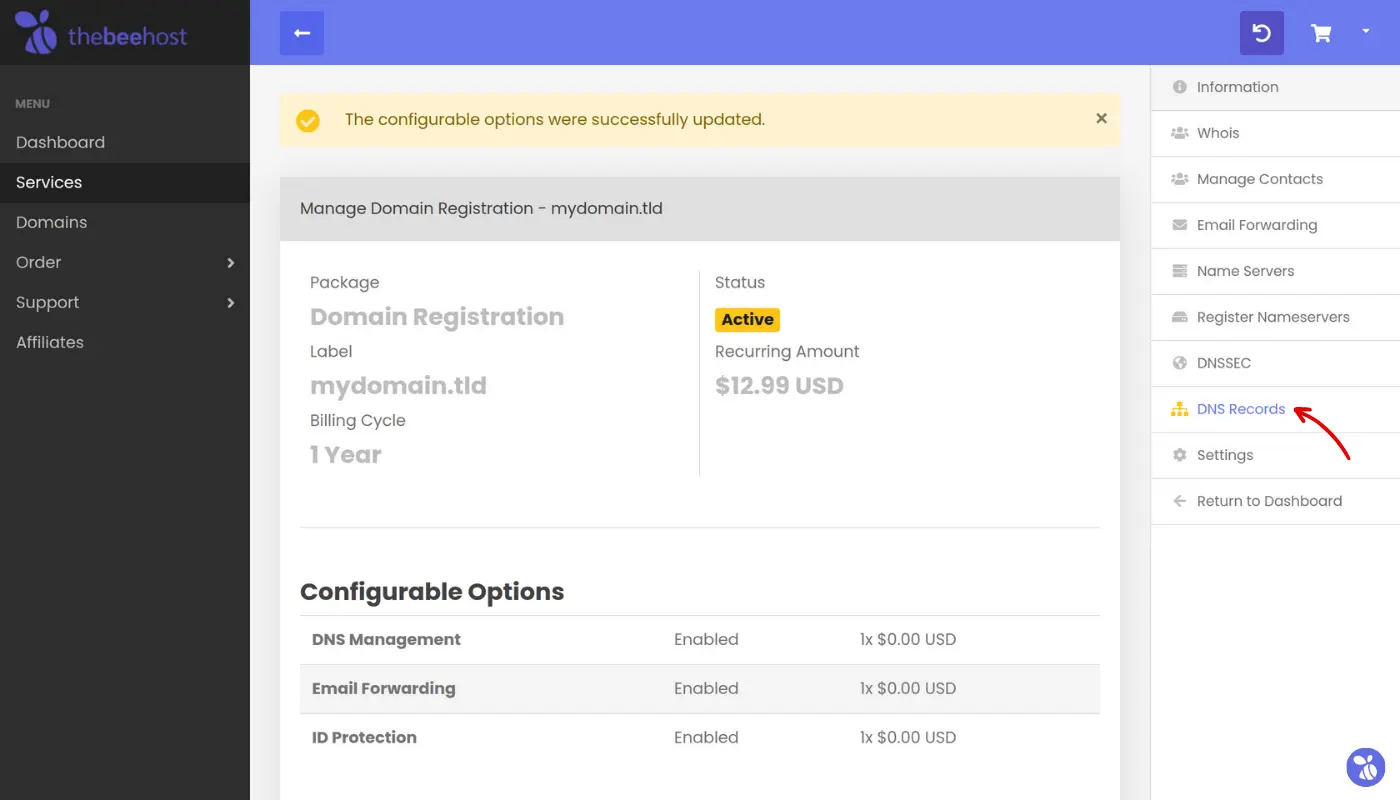
That’s it! You can now manage and update custom DNS records for your domain directly from TheBeeHost Client Area.
Note: This guide does NOT apply to .pk domains as they are controlled at the registrar’s end, and their DNS settings cannot be modified directly from the client area.
To update DNS records for a .pk domain:
Please email us at [email protected] with:
- Your domain name
- Complete DNS records you want to add, update, or remove
Our team will make the changes for you accordingly.
If you still face any issues, or if you need assistance with DNS changes, feel free to contact our support team and we’ll be happy to help.