Is your website prepared for the unexpected? With WordPress powering over 40% of all websites, it’s a prime target for hacking attempts, unauthorized access, accidental deletion, or technical failures. But don’t worry! In this guide, we’ll cover the methods to create and restore backups, providing step-by-step instructions and making it easy for you to protect your data—regardless of your technical expertise.
TheBeeHost customers also benefit from our free JetBackup service, offering automatic backups and a simple restoration process. However, for those who prefer more manual control or an added layer of protection, this guide will walk you through how to effectively manage your own backups.
By the end of this post, you’ll have the tools and knowledge to keep your WordPress website safe, reliable, and operational at all times.
What is a WordPress Backup?
A WordPress backup is a secure copy of all the important elements that make up your website, allowing you to recover from unexpected data loss or system failures. This backup includes two important components:
- The Files: These are the static elements of your website, including themes, plugins, and media uploads, as well as the core WordPress files that are responsible for your site’s functionality and appearance.
- The Database: This stores all the dynamic content, such as posts, pages, comments, user data, and site configurations. Without the database, your site would lack the information that gives it structure and purpose.
Regularly backing up both components ensures you can fully restore your site if anything goes wrong, whether from data corruption, hacking, or a plugin conflict.
Manual Backup Method: Step-by-Step Guide
Backing up your WordPress website manually is a reliable way to maintain full control over your site’s data and ensure that everything is stored securely.
Backing Up Website Files
cPanel File Manager
To back up your website files through cPanel, follow these detailed steps:
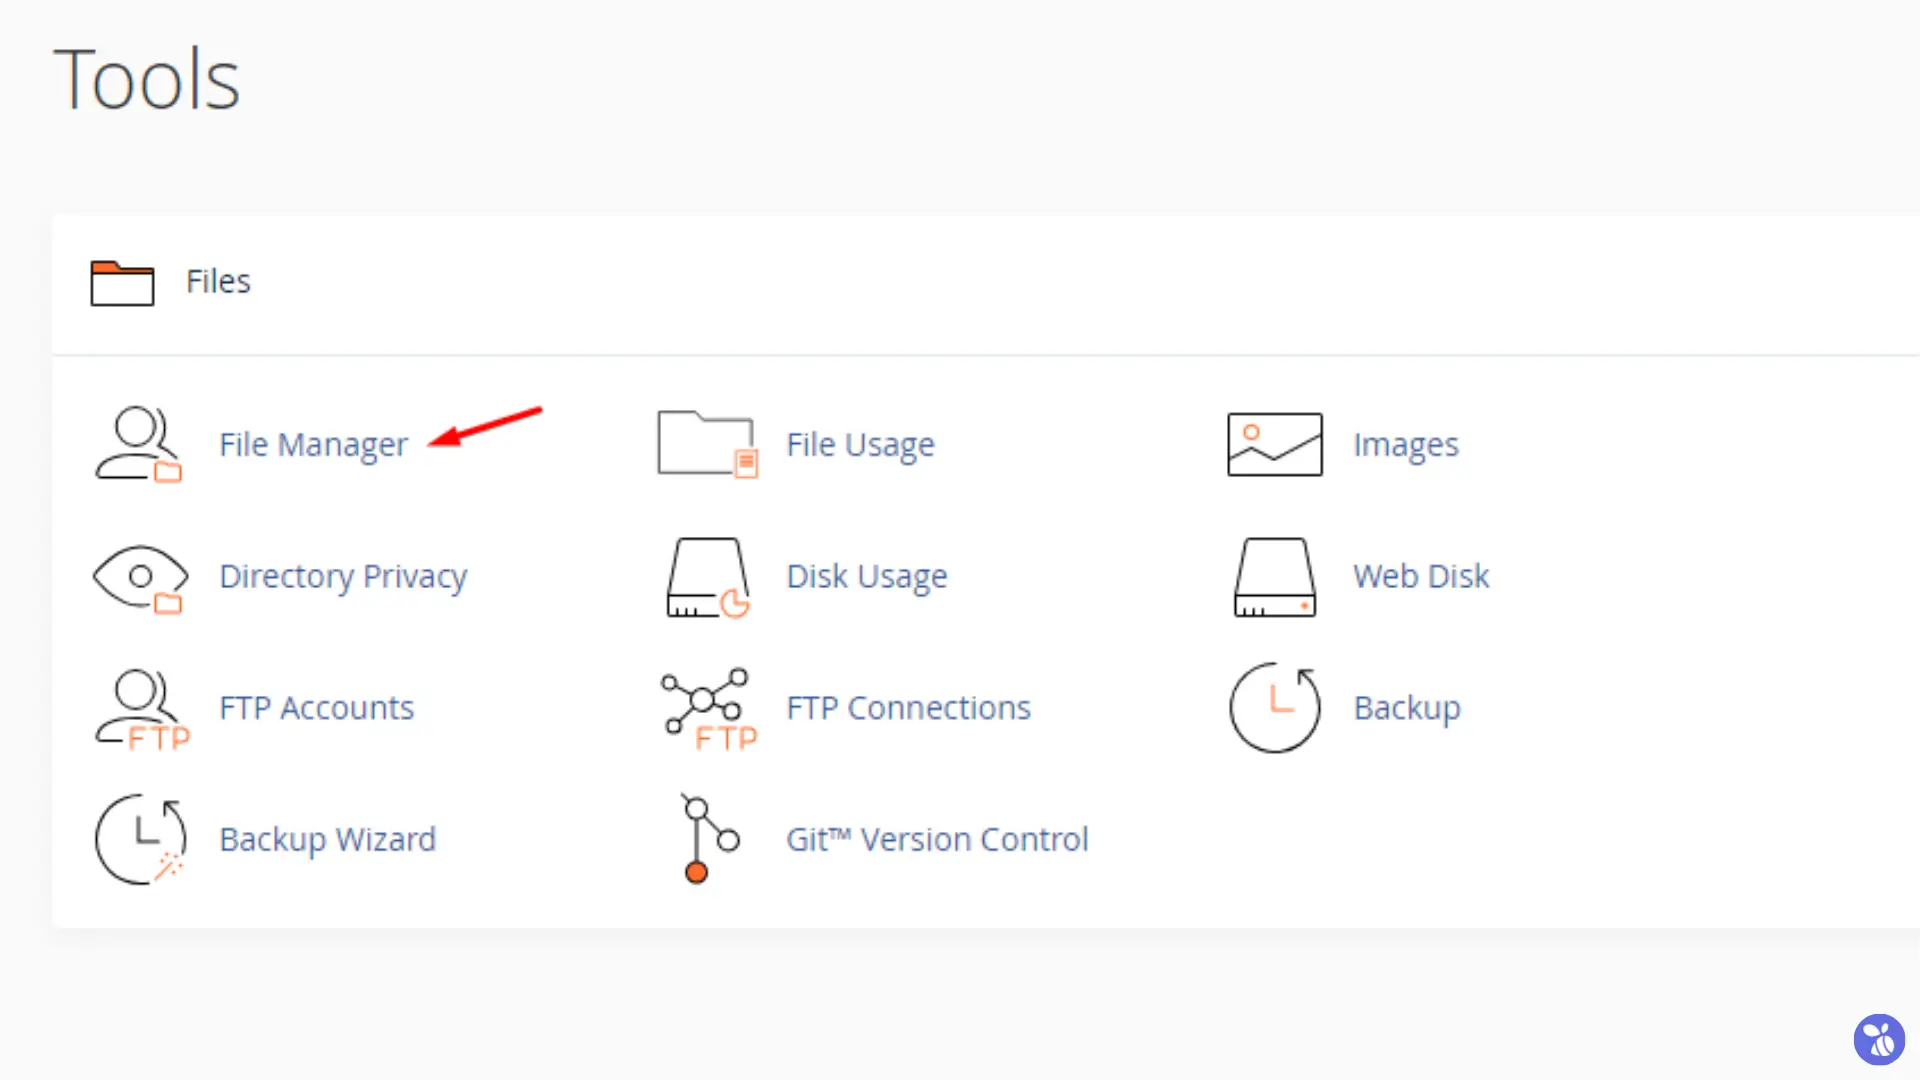
- Access your cPanel hosting account by navigating to
https://yourdomain.com:2083/. - Once in cPanel, navigate to the Files section and click on File Manager.
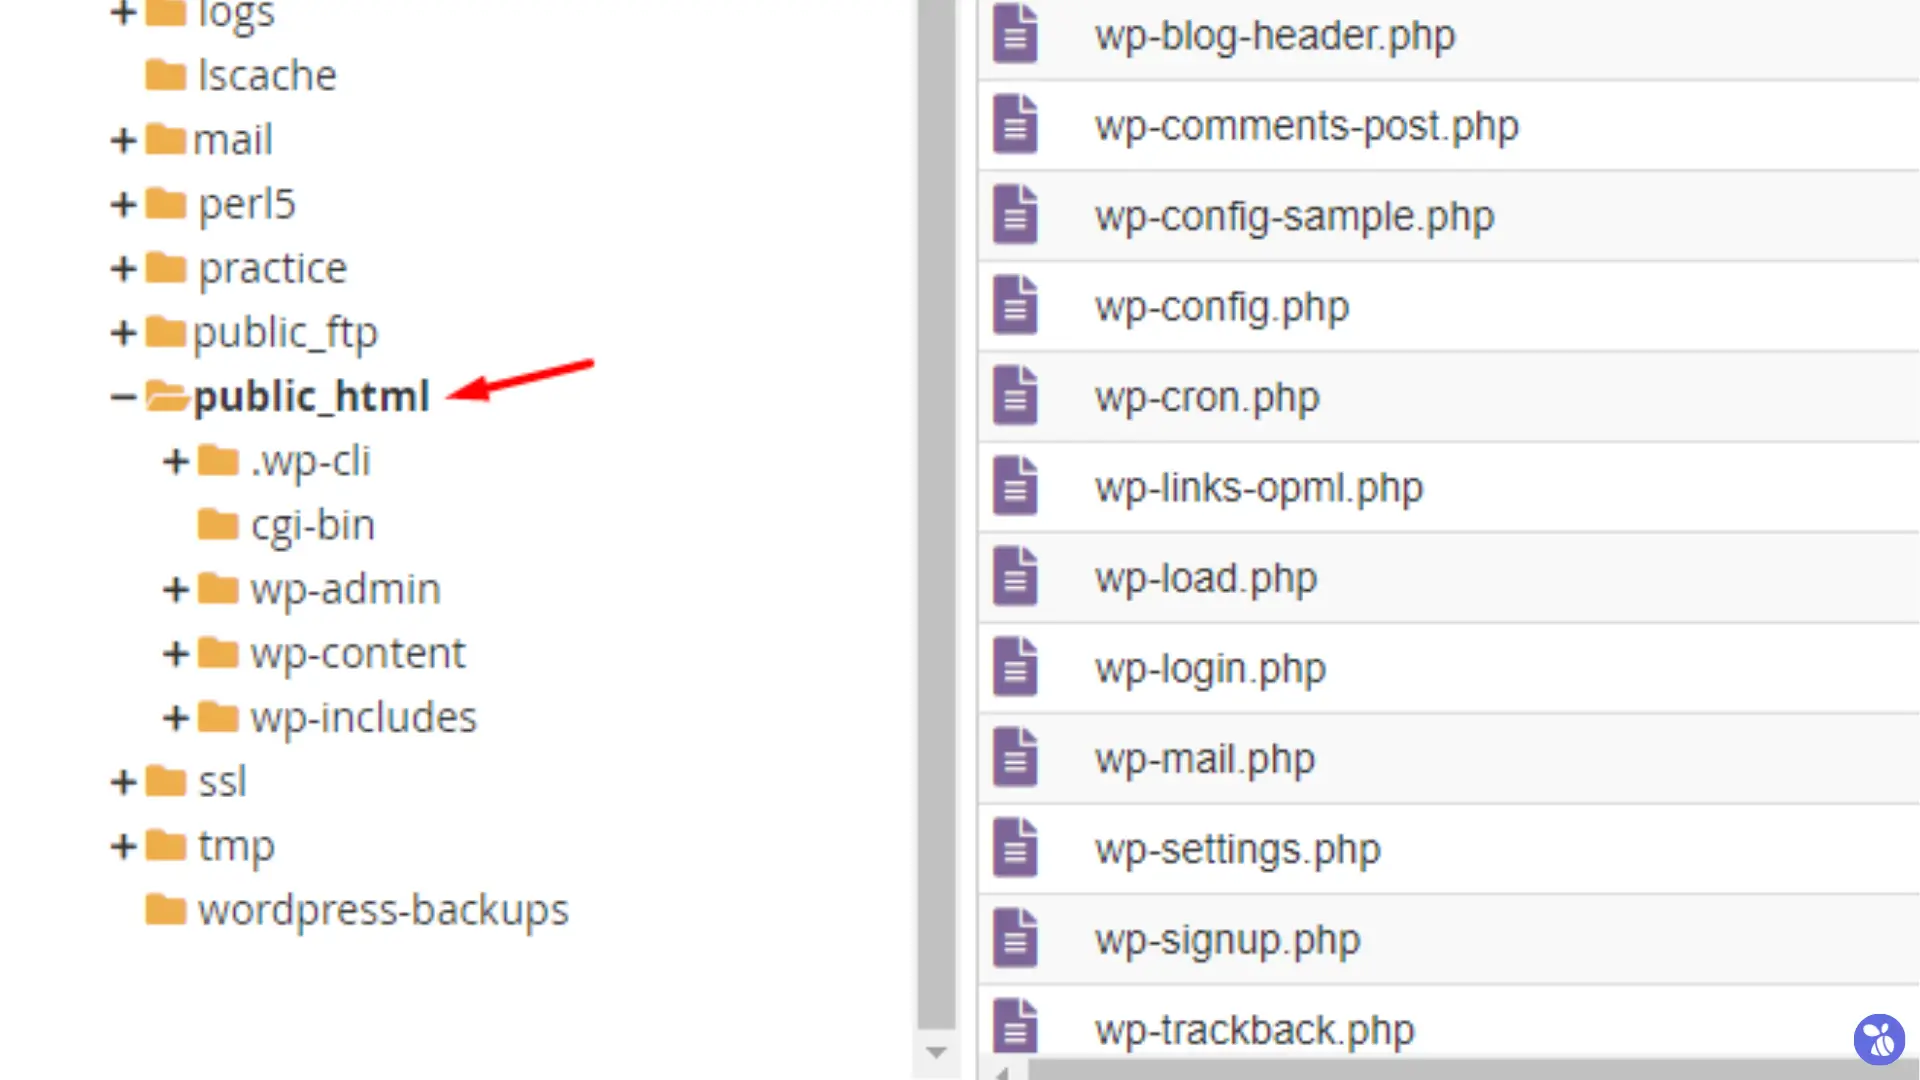
- In the File Manager, open the domain’s public_html directory, which contains all the files for your website.
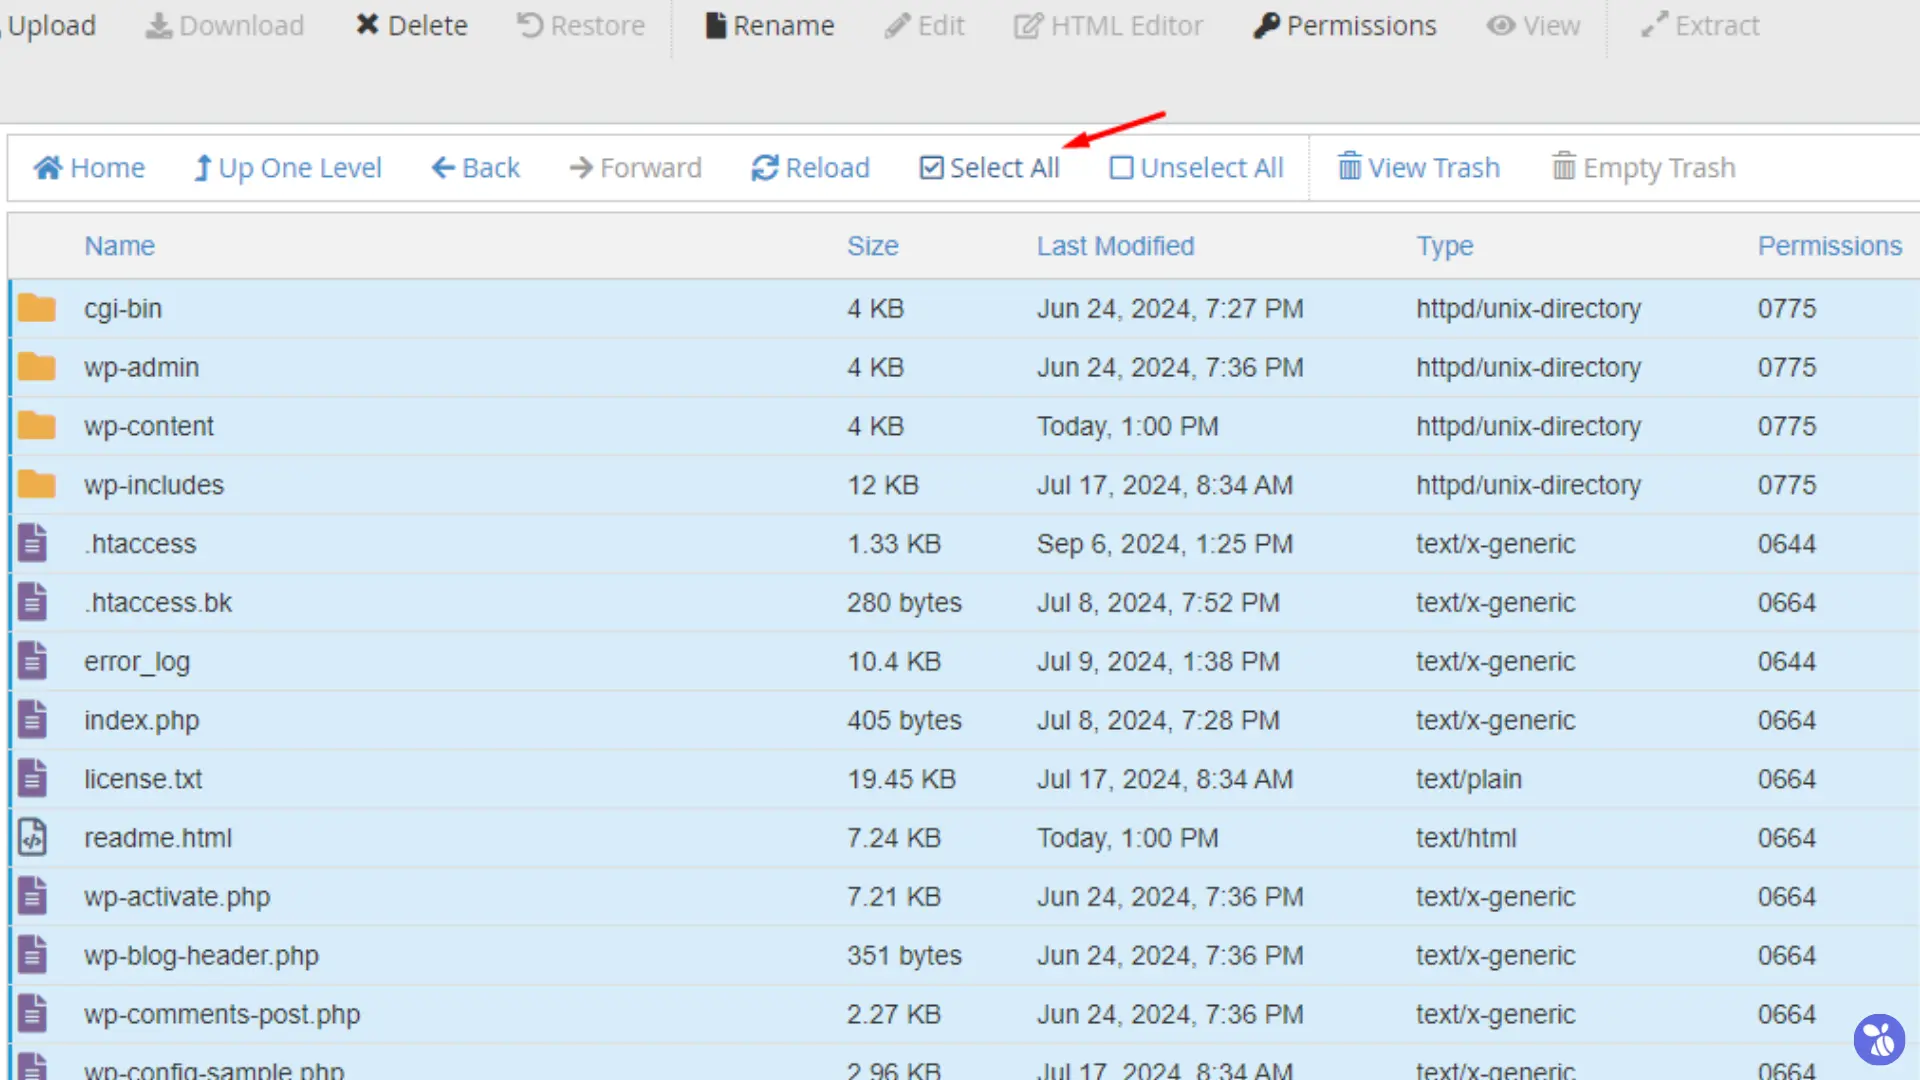
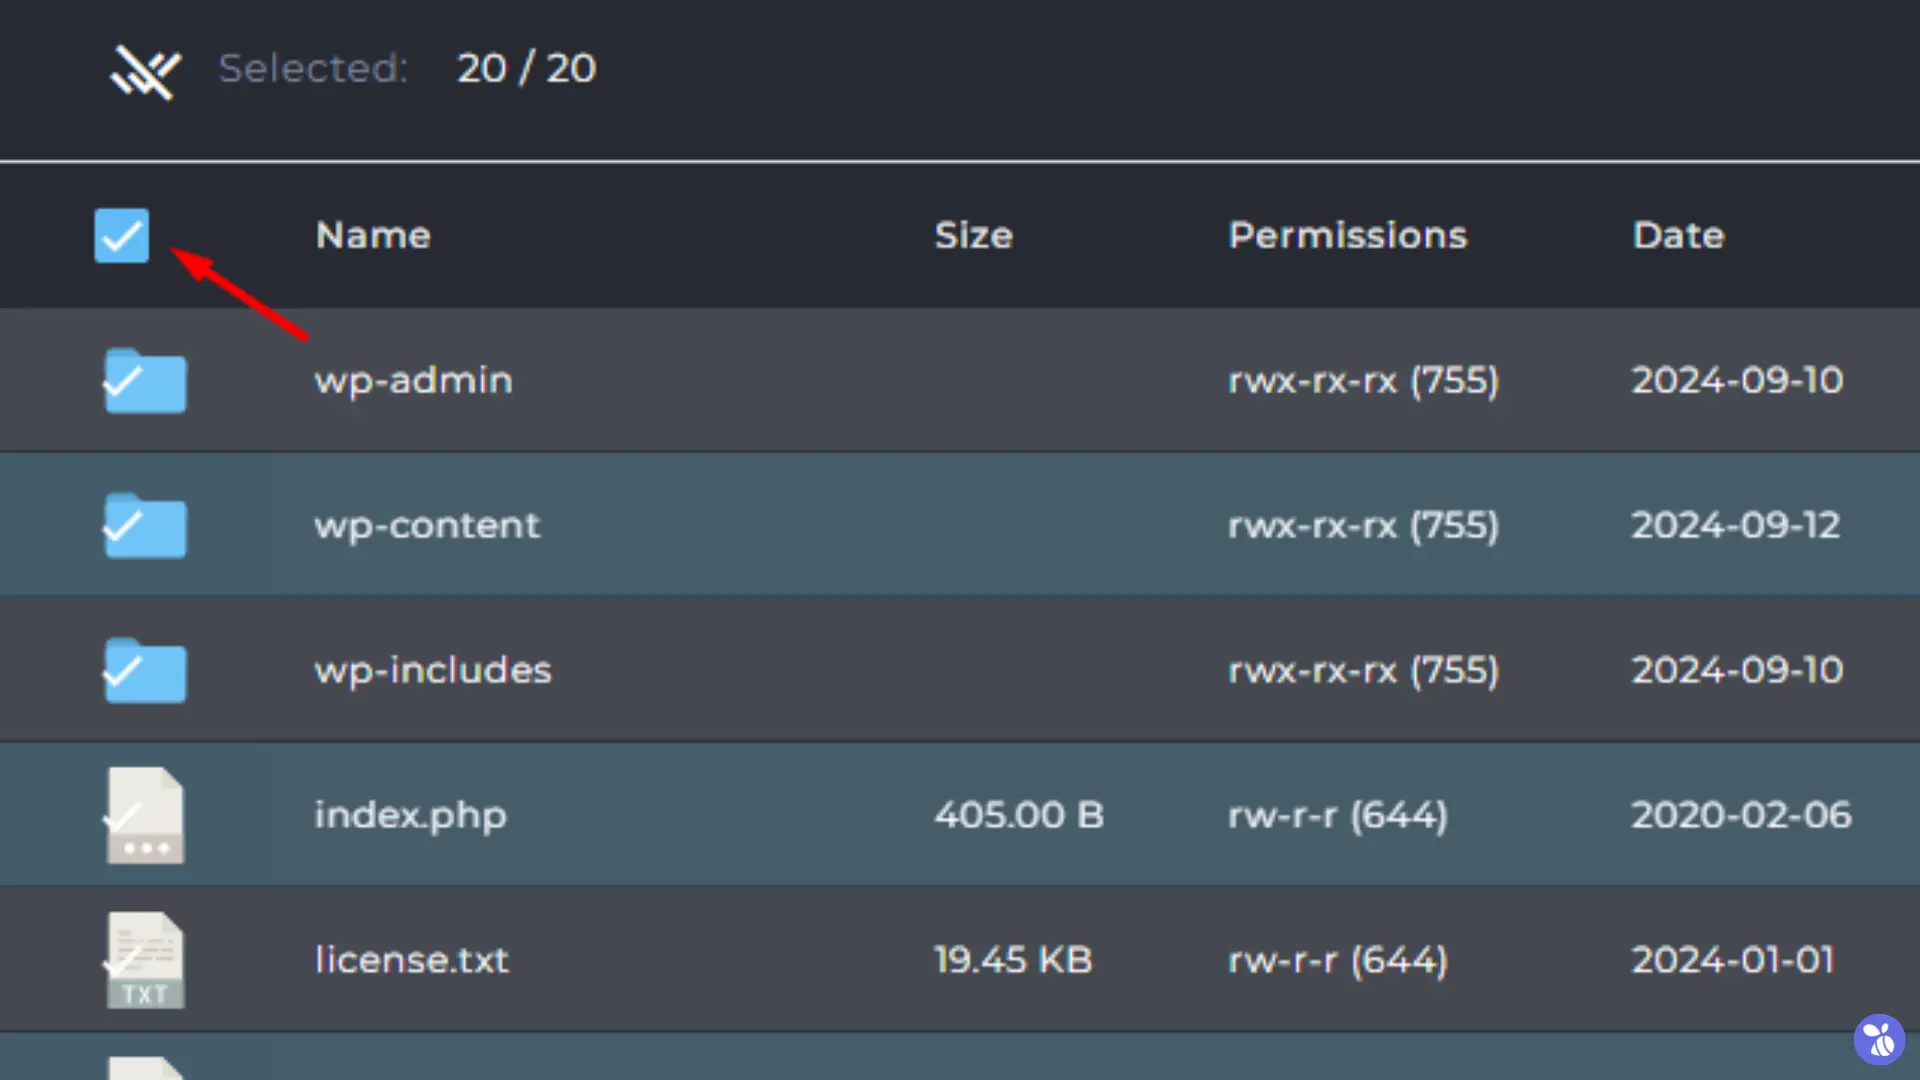
- Select all the files in the public_html folder. You can do this by clicking the Select All button at the top or manually selecting files with
Ctrl + Click (Windows)orCommand + Click (Mac).
- After selecting the files, right-click and click on Compress.
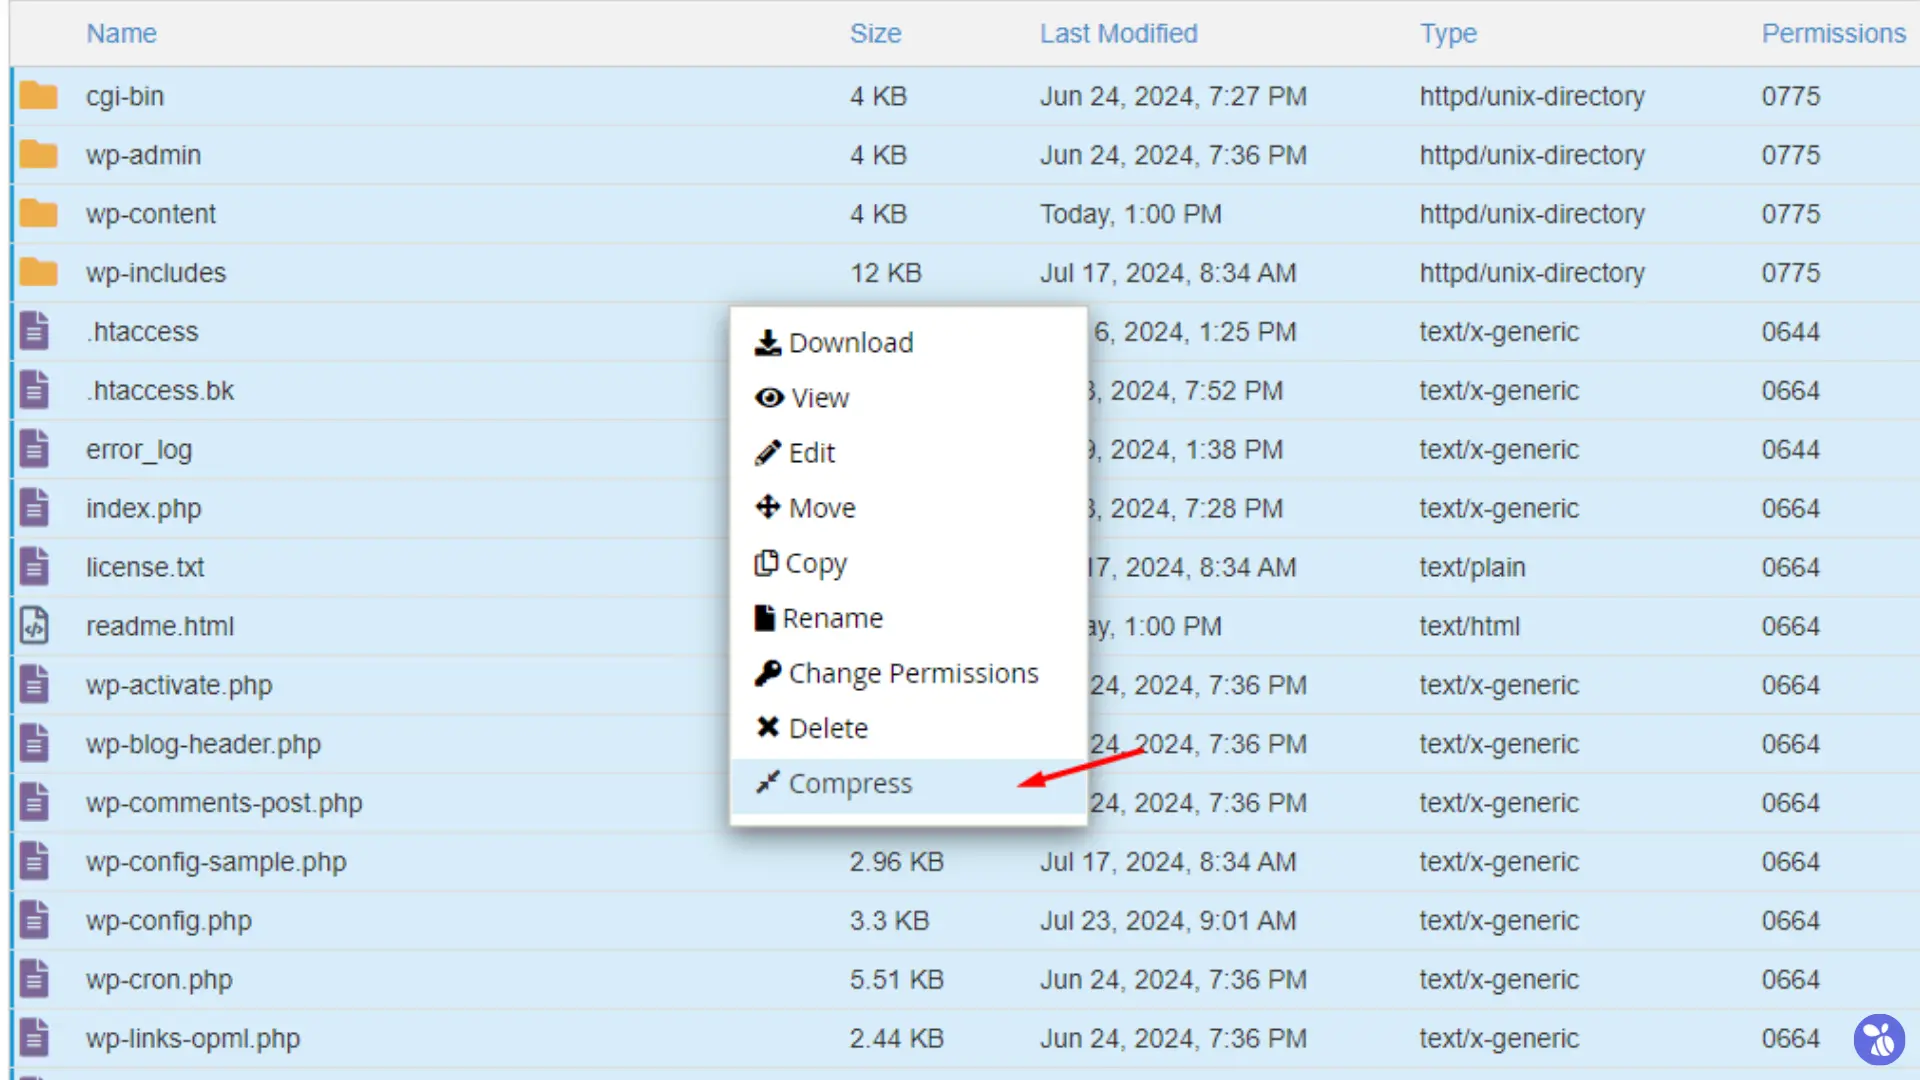
- Choose the Zip Archive option and name your compressed file
(e.g., files-backup-15-09-2024.zip). This naming convention helps you keep track of different backup versions easily.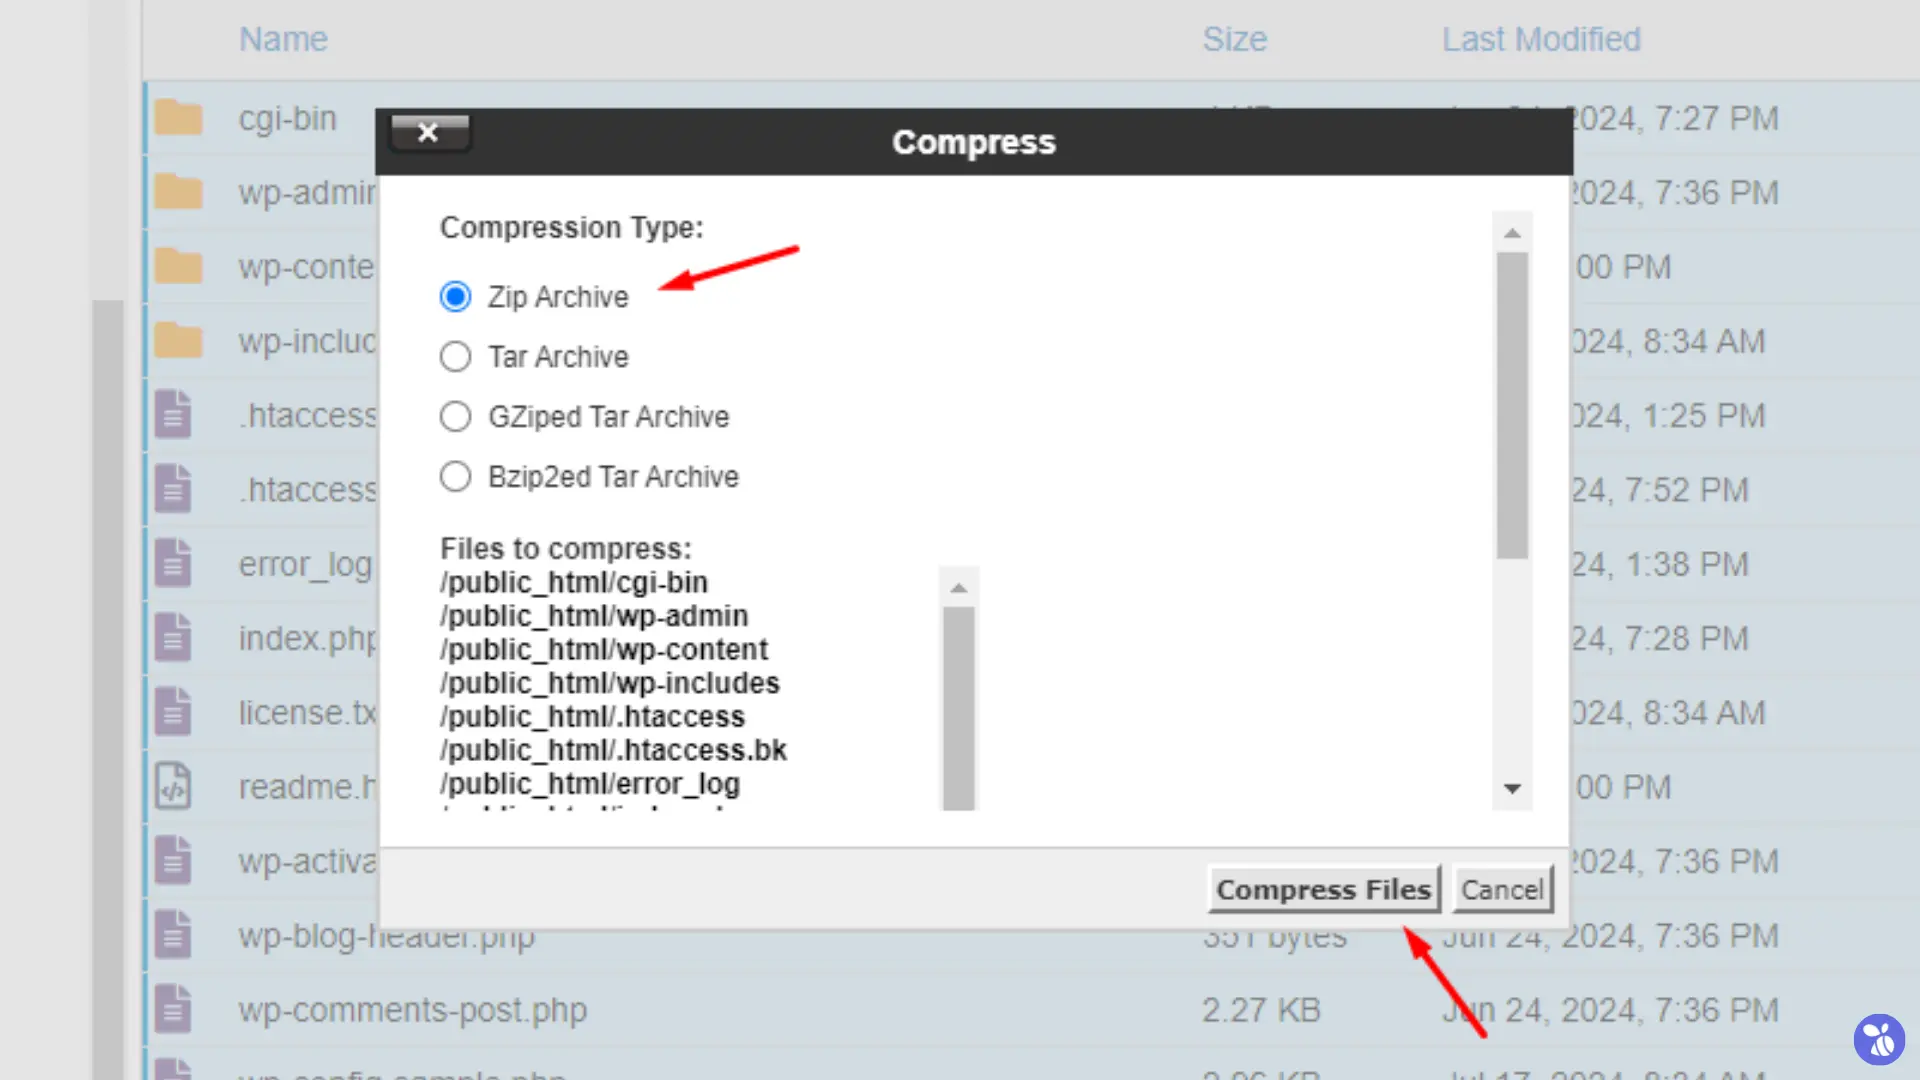
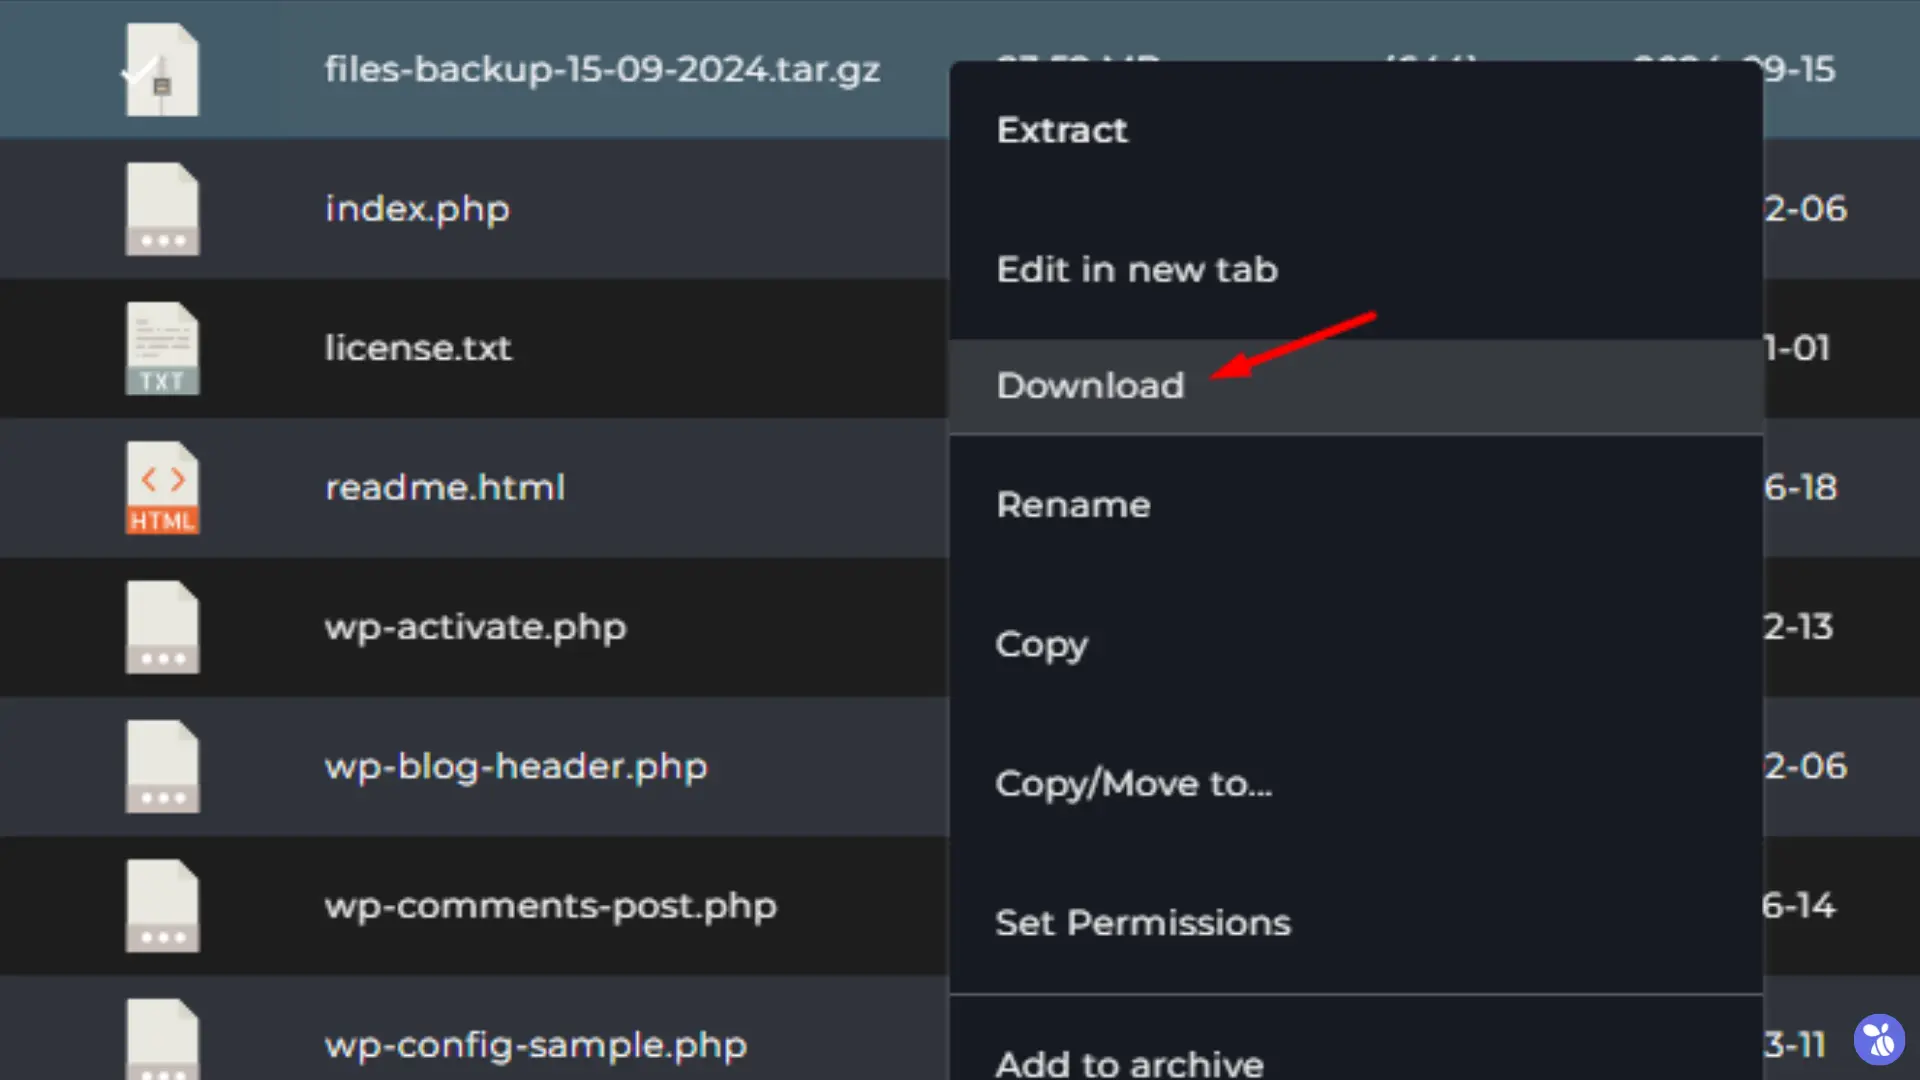
- Once the files are compressed, right-click on the compressed file and select Download to save the backup to your local machine.
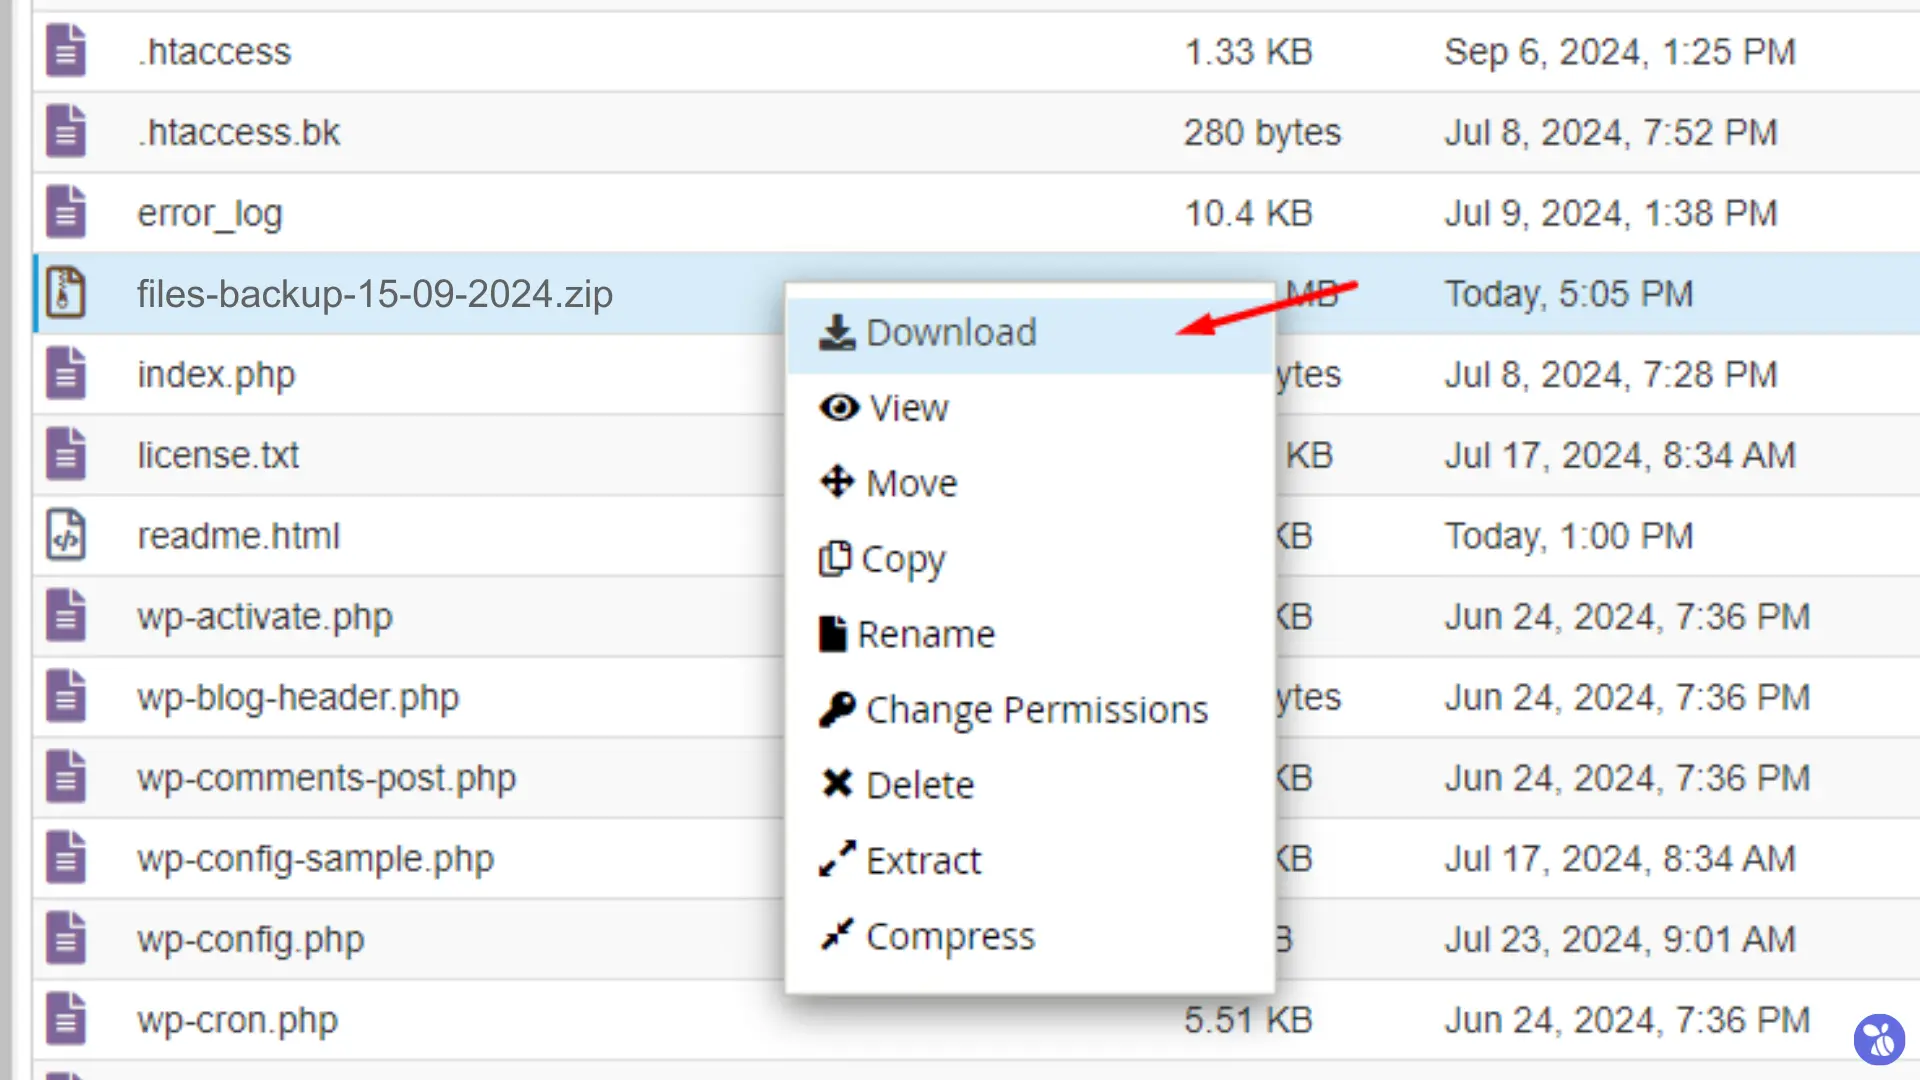
You now have a full backup of your website files stored locally.
DirectAdmin File Manager
DirectAdmin users can follow these steps to manually back up their website files:
- Access the DirectAdmin hosting control panel by navigating to
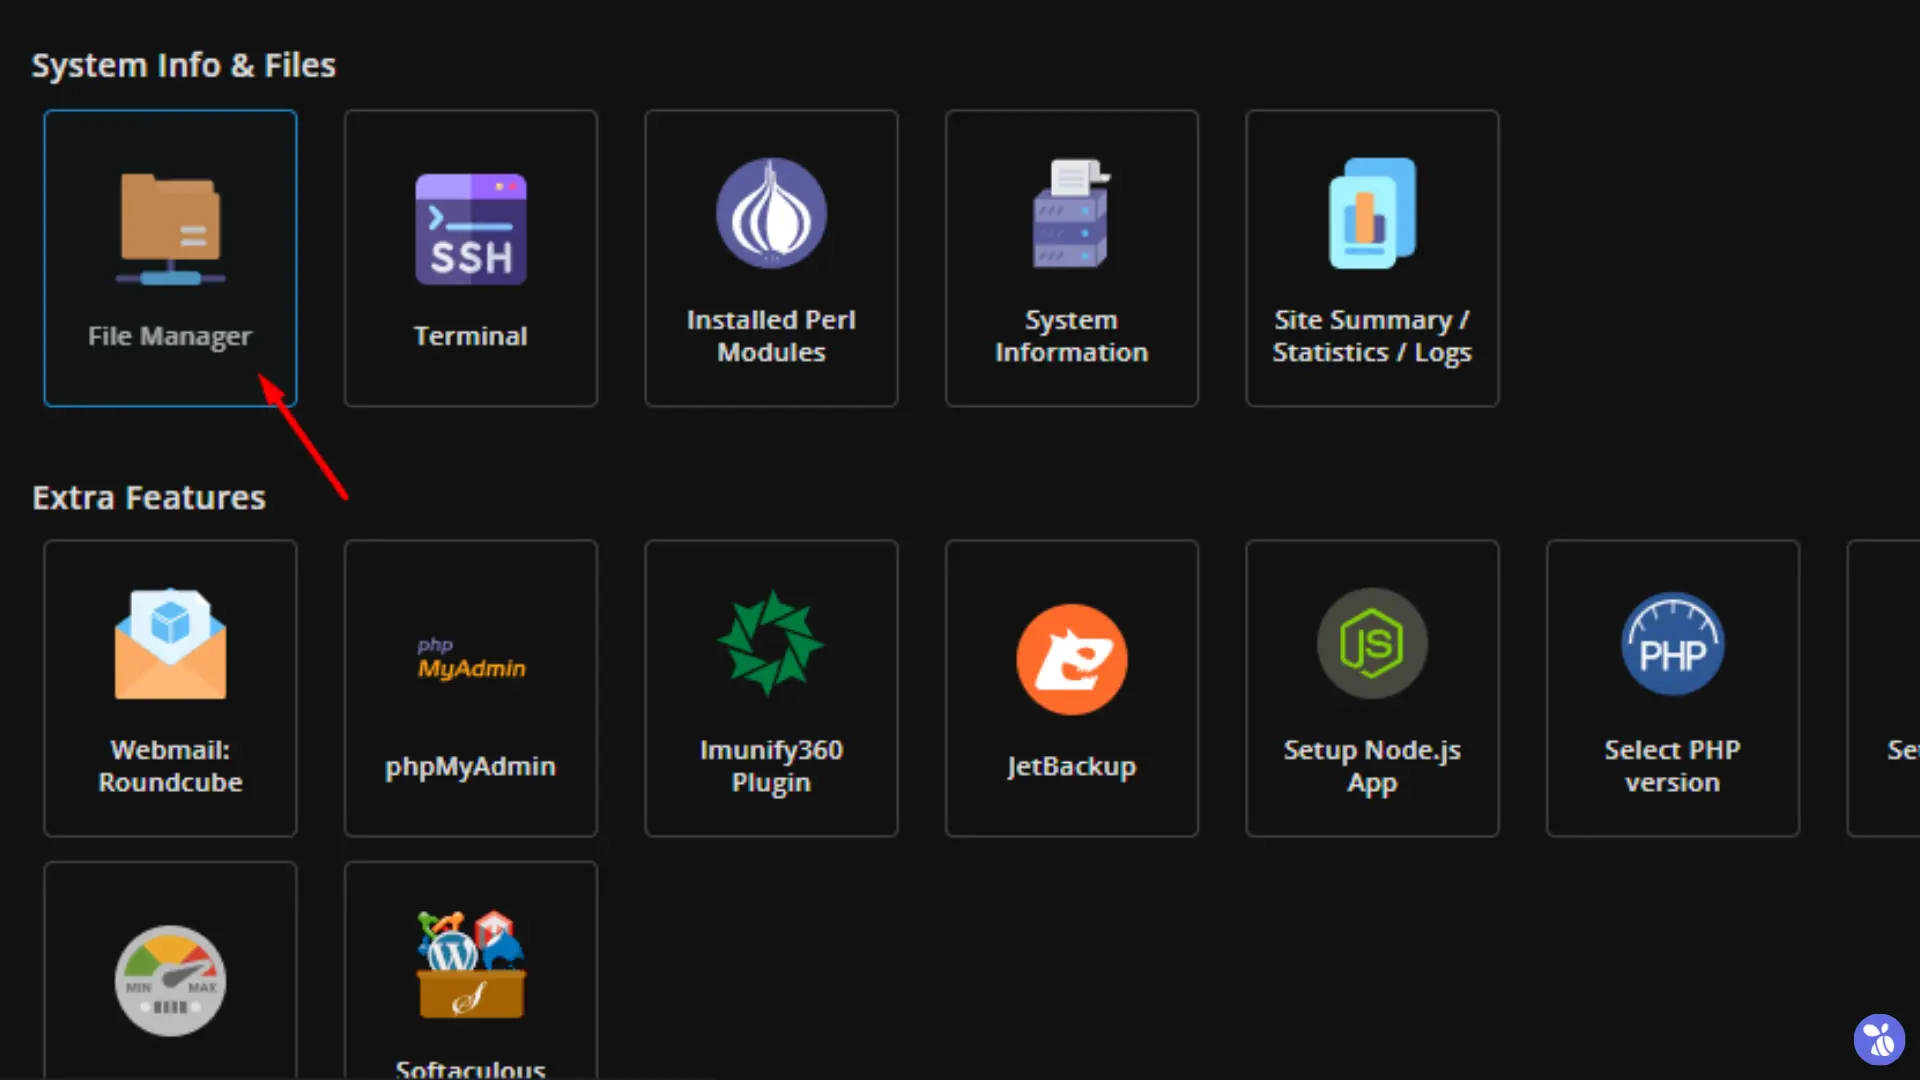
https://yourdomain.com:2222. - Once logged in, locate the System Info & Files section, and click on File Manager.
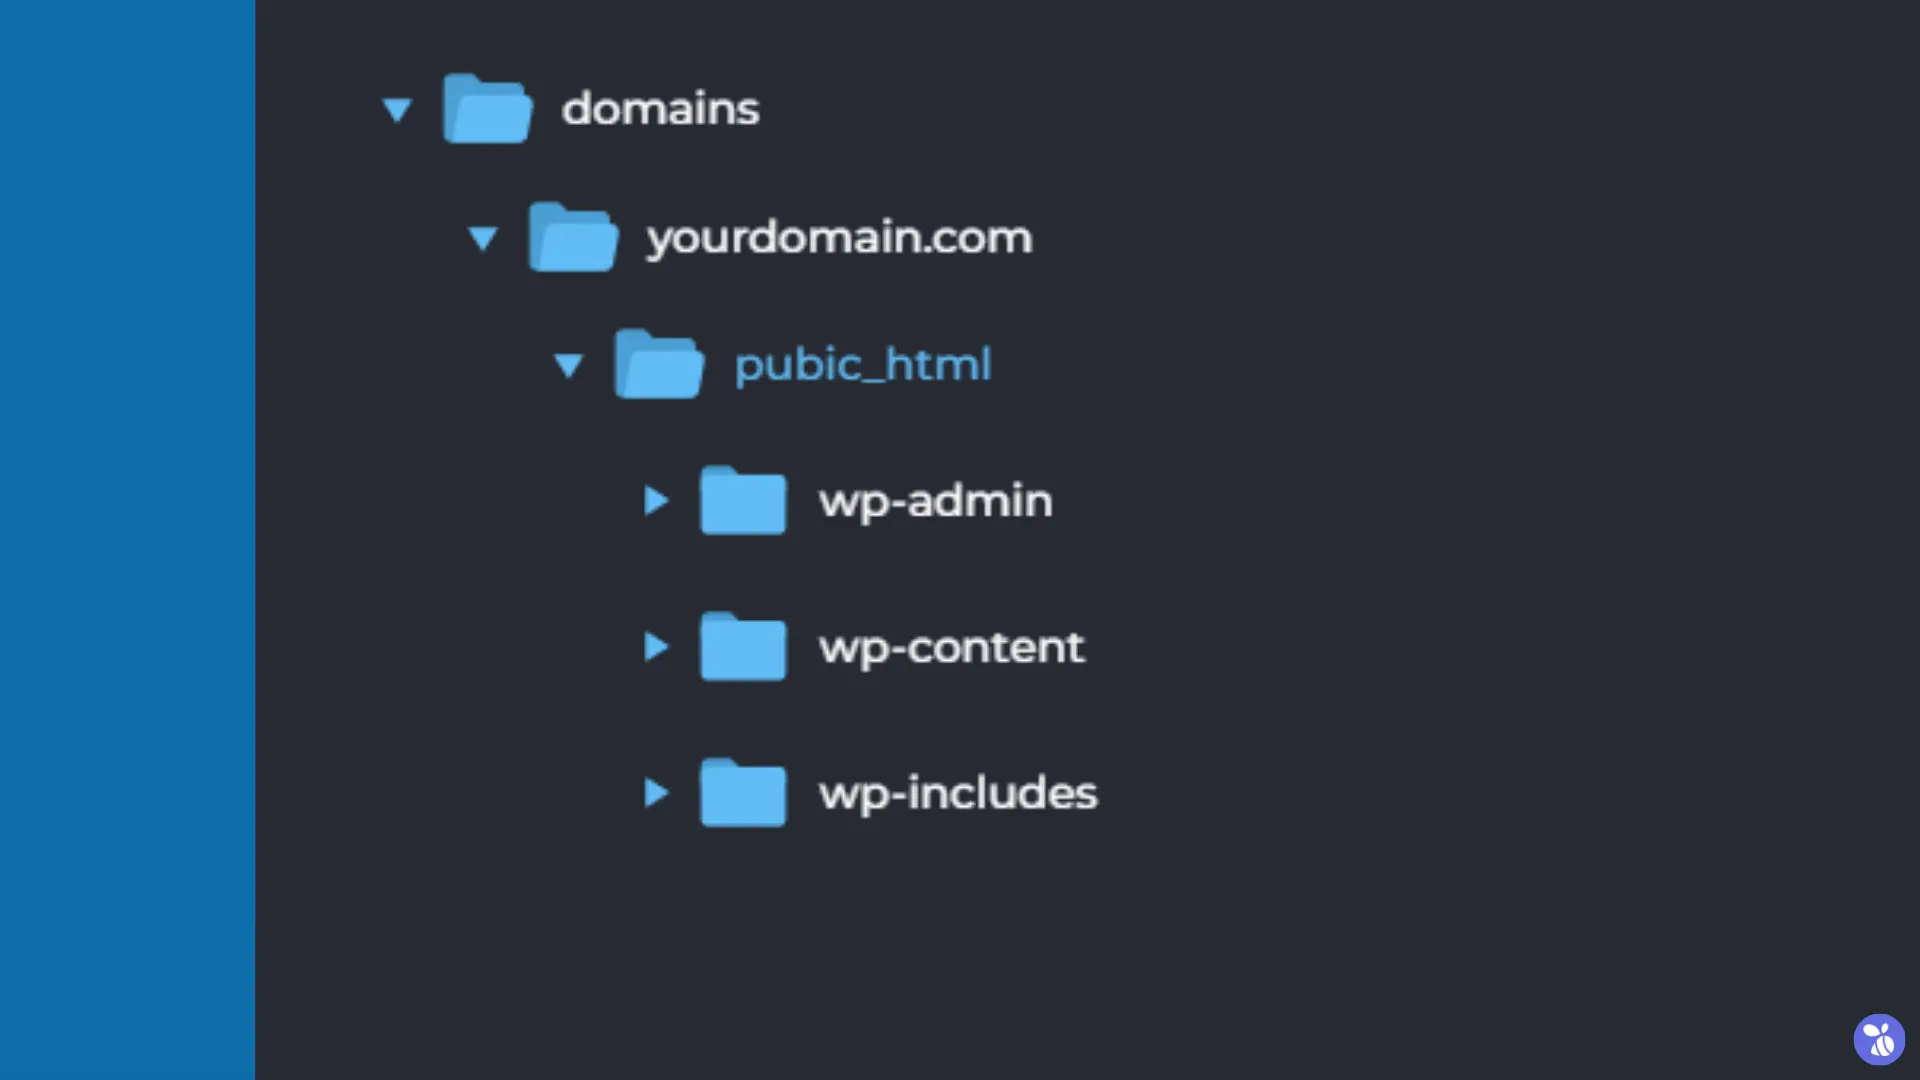
- Navigate to the domains folder, then open the folder corresponding to your domain (e.g.,
yourdomain.com). Inside this, find the public_html folder containing your website files.
- Select the necessary files in the public_html directory that you want to back up.
- Right-click and click on Add To Archive from the options menu and choose to compress the files.

- After the archive is created, right-click on it and choose Download to save the backup to your computer.
FTP Client (FileZilla)
An FTP (File Transfer Protocol) client is an application software that allows you to connect directly to your website’s server to manage files. It provides a user-friendly interface to upload, download, and modify files between your local computer and the server where your website is hosted.
Using an FTP client is particularly beneficial when dealing with large backup files that may exceed the size limits of hosting control panels like cPanel or DirectAdmin. FTP clients allow for unlimited file sizes and provide a stable connection for uploading, along with features like pausing and resuming transfers.
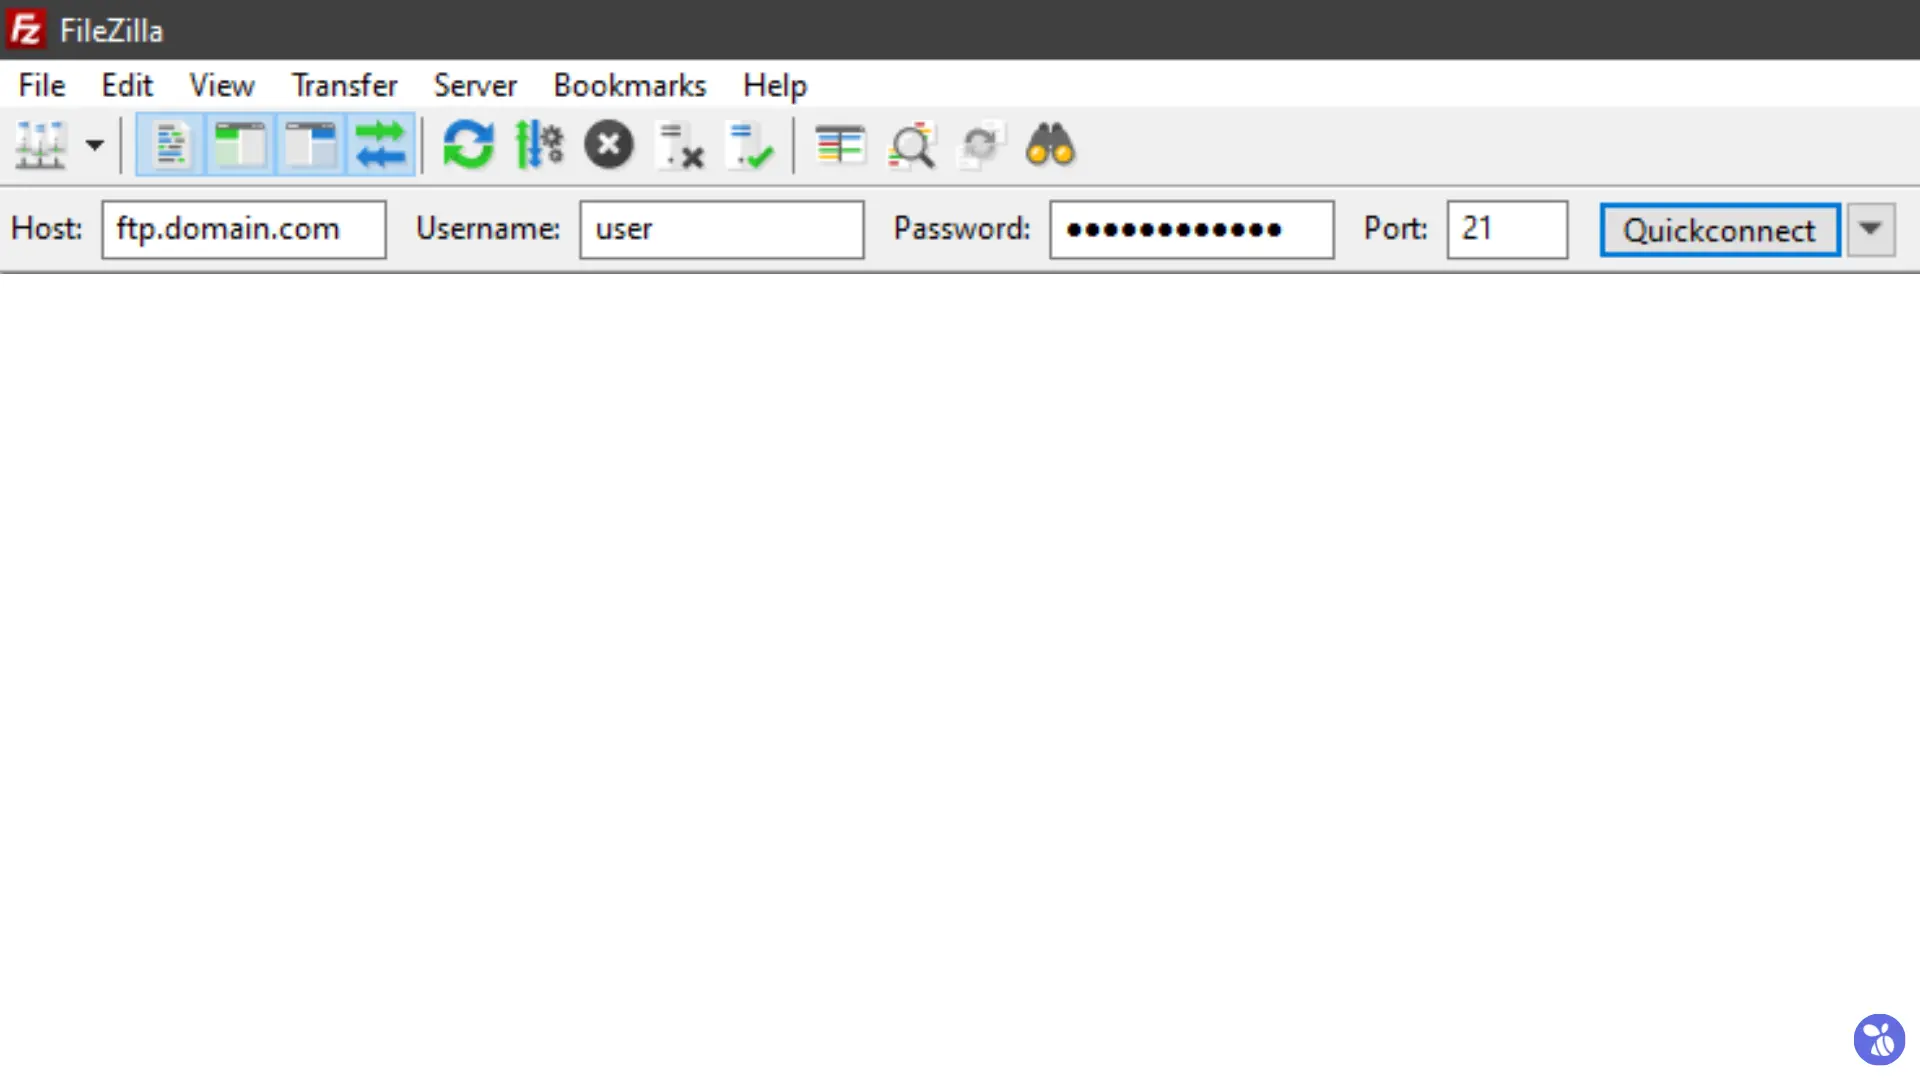
In this guide, we’re using FileZilla, follow these steps to back up your files using it:
- Open FileZilla and connect to your server by entering your FTP credentials (host, username, password, and port).
- Hostname: ftp.yourdomain.com
- Use your hosting account credentials in the username and password fields.
- Port: 21
- Once connected, navigate to the public_html directory on the server, which contains all your website files.
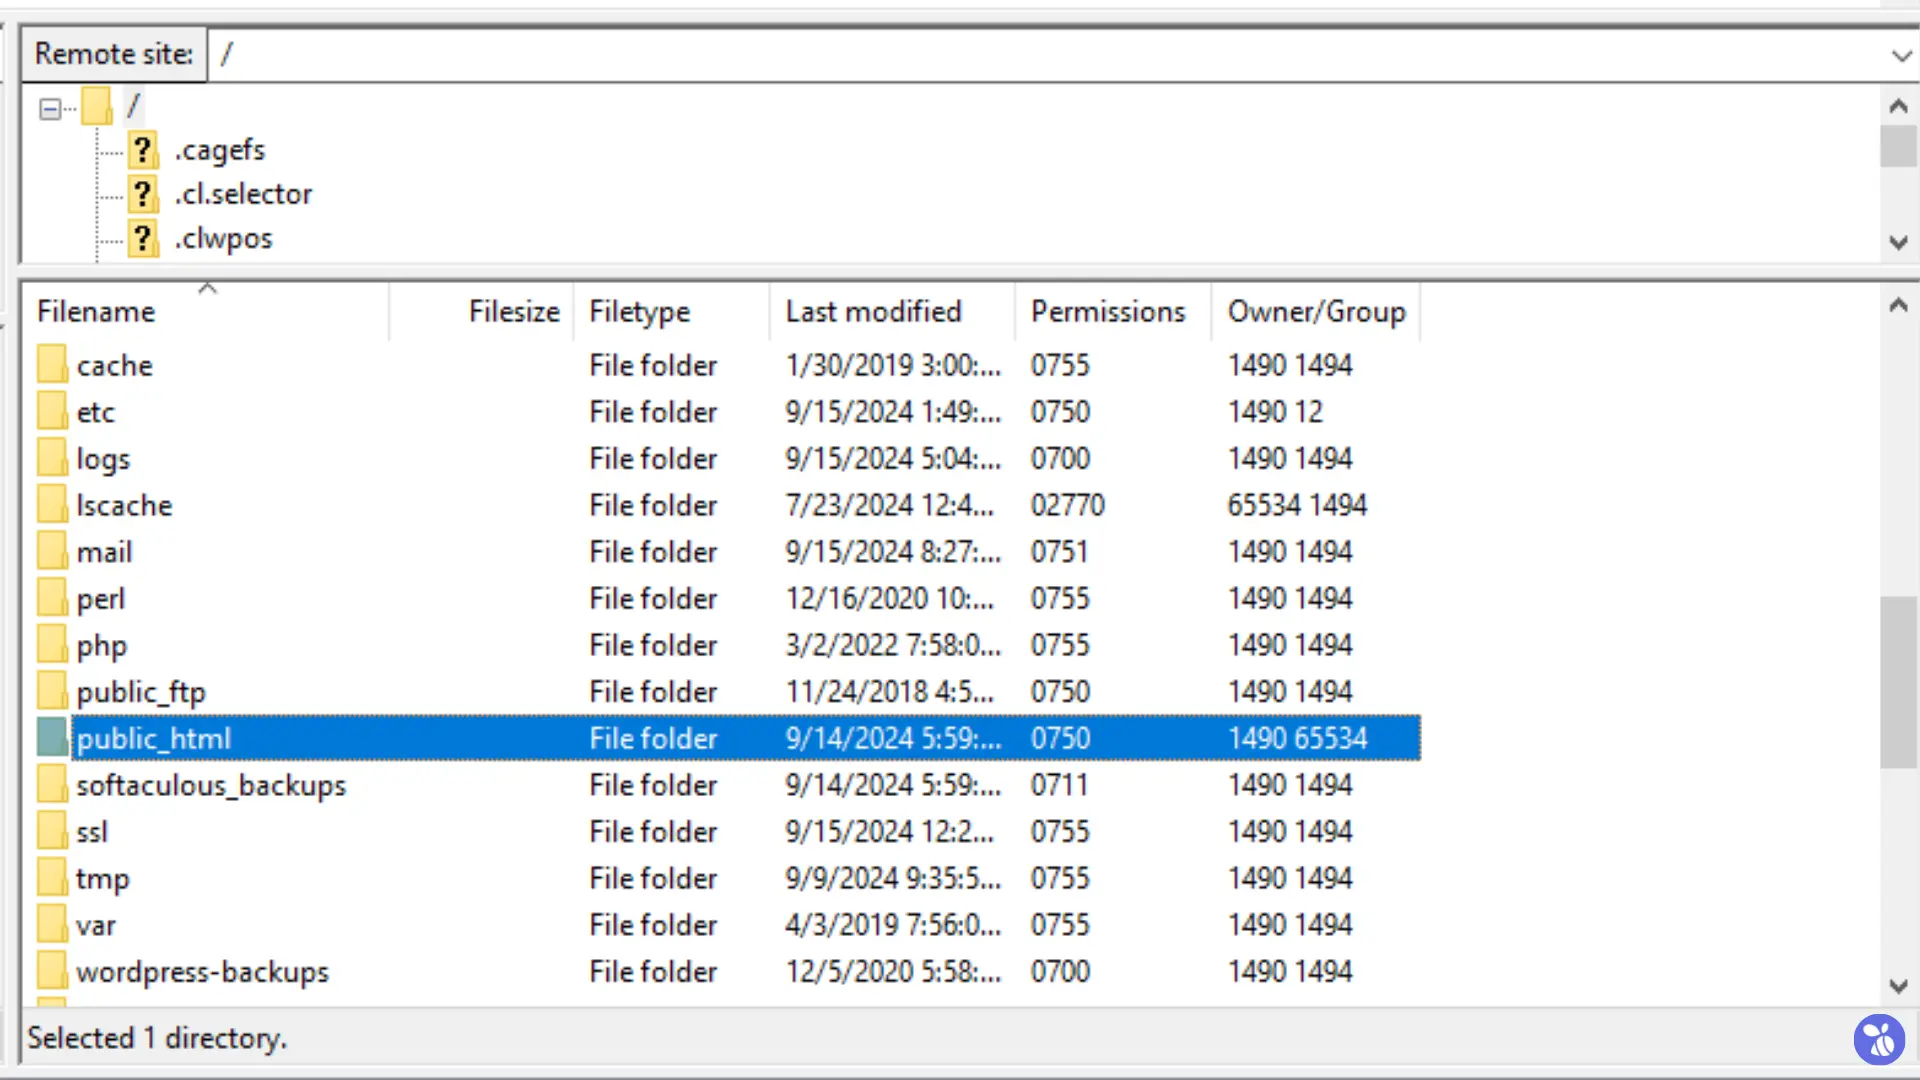
- Select the files you want to back up, then right-click and choose Download. This will copy the files to a folder on your local machine.
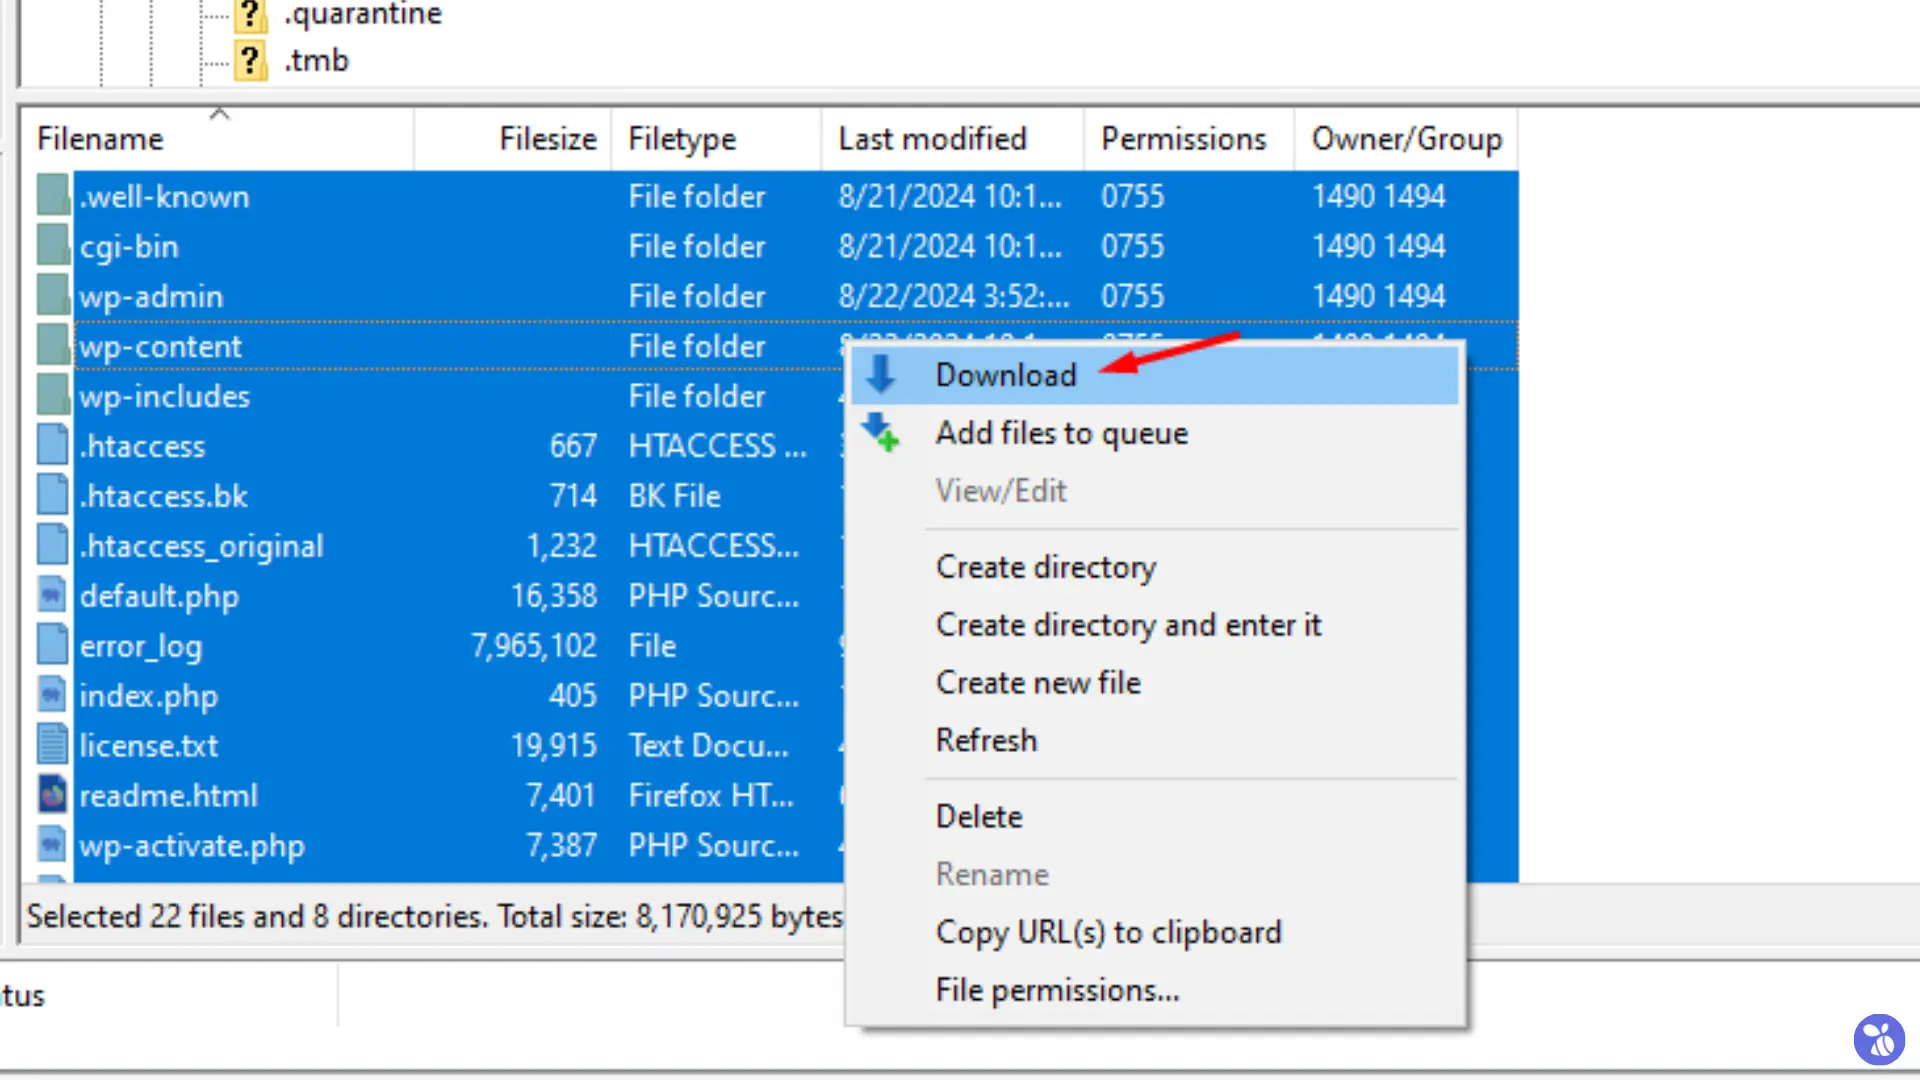
- Once the download is complete, verify that all the necessary files have been transferred to your local machine.
- Afterwards, zip the downloaded files locally.
Backup Database
The next step in your manual backup process is to back up your website’s database, which contains all your site’s content and settings.
Identify Your Website’s Associated Database
To back up your WordPress database, you first need to identify which database is associated with your website. Here’s how you can find that information:
- Within the File Manager interface, locate and open the
wp-config.phpfile in your domain’s document root, i.e. public_html directory. - Scroll down through the
wp-config.phpfile until you find the section that defines the database settings. Look for the line that starts withdefine( 'DB_NAME', 'your_database_name' );.
This line specifies the name of the database associated with your WordPress site. Note this database name, as you’ll need it for the backup process.
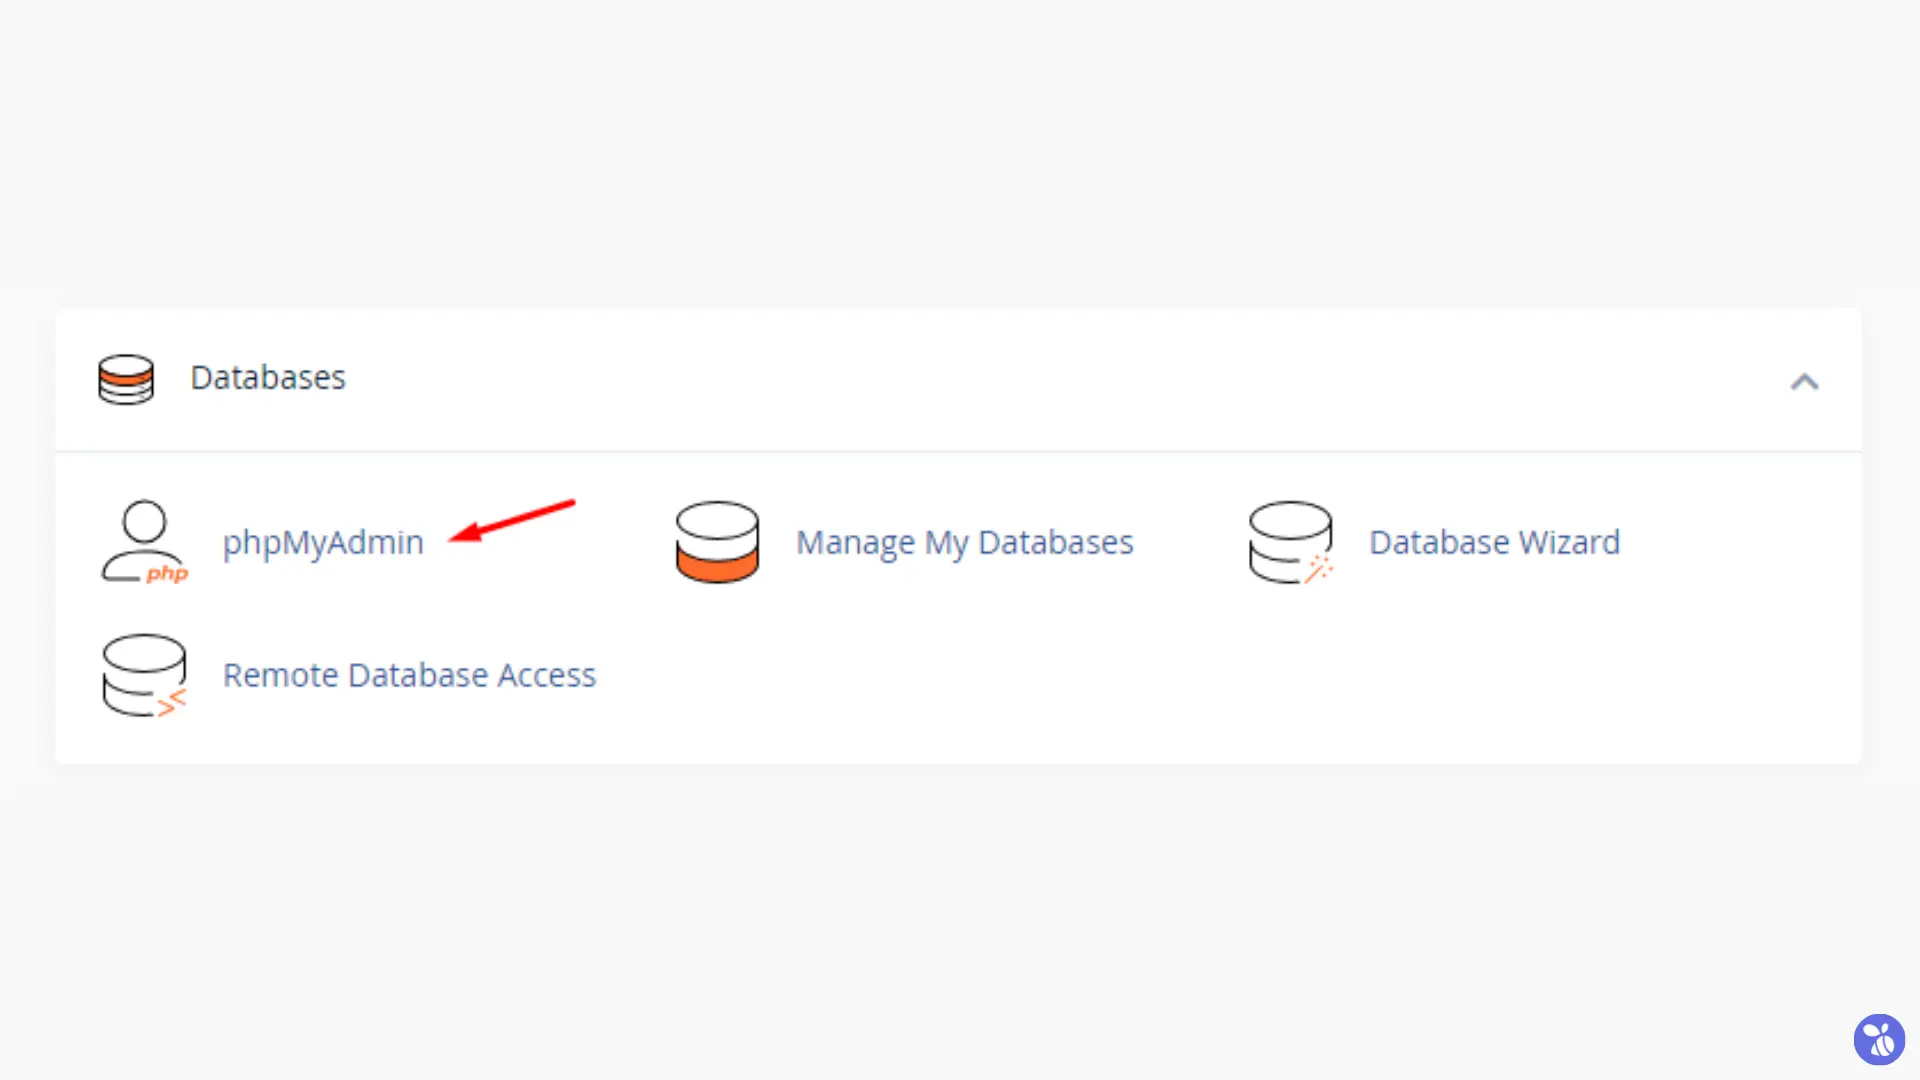
- Return to your hosting control panel and open phpMyAdmin.
- In cPanel, scroll down to the Databases section and click on phpMyAdmin.
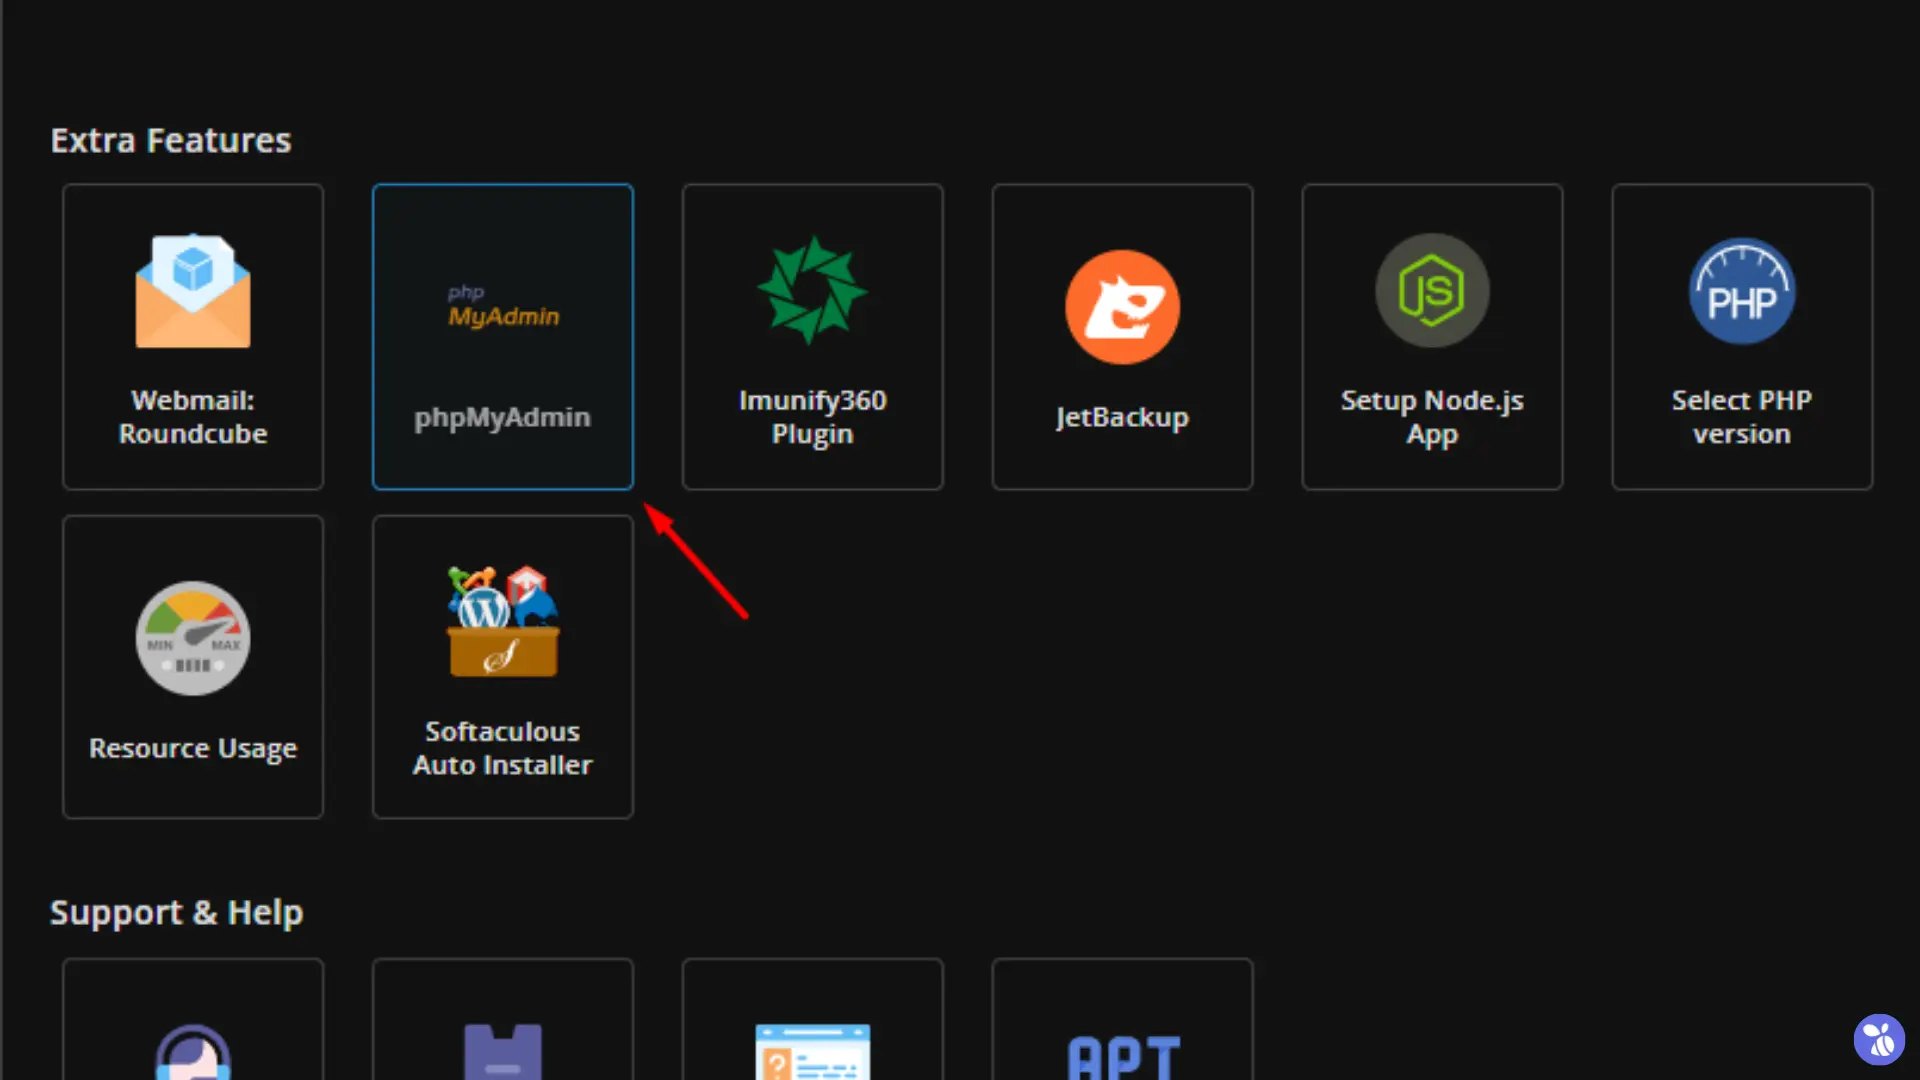
- In DirectAdmin, scroll down to the Extra Features section and click on phpMyAdmin.
- Once inside phpMyAdmin, find and select the database name you noted from the
wp-config.phpfile from the list on the left-hand panel.

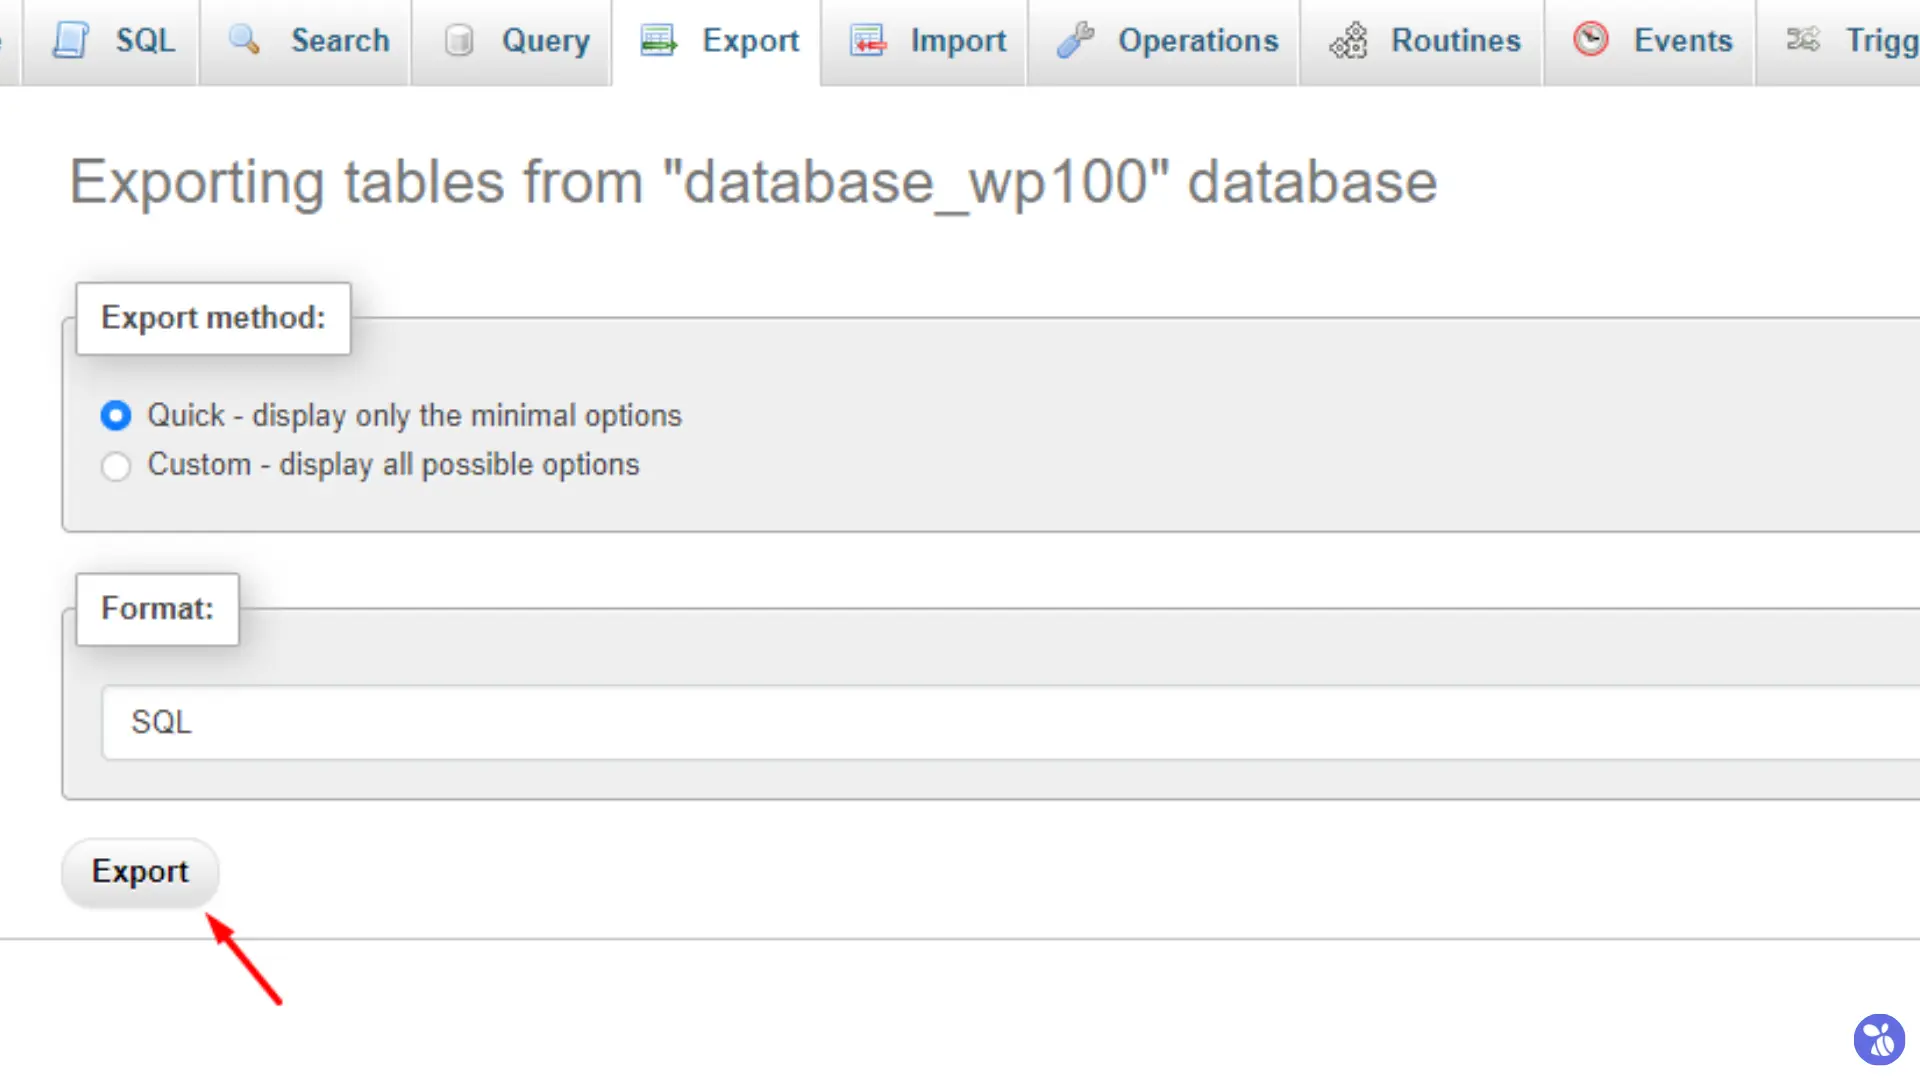
- At the top of the phpMyAdmin interface, click the Export tab.
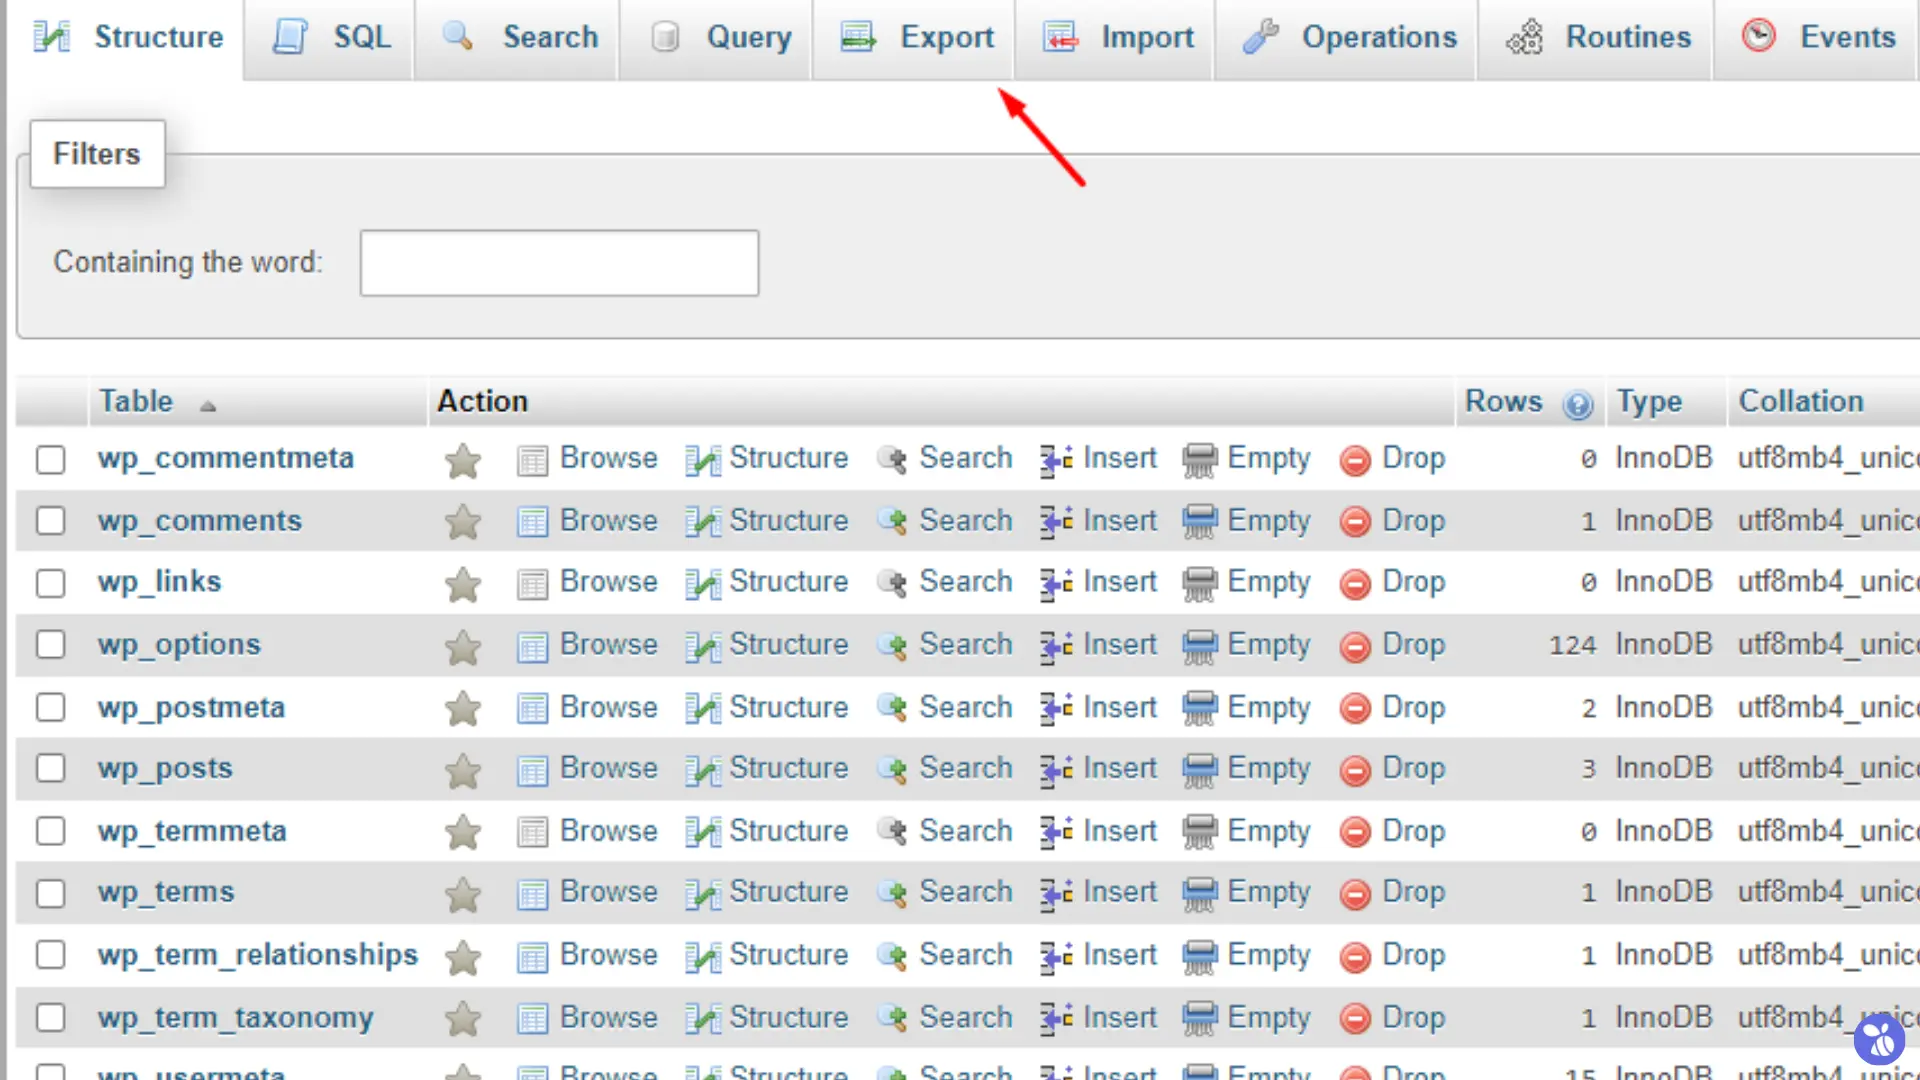
- Click the Export button and your database will be exported as an SQL file. Save this file to your local machine for safekeeping.
Your database backup is now stored and ready for future use.
Backup Restoration
In case of a website failure or data loss, you’ll need to restore your backups to bring your site back online. Here’s how to restore both your files and database.
Restoring Website Files
cPanel File Manager
- Access cPanel and go to File Manager under the Files section.
- Navigate to your domain’s public_html folder, and select and delete the domain’s associated existing files to avoid conflicts with the restored backup.
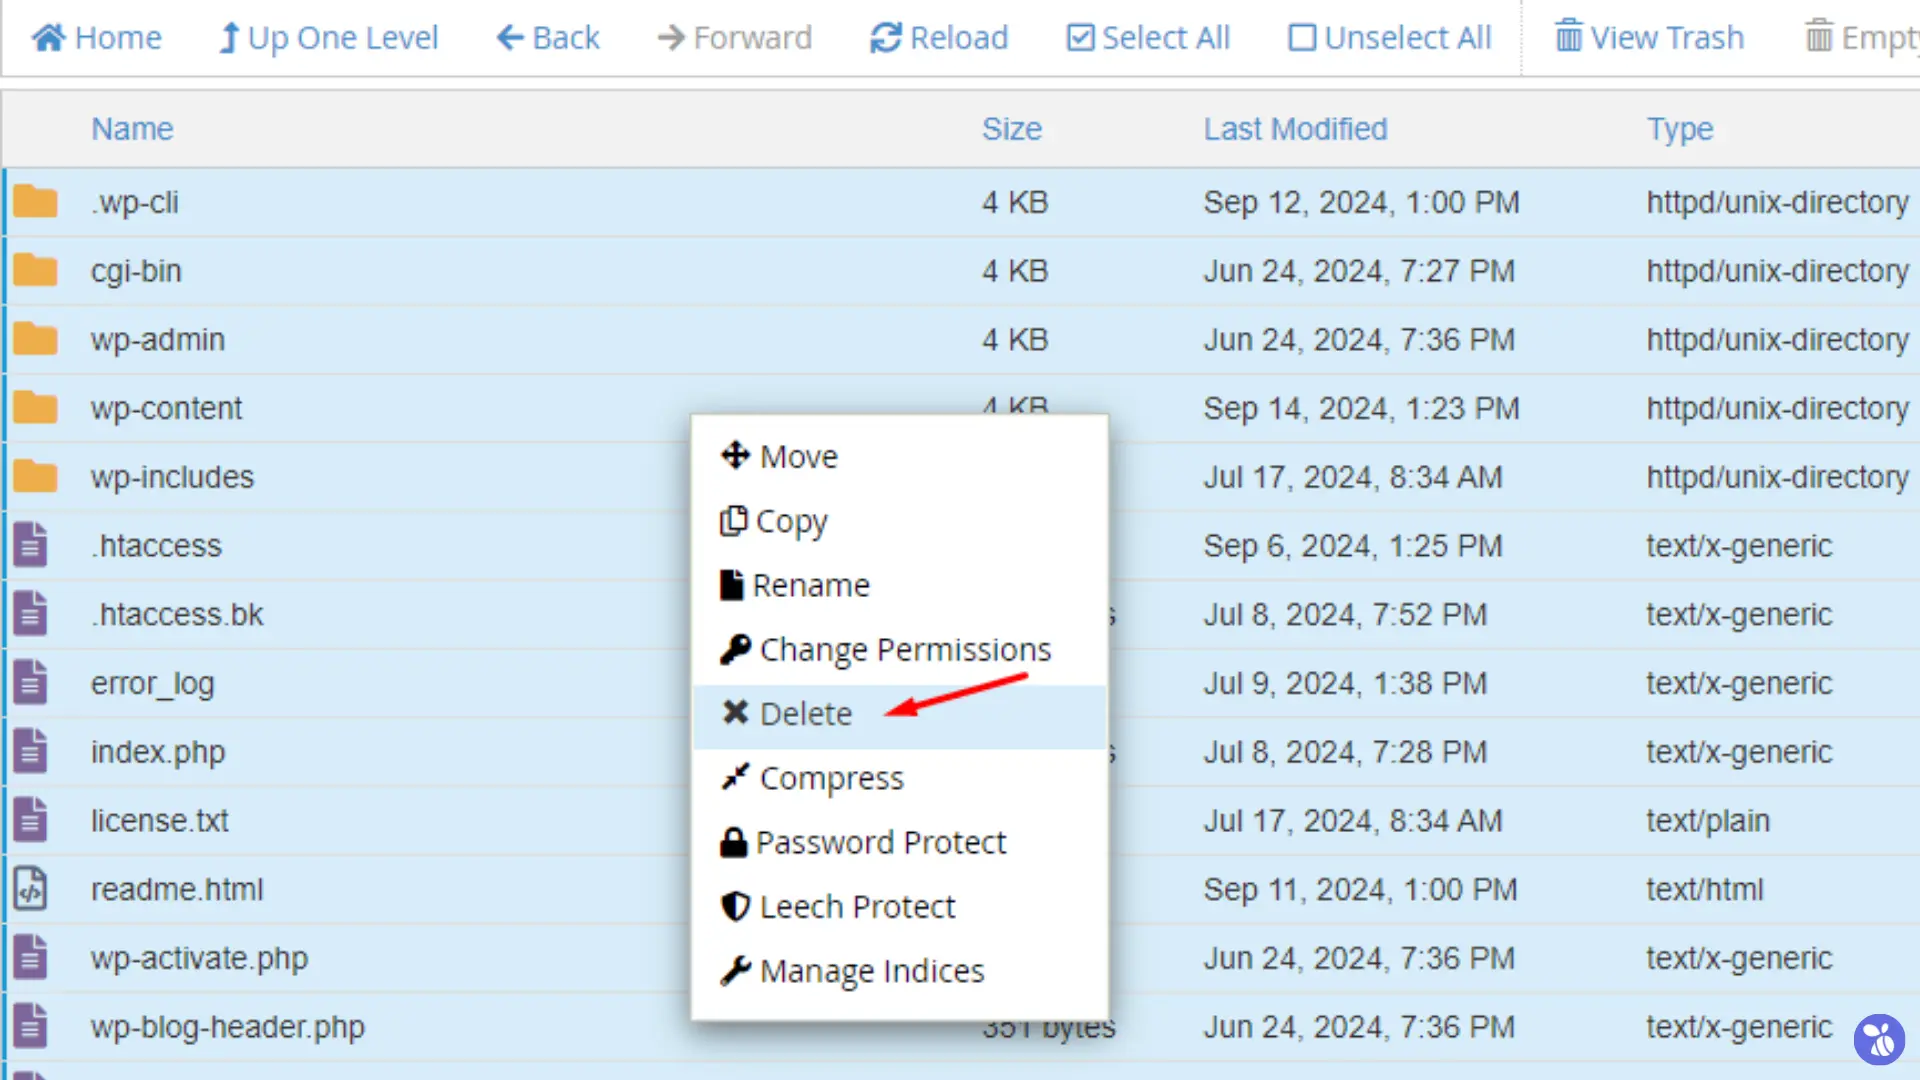
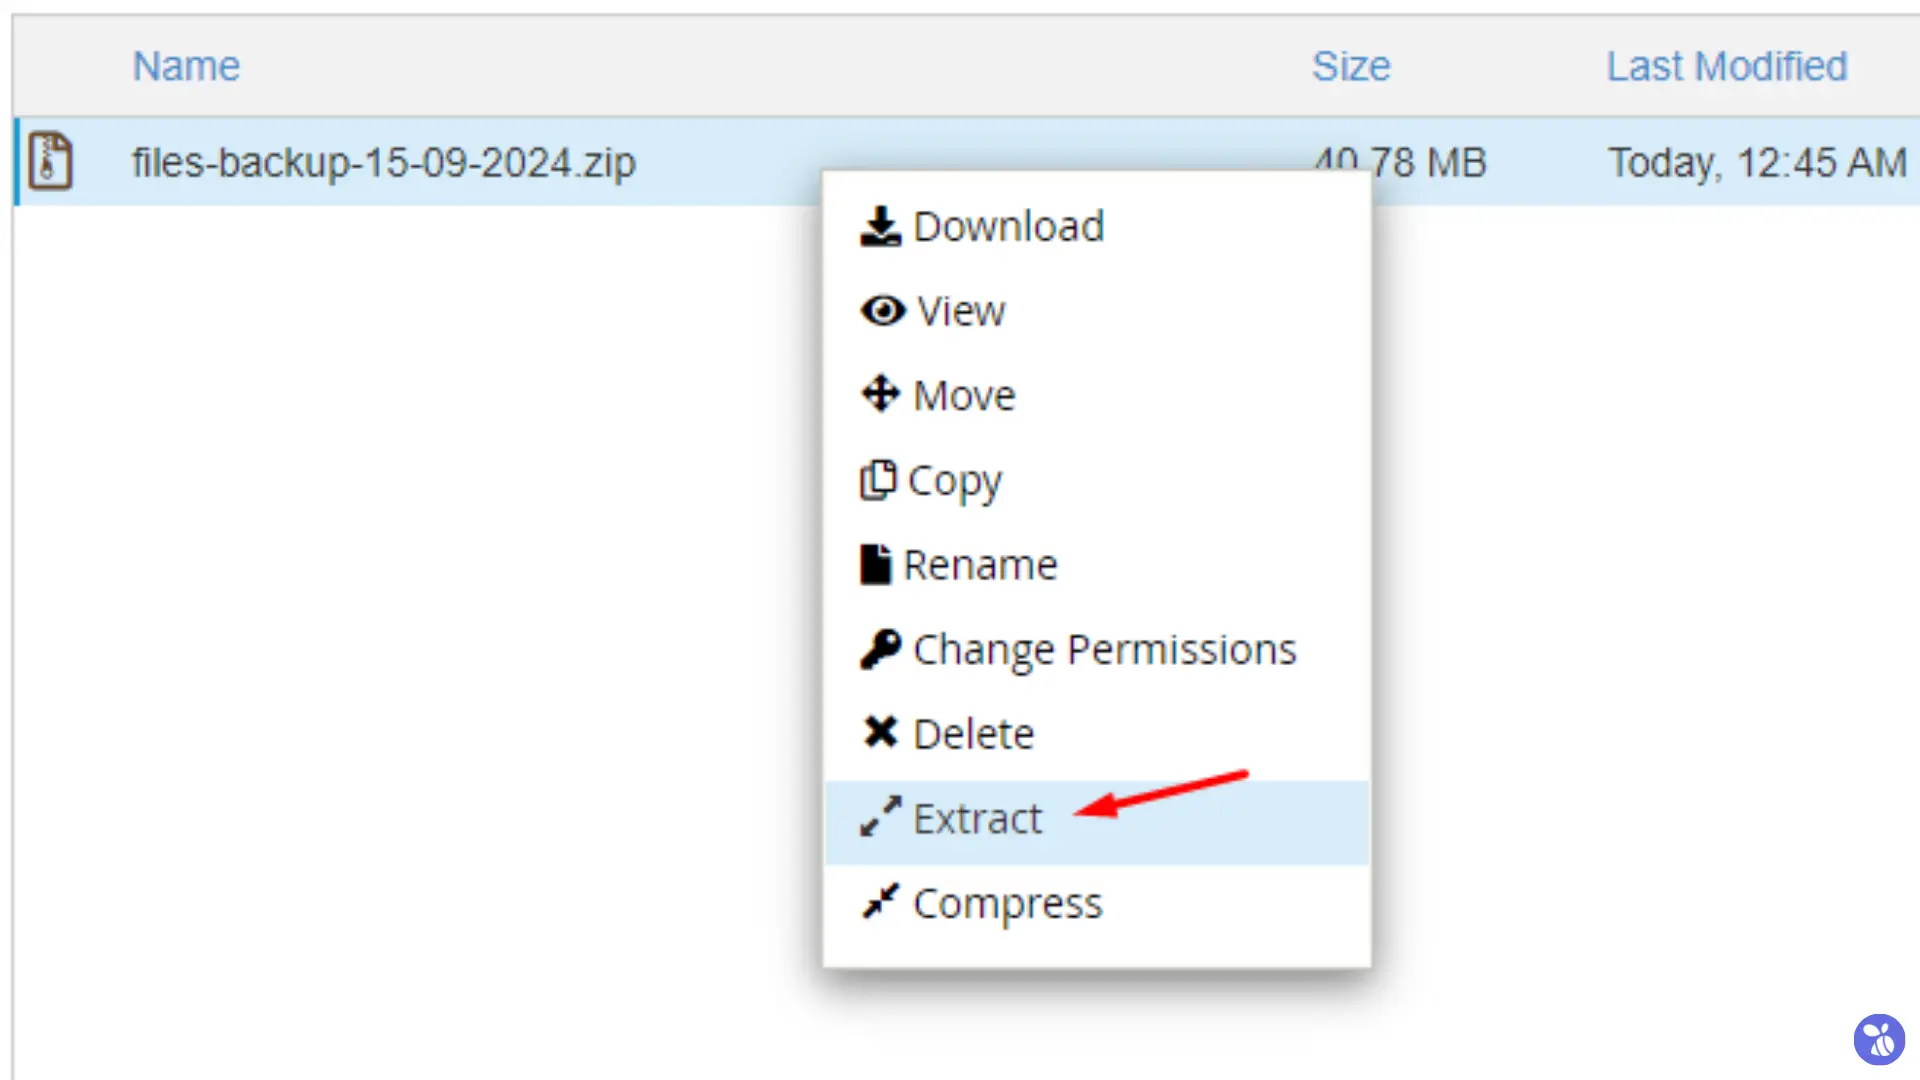
- After deleting the old files, upload the backup zip file.
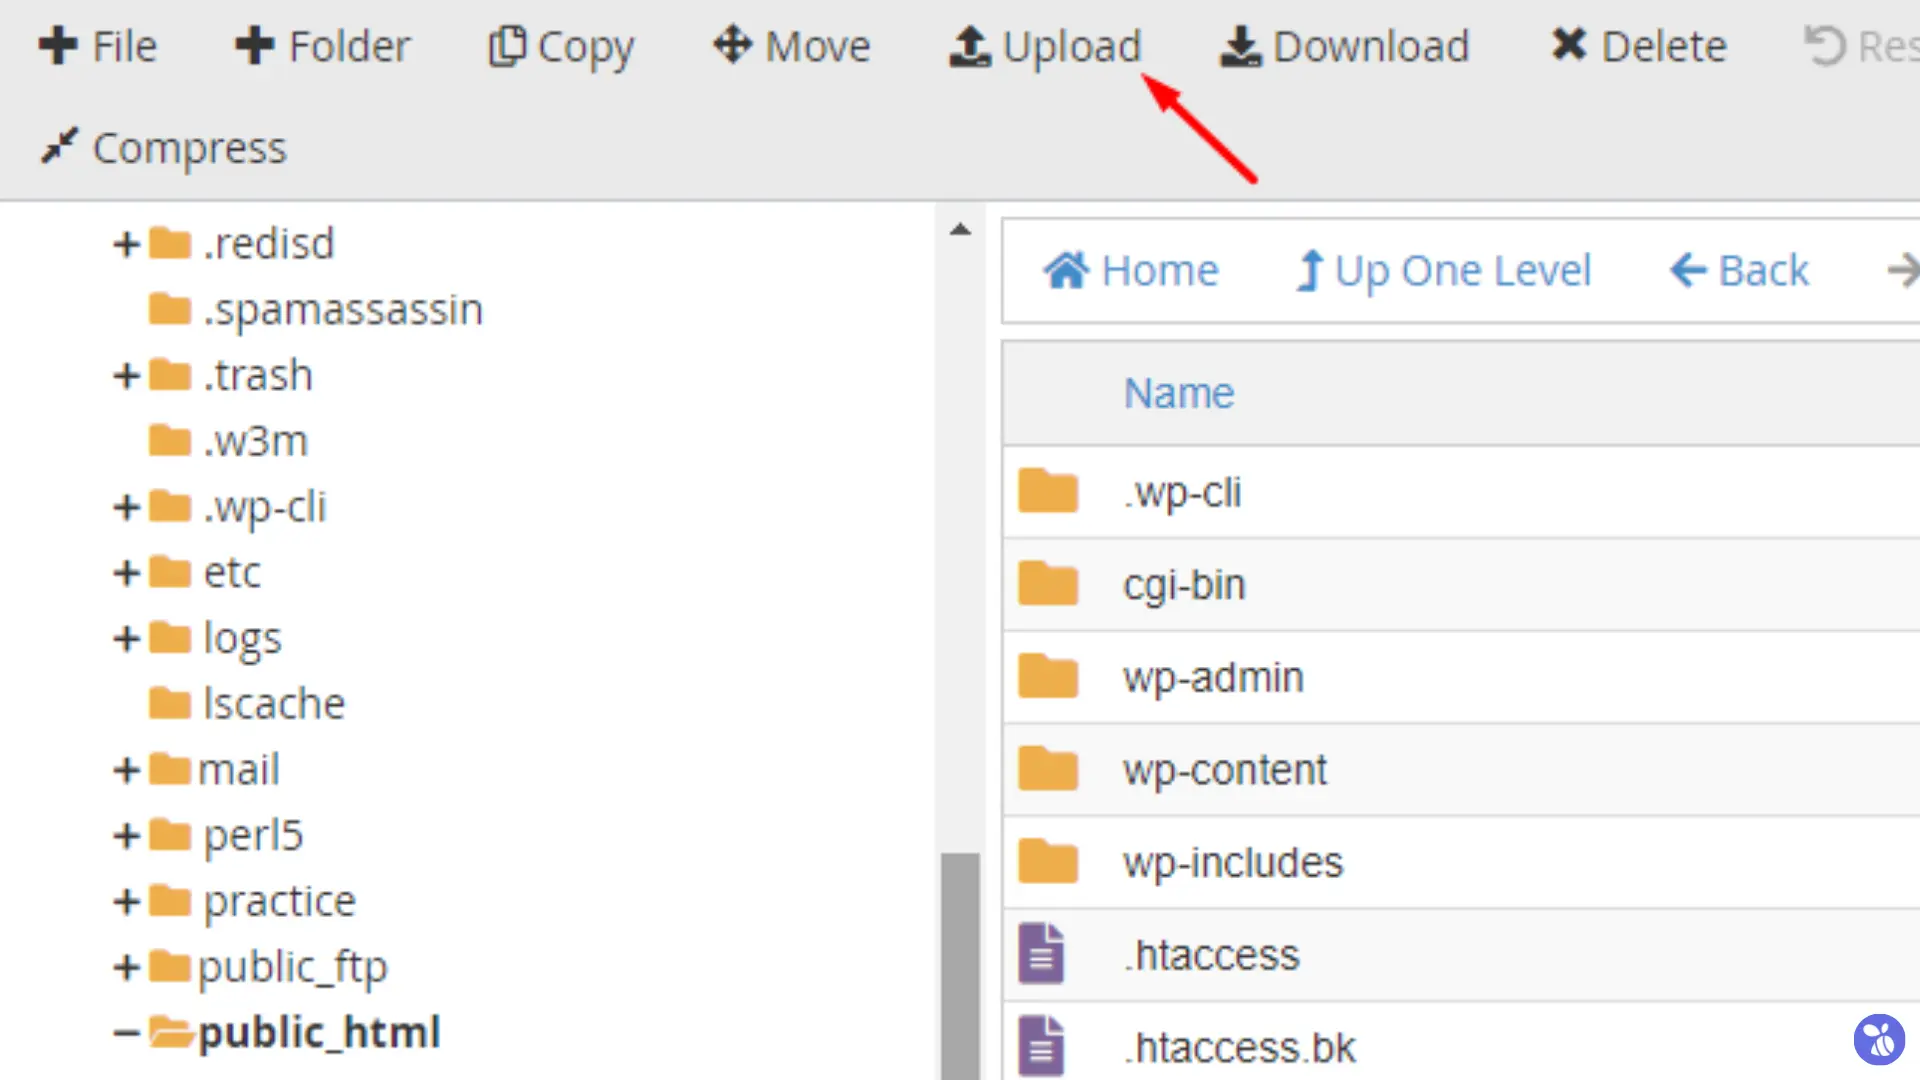
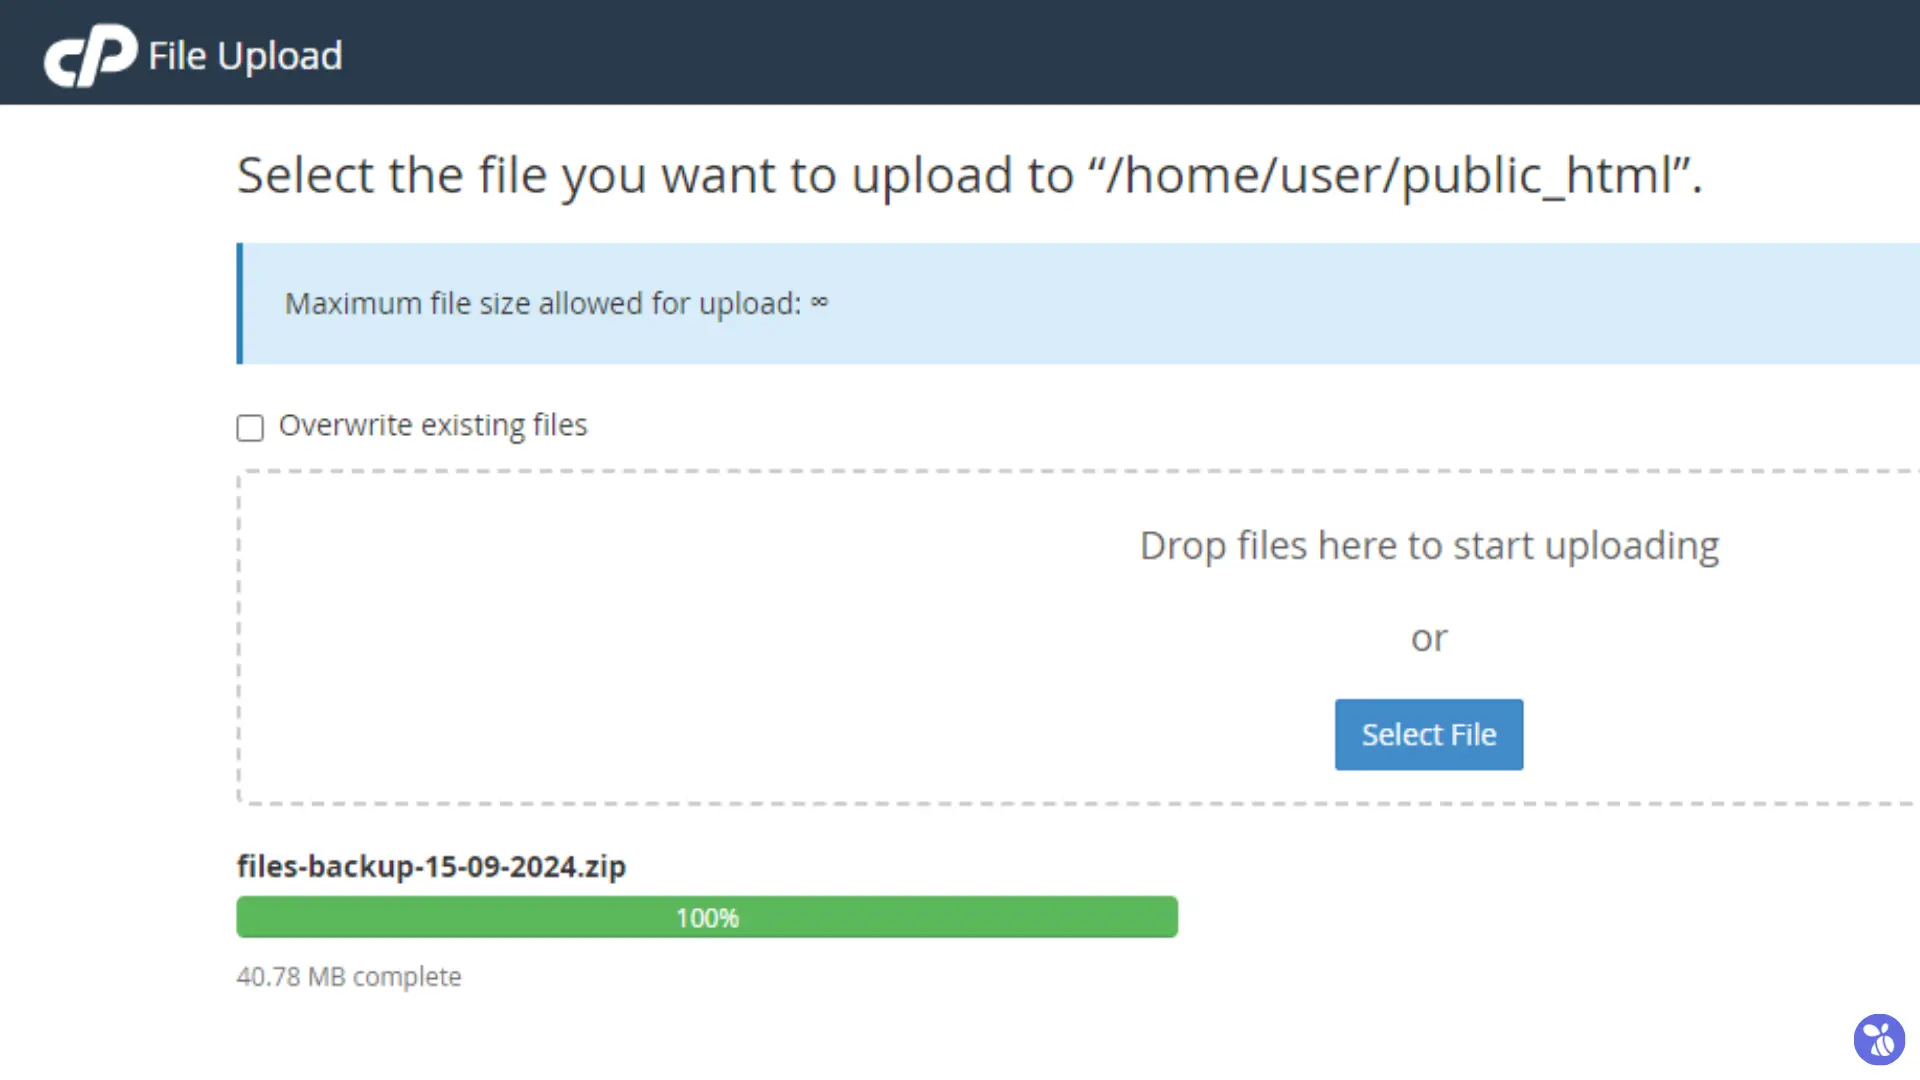
- Once the upload is complete, right-click the zip file and choose Extract to restore the files to your website.
DirectAdmin File Manager
- Access your DirectAdmin control panel and navigate to the System Info & Files section. There, click on File Manager.
- Navigate to the
domainsdirectory, then open the public_html folder corresponding to your domain. - Select the existing files associated with your domain in the directory and delete them to prevent any conflicts.
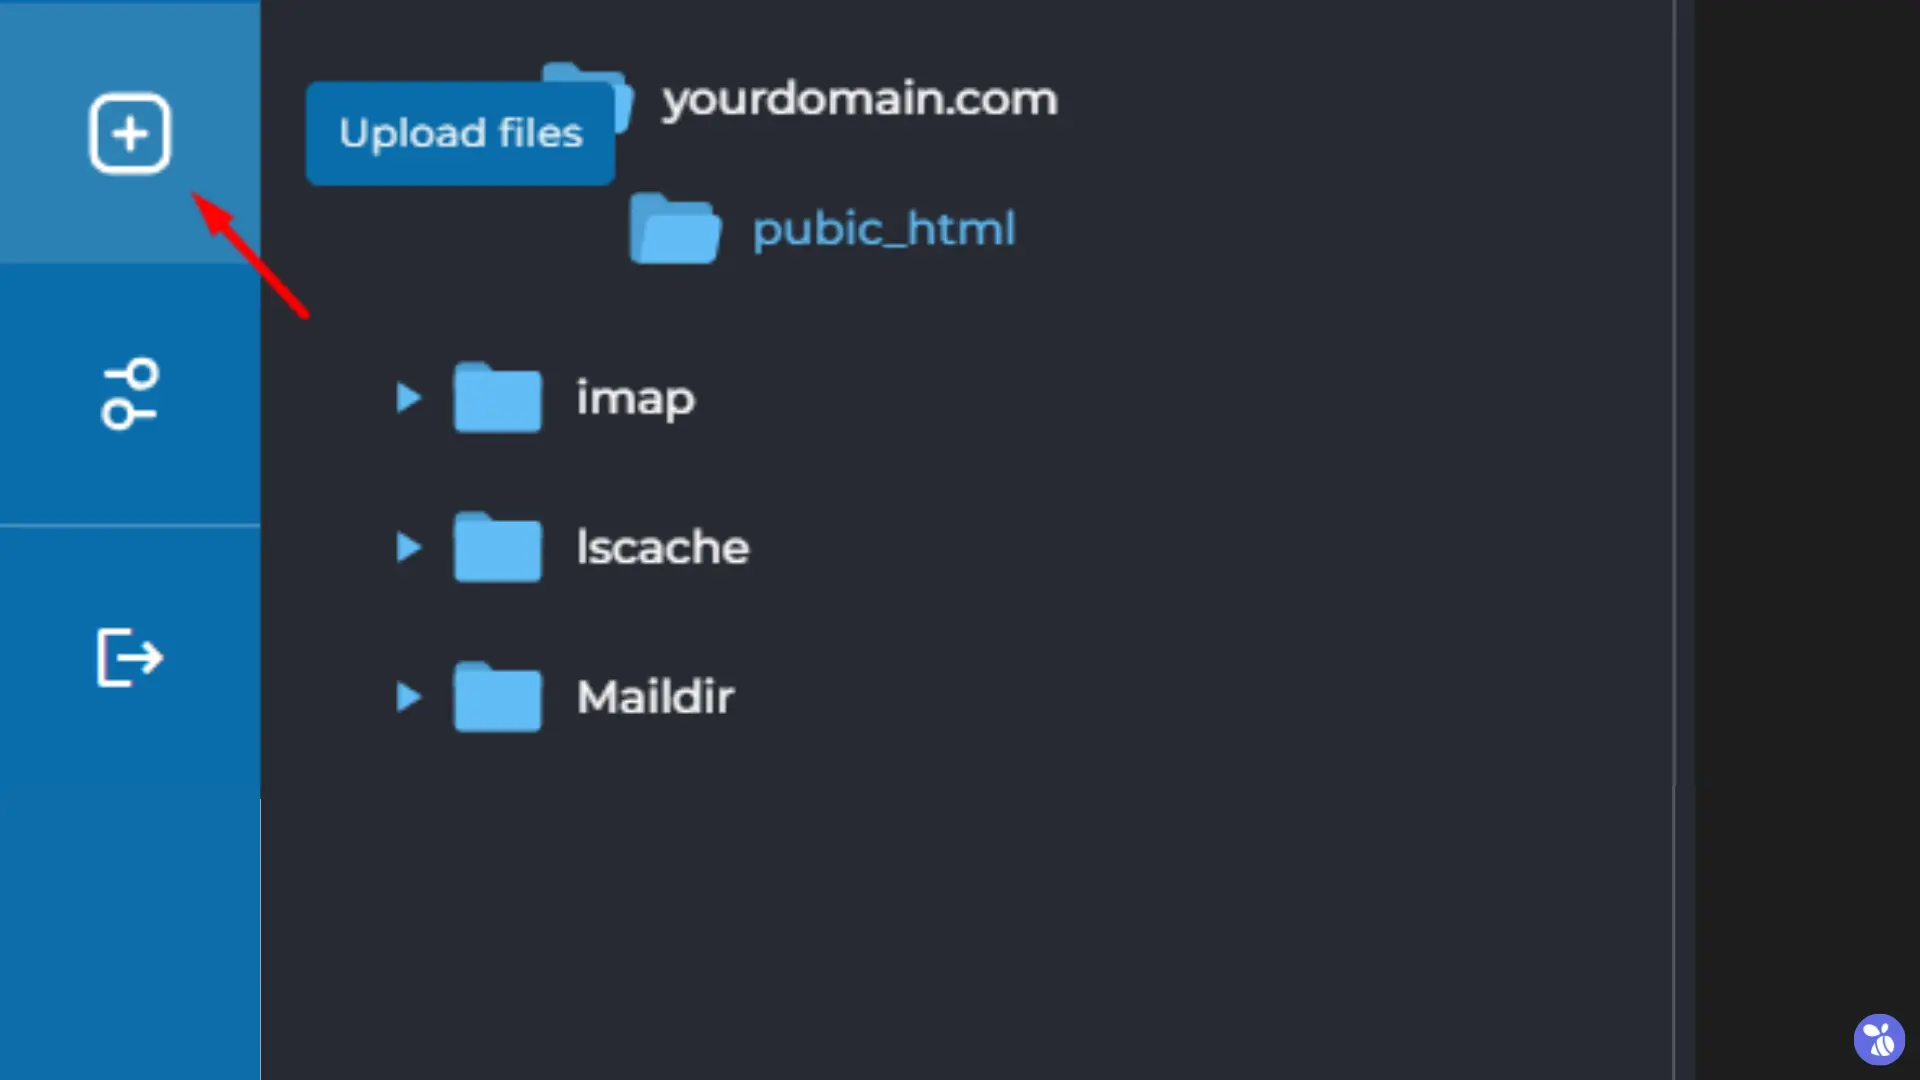
- Click on Upload Files and select your backup archive file
(files-backup-15-09-2024.zip)from your local machine.
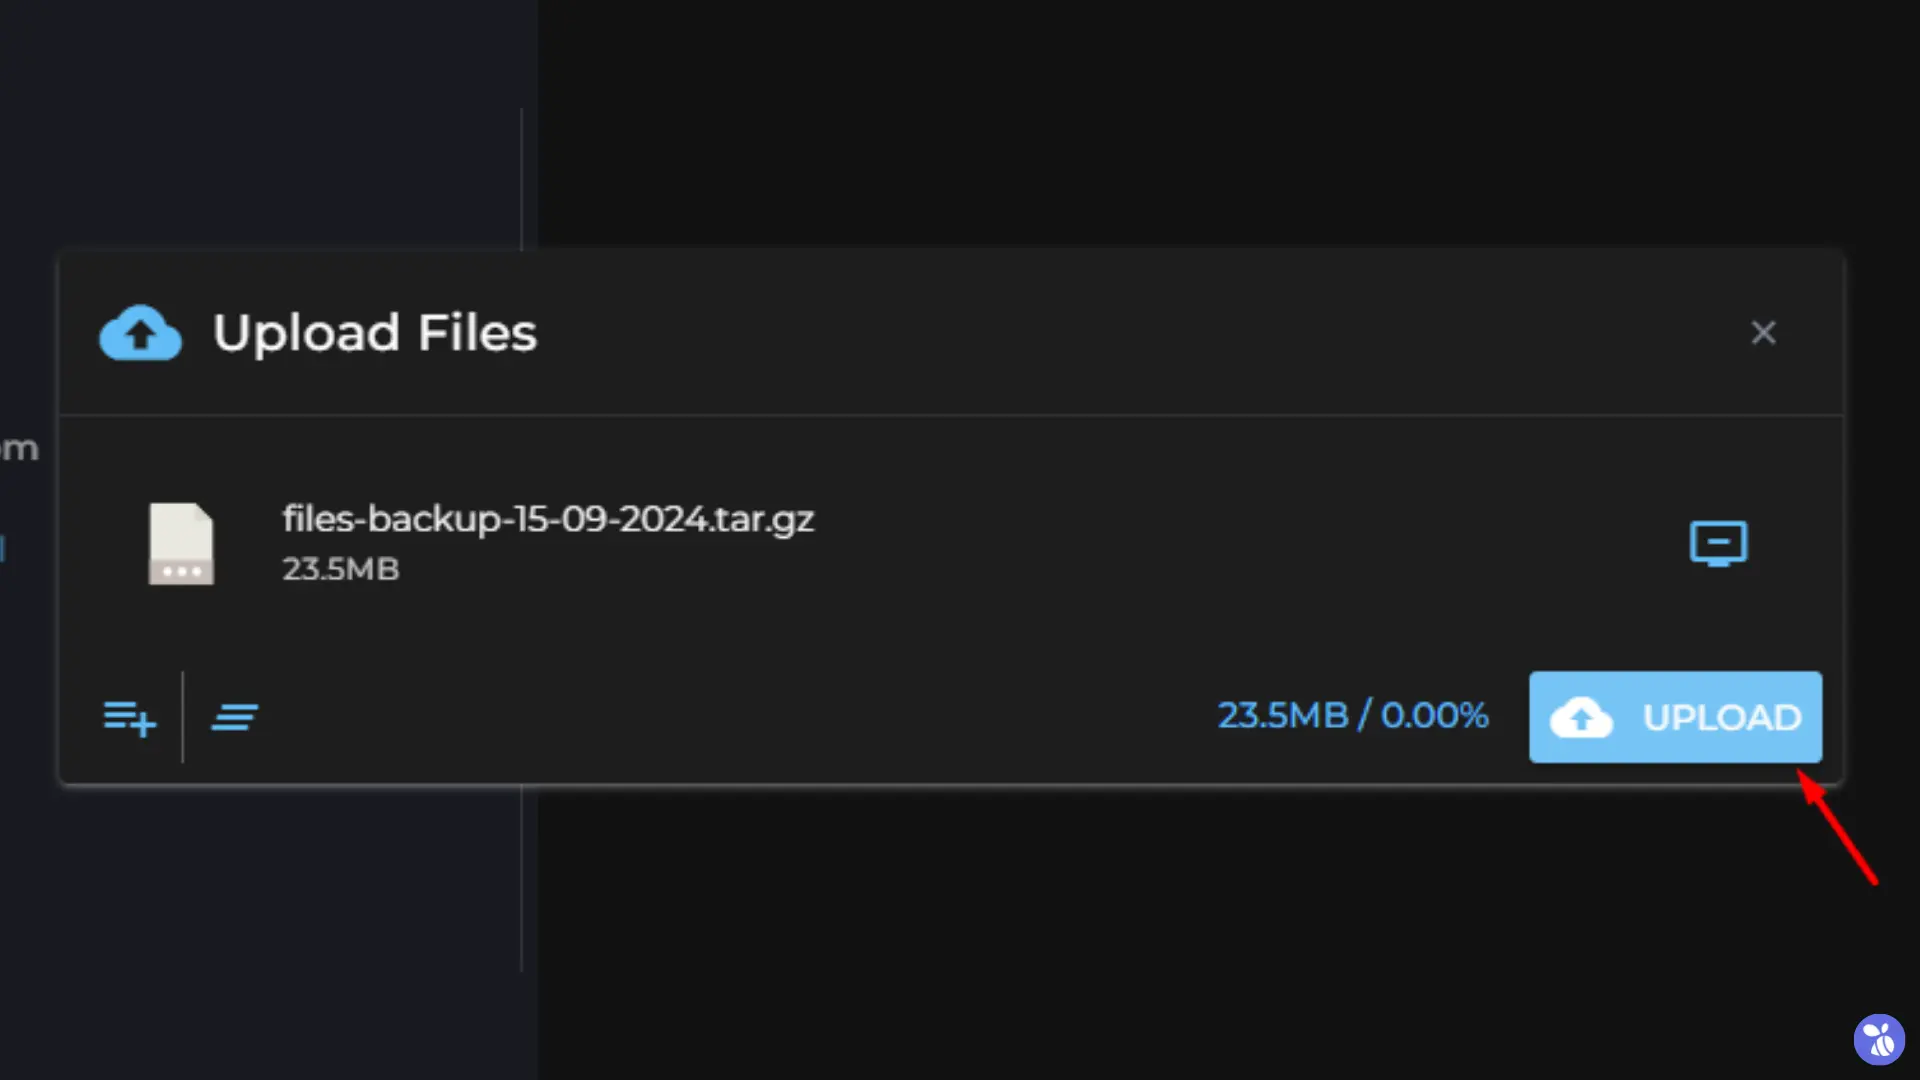
- After the upload is complete, right-click on the uploaded zip file, and click on Extract from the options menu. This will decompress the backup files into the directory.
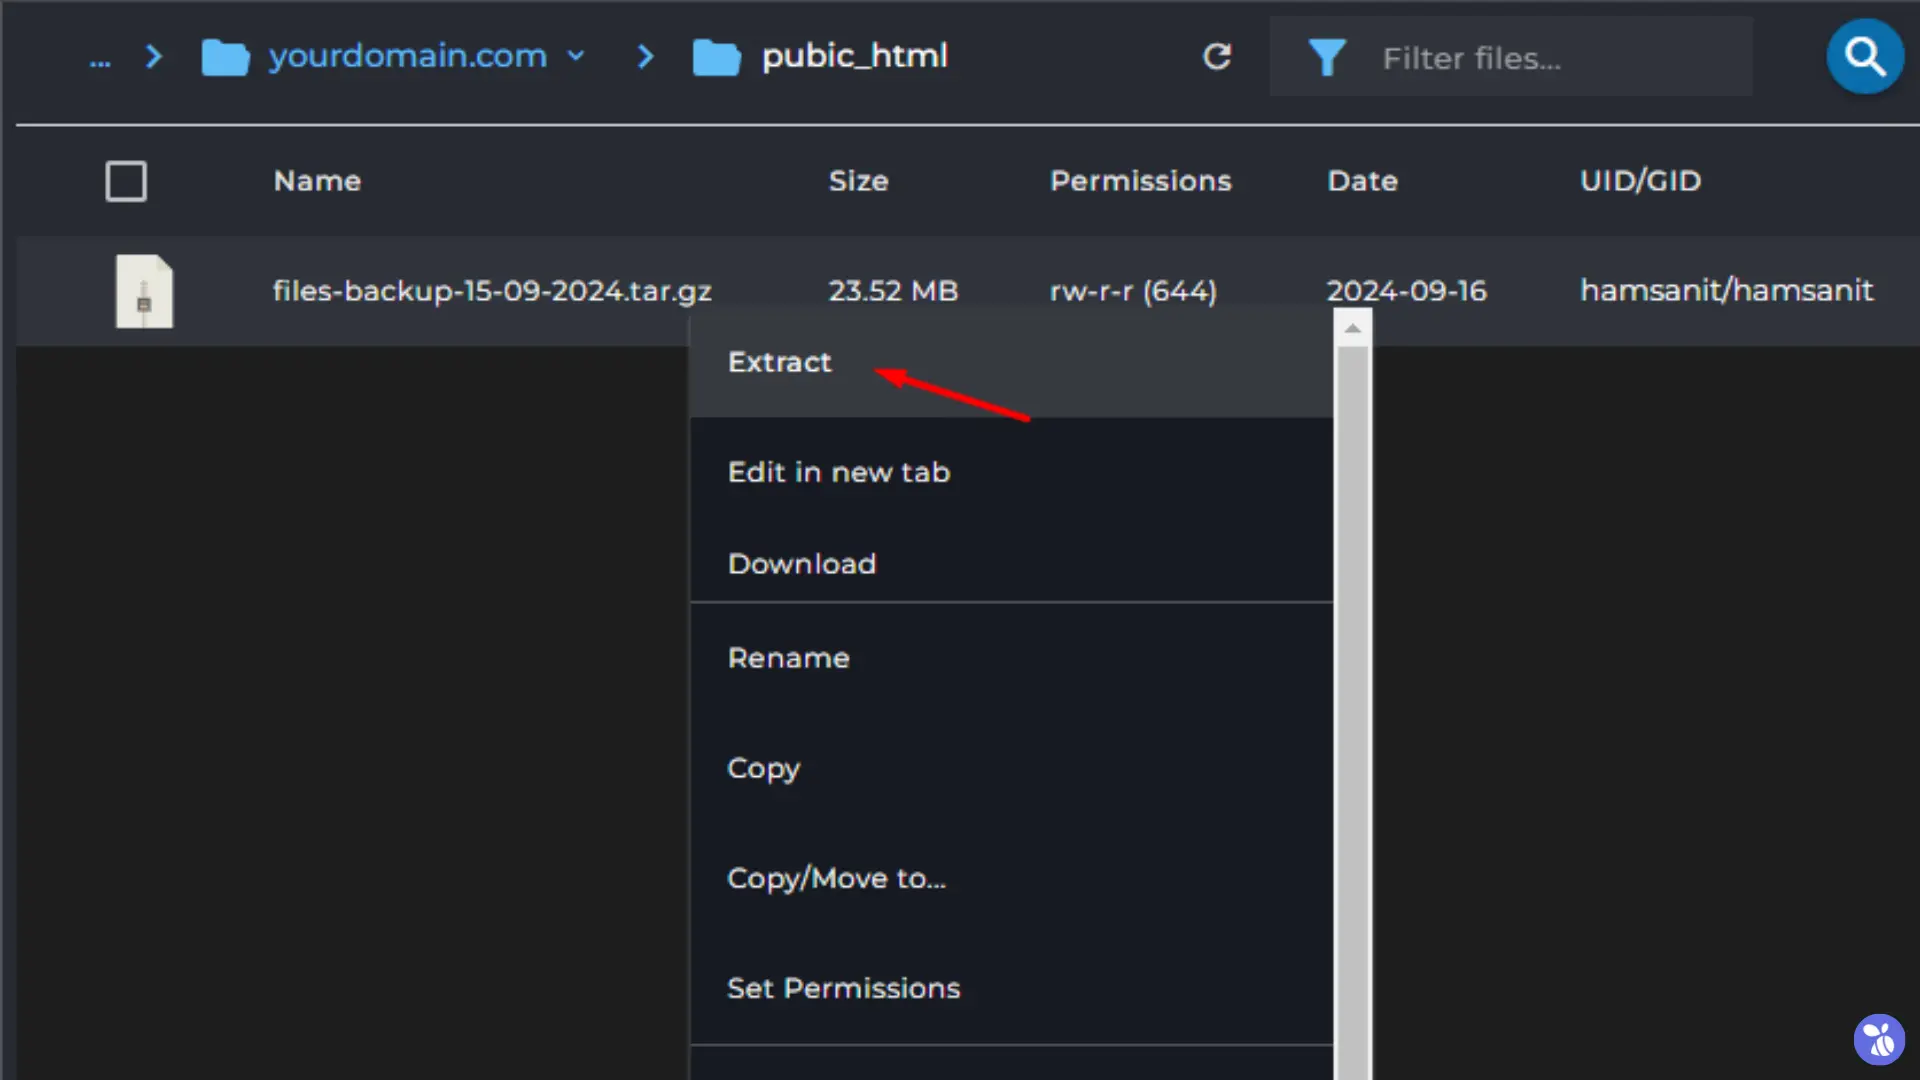
- Make sure all files have been properly extracted and are in the correct directories.
FTP Client (FileZilla)
For uploading the backup file using an FTP client such as FileZilla, you can follow these steps:
- Open the FileZilla FTP client on your computer.
- On the server side (right panel), navigate to the public_html directory of the domain.
- Select the existing files and folders in the directory associated with the domain, right-click, and choose Delete to remove them.
- On the local side (left panel), navigate to the folder where your backup file is stored.
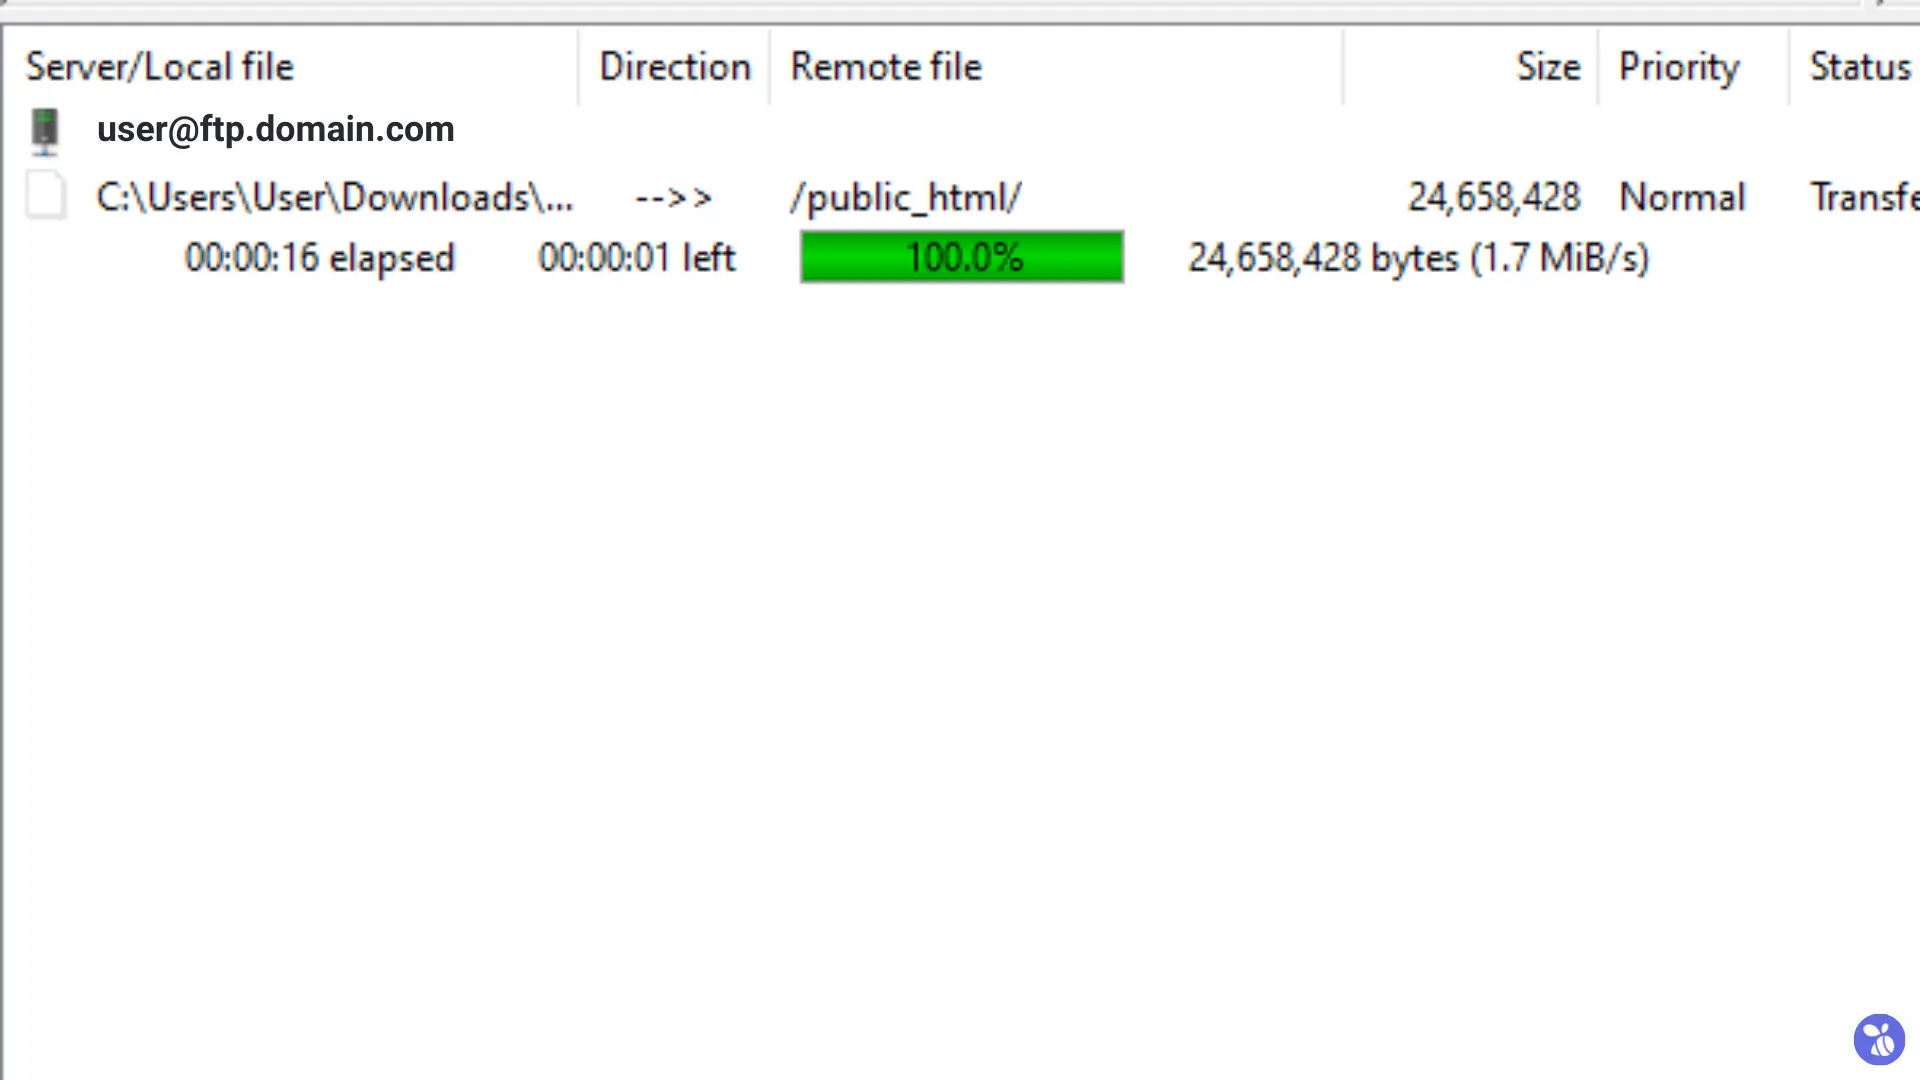
- Select the backup file you zipped earlier (locally), right-click, and choose Upload. The file will begin transferring to the server directory.

- Keep an eye on the Queued files section to ensure the backup is uploaded successfully without errors.
- Once the transfer is complete, extract the zip file on the server.
Creating a New Database in cPanel and DirectAdmin
Why Create a New Database?
A new database keeps your restored site separate from other sites or installations.It helps in maintaining a clean structure, making management and troubleshooting easier.
cPanel
- Access your cPanel dashboard.
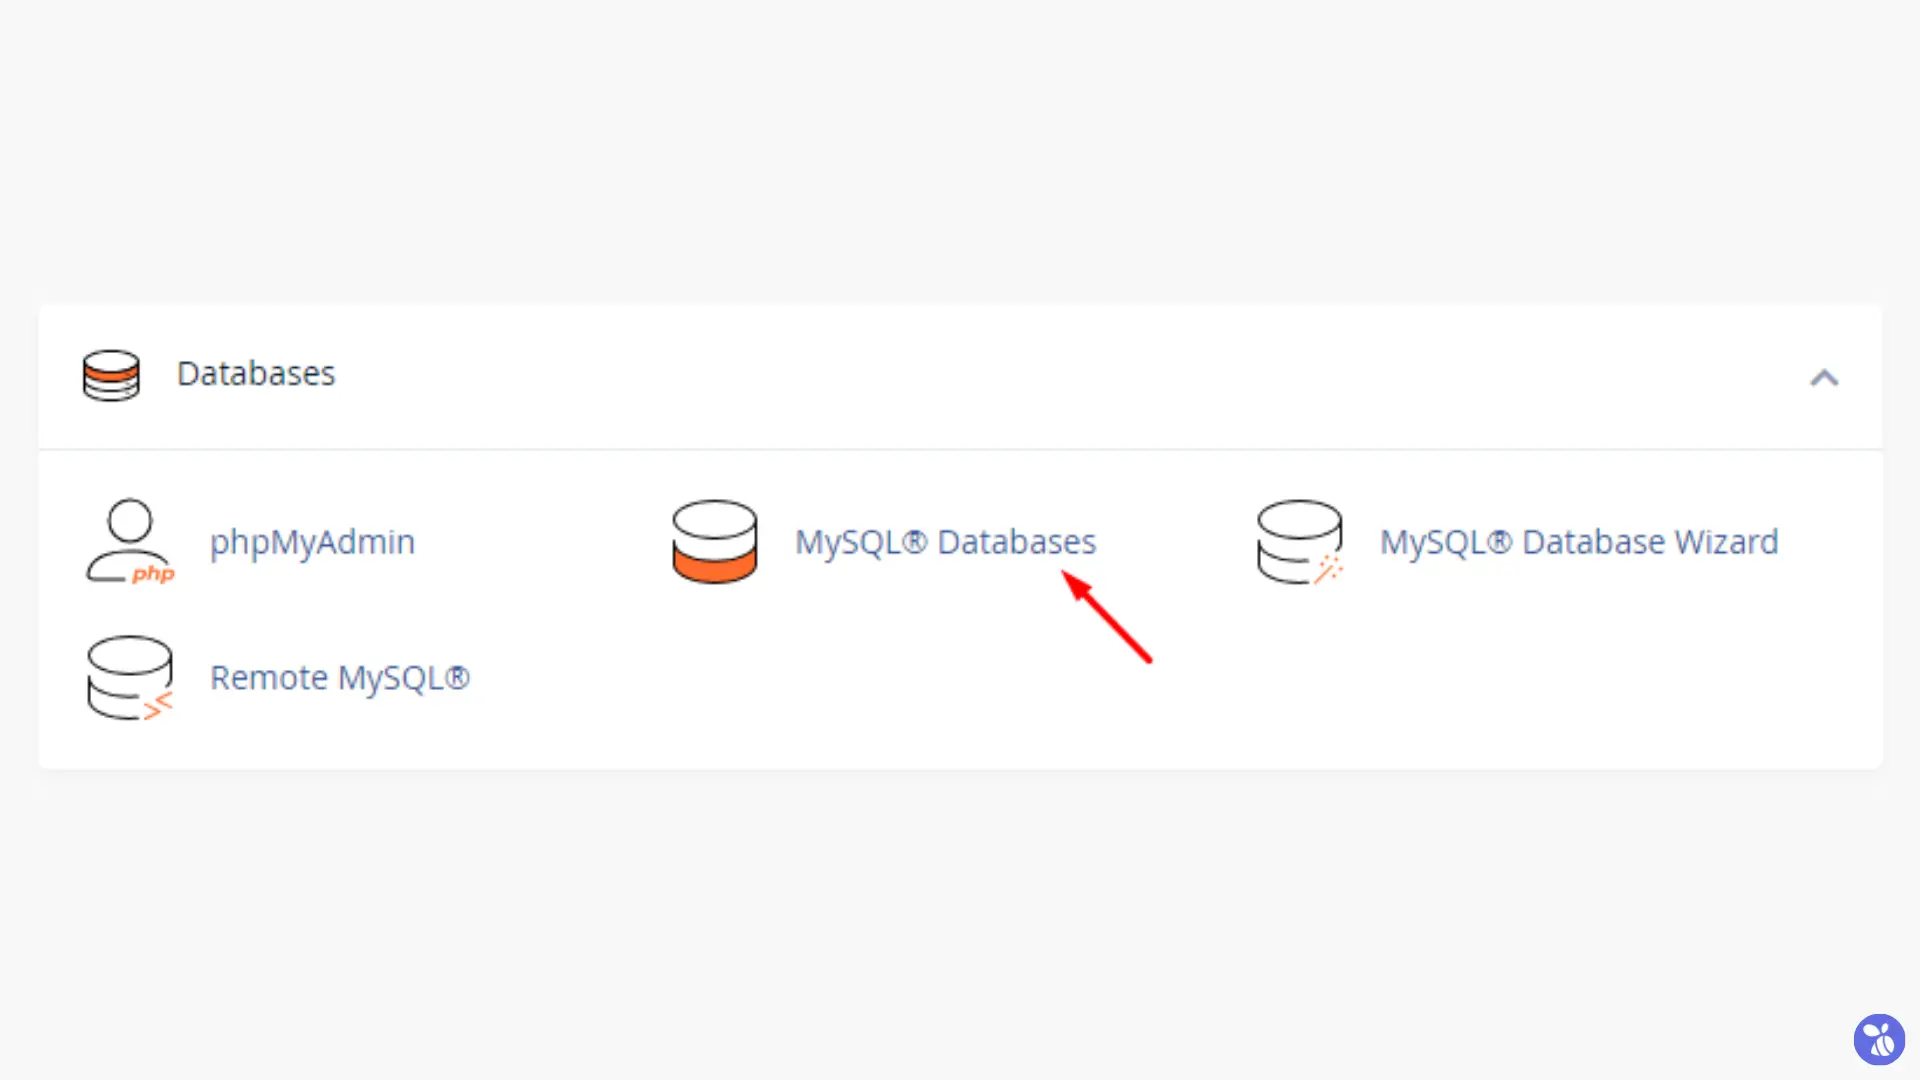
- Navigate to the Databases section and click on MySQL Databases.
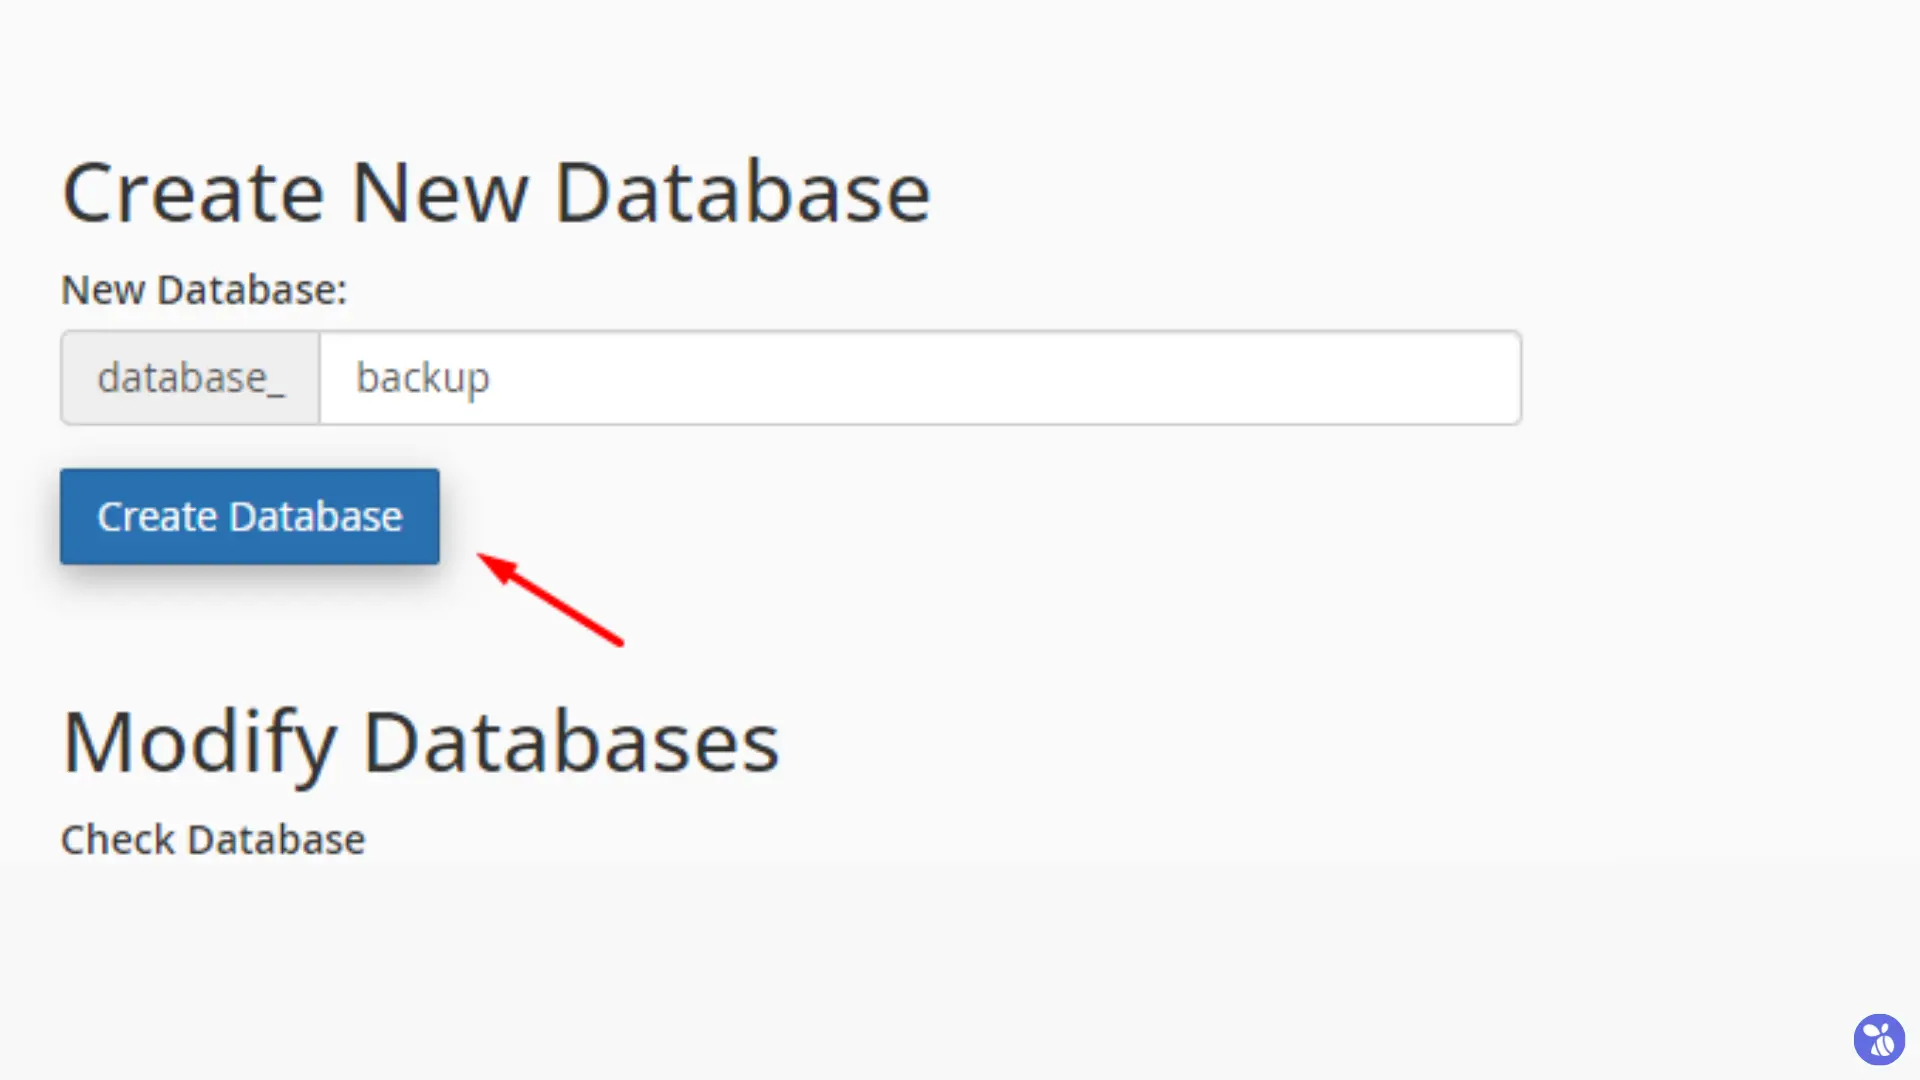
- In the Create New Database field, enter a name for your database and click Create Database.
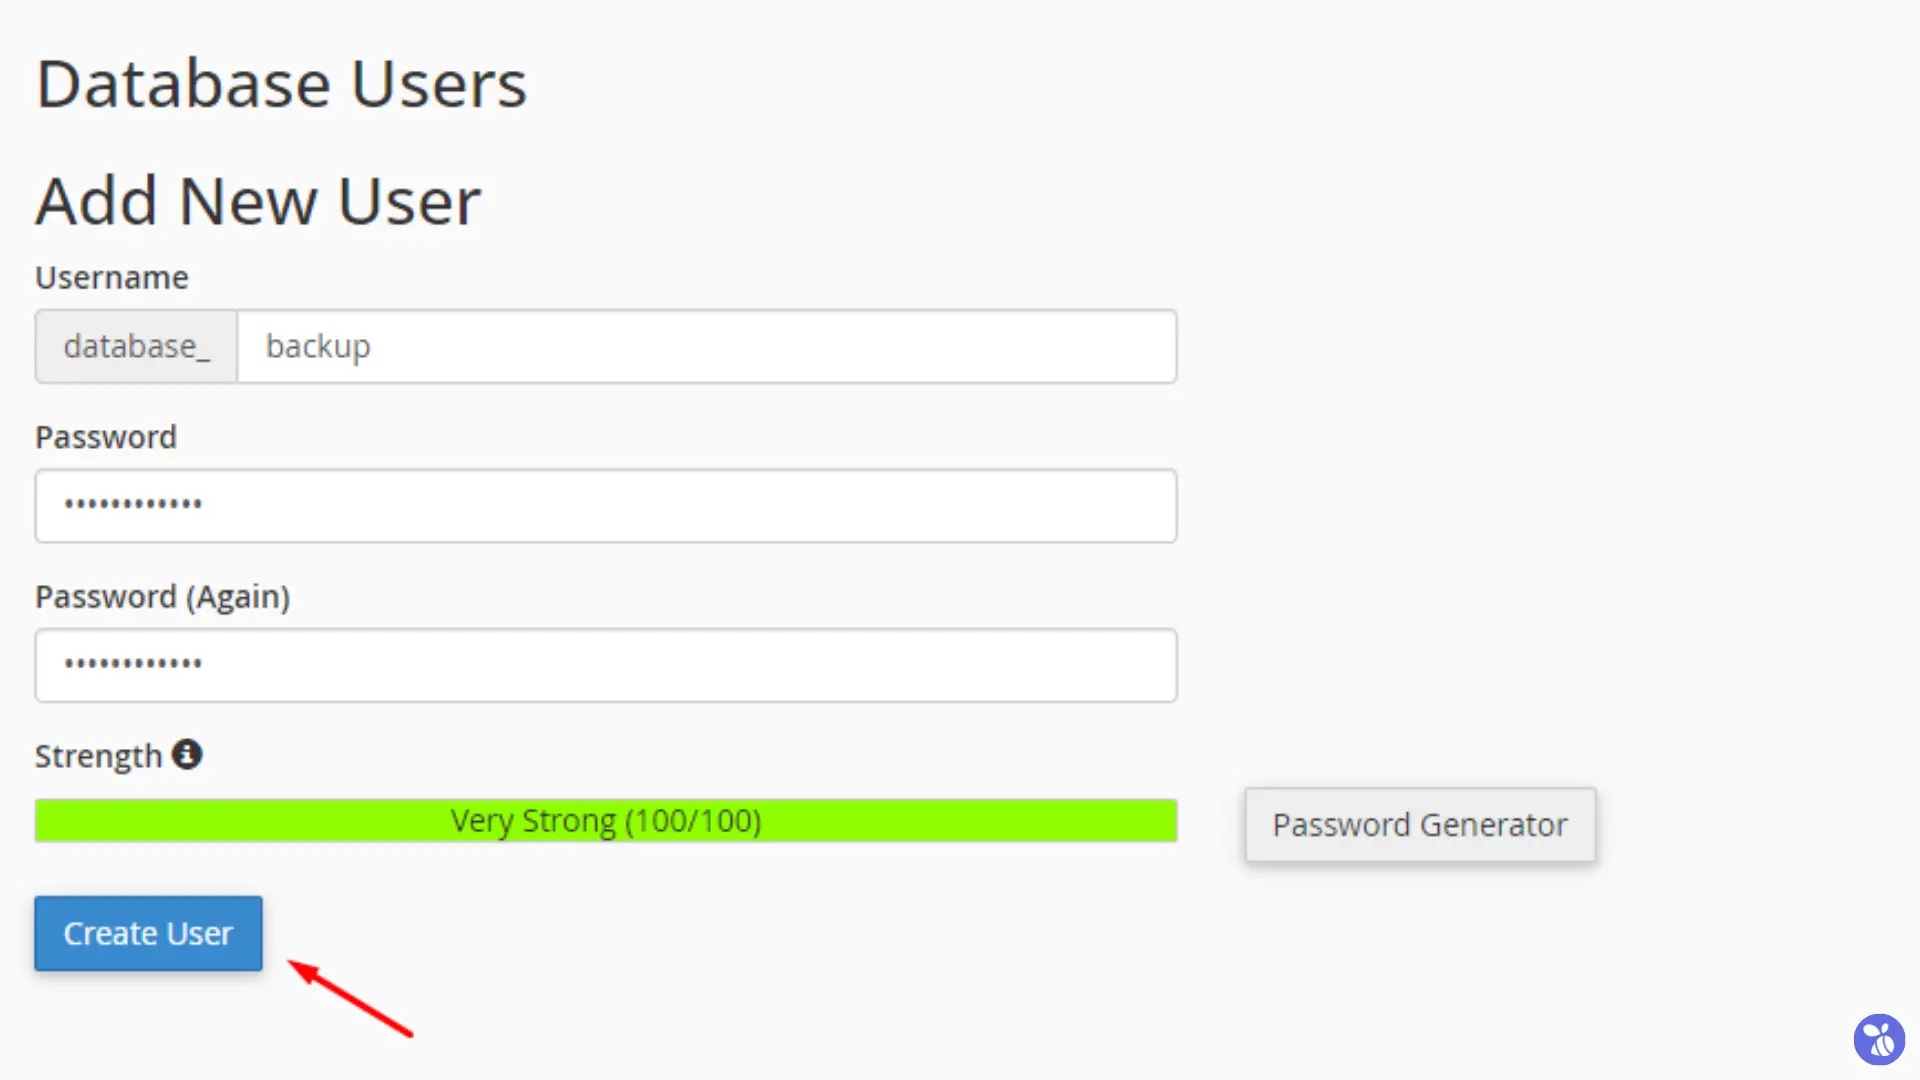
- Scroll down to MySQL Users and add a new user by entering a username and password and click Create User.
- Under Add User To Database, select the user and the database you just created.
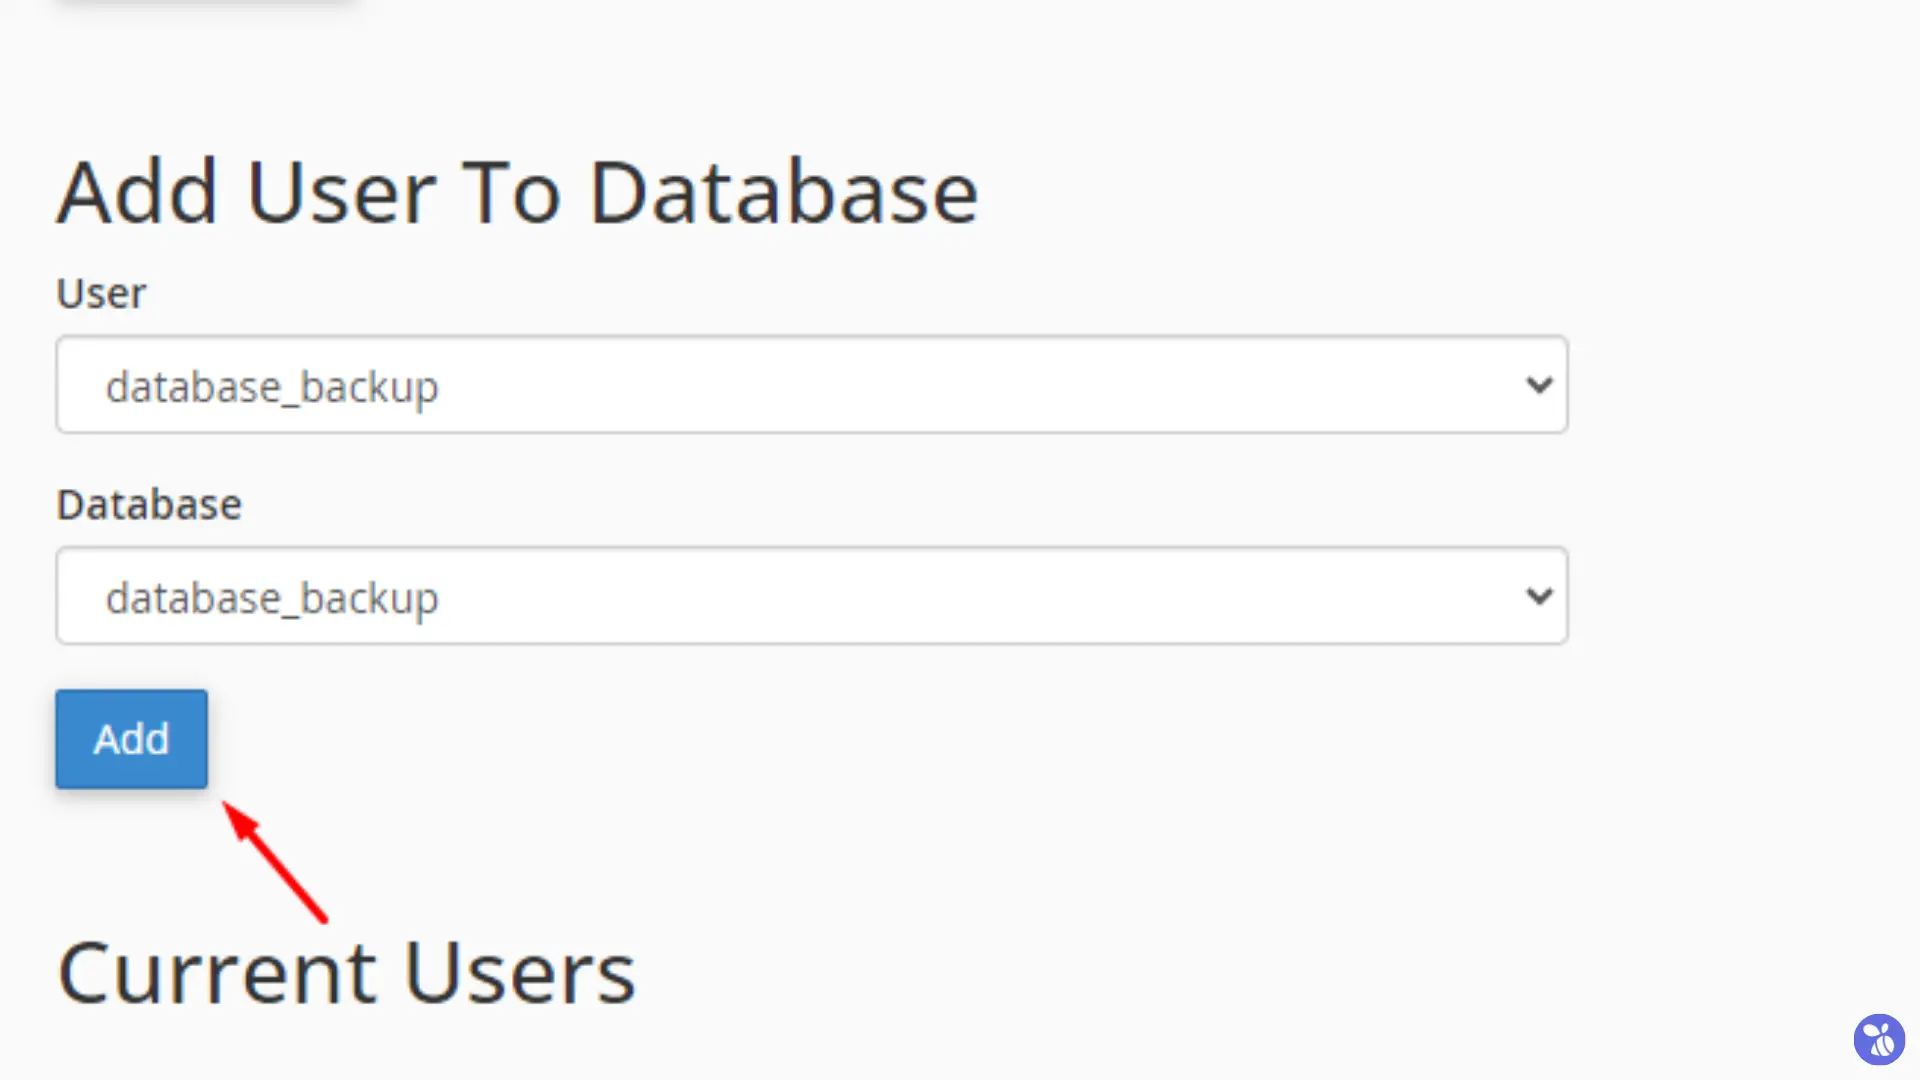
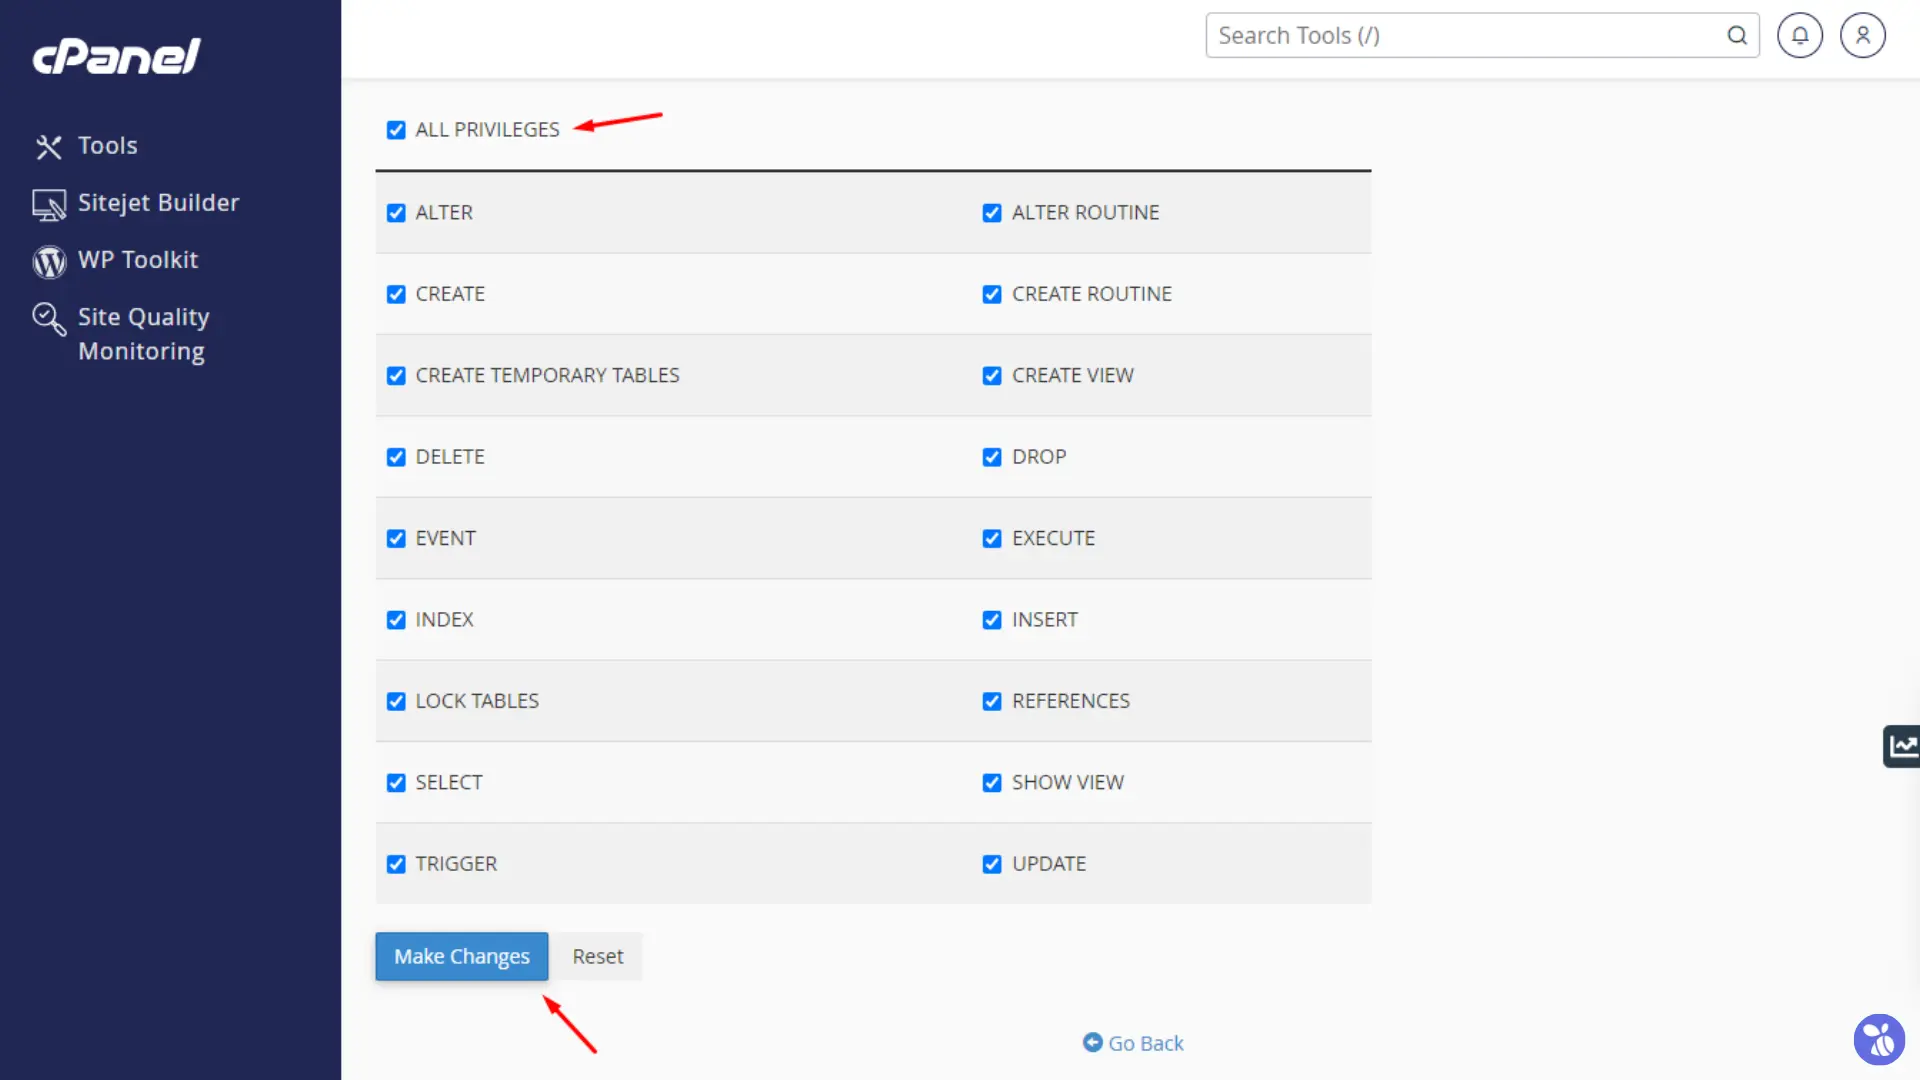
- On the next screen, check All Privileges to grant full access and click Make Changes.
- Keep a note of the database name, username, and password. You will need these details to update your
wp-config.phpfile.
DirectAdmin
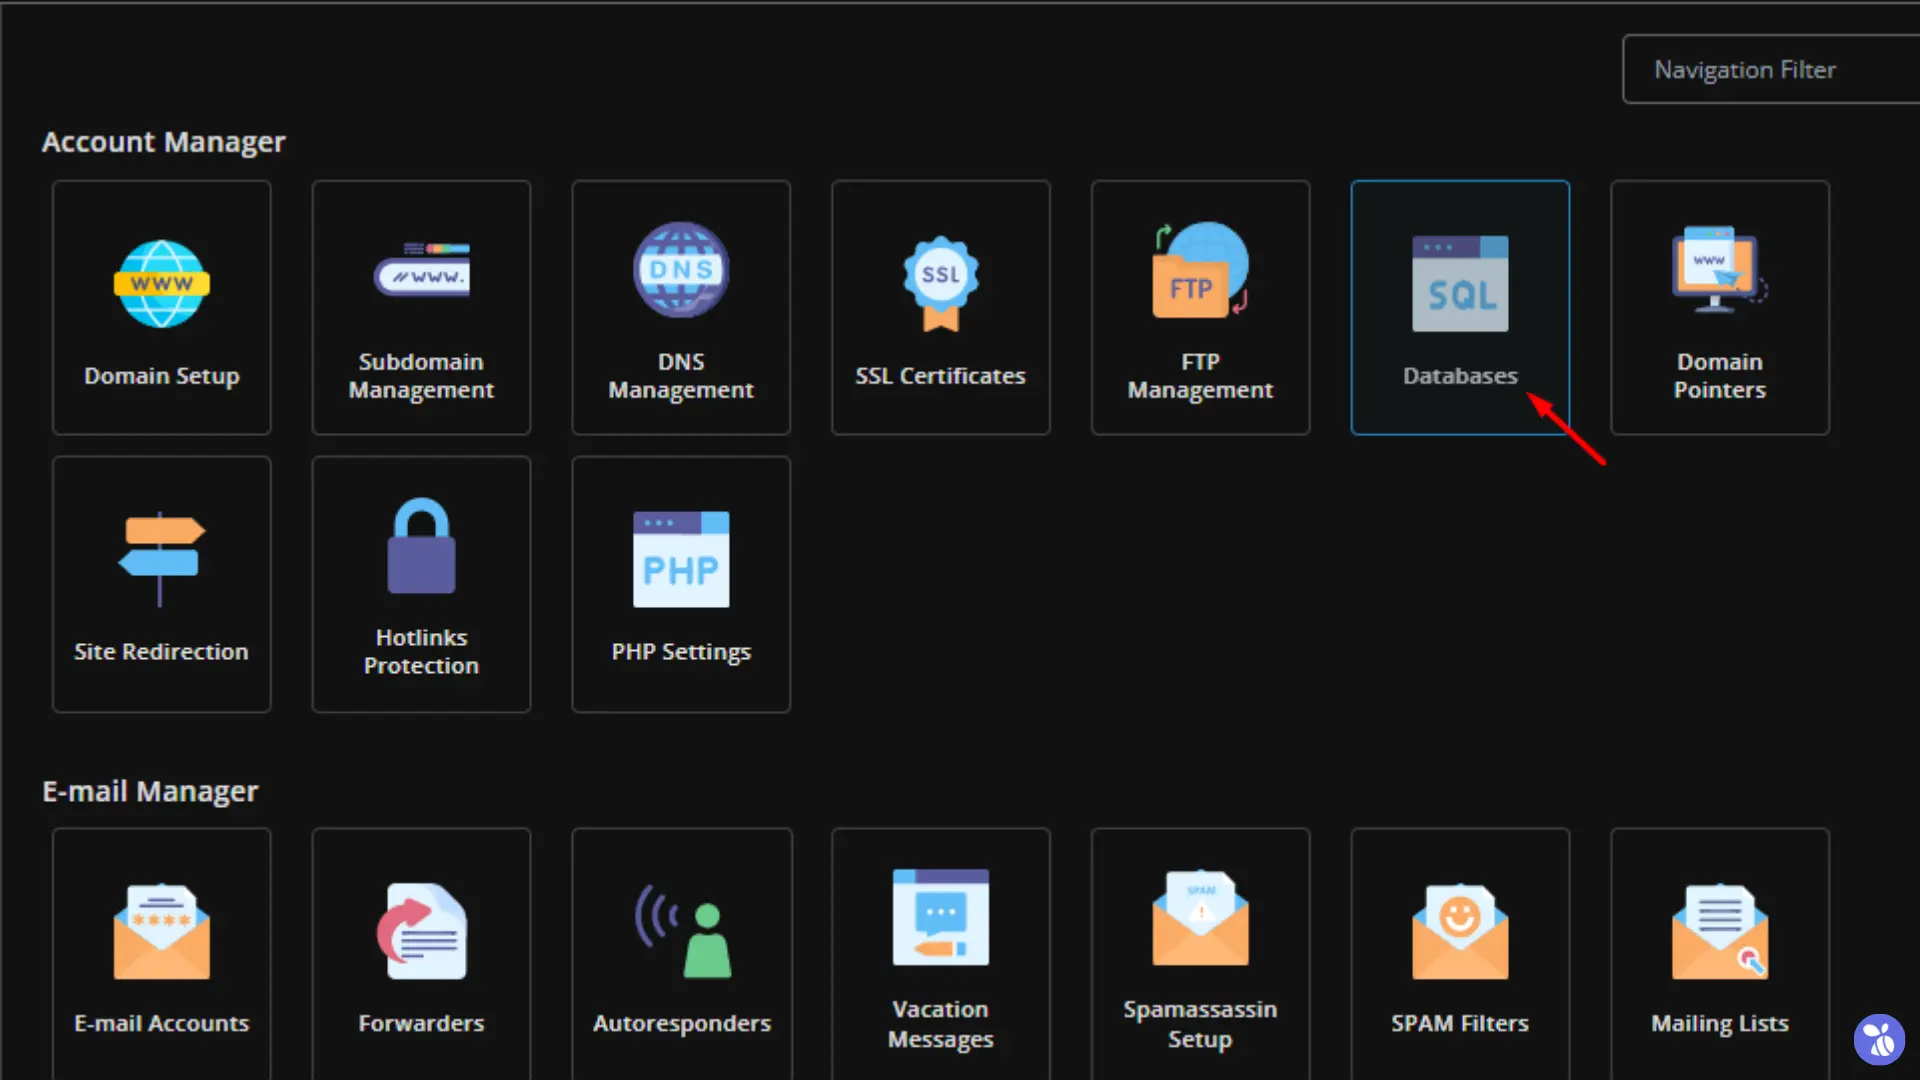
- Access your DirectAdmin control panel.
- Under the Account Manager section, click on Databases.
- Scroll down and in the Create New Database section, enter the database name.
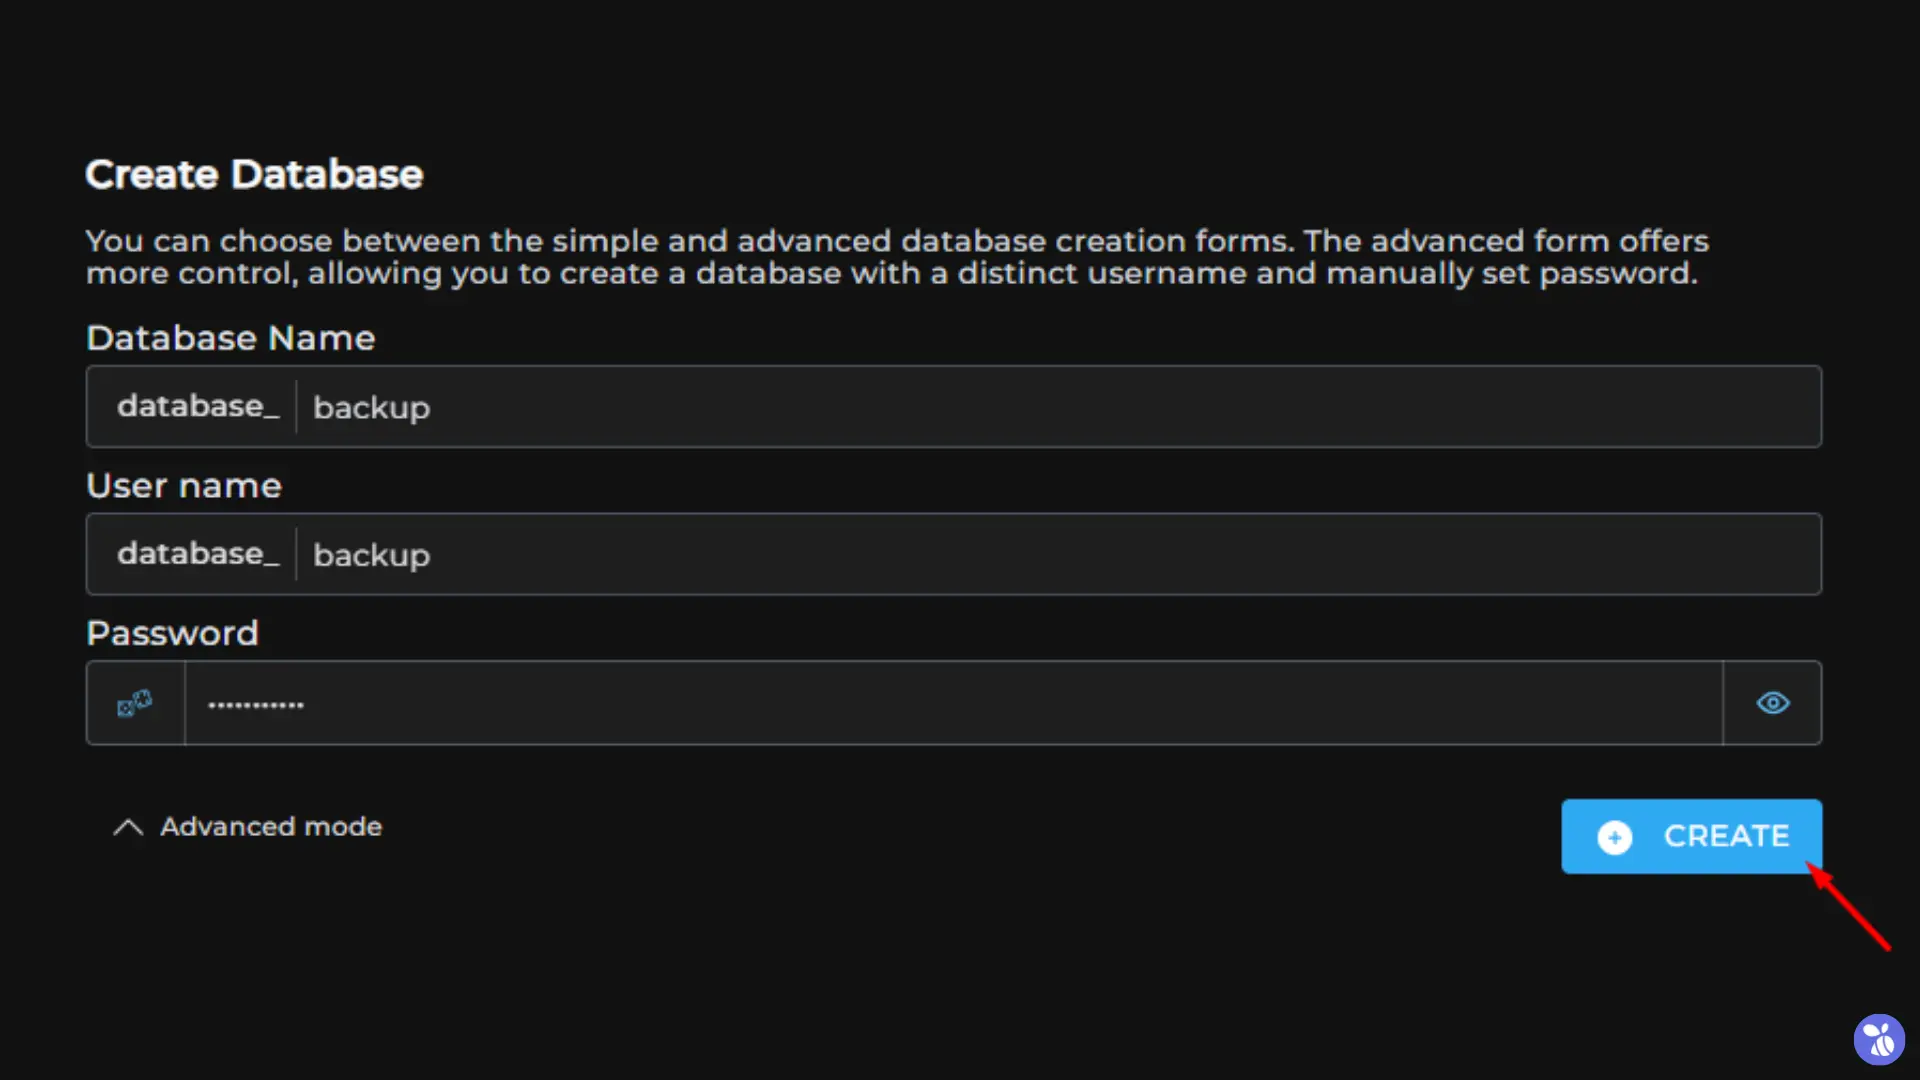
You can choose between the simple and advanced database creation forms. The advanced form offers more control, allowing you to create a database with a distinct username and manually set passwords.
- Note down the database name, username, and password for updating your
wp-config.phpfile.
Restoring the Database
With your new database created, you can now upload your backed-up database into it using phpMyAdmin.
- Access phpMyAdmin, In the left sidebar, click on the name of the new database you created.

- Click on the Import tab at the top of the page.
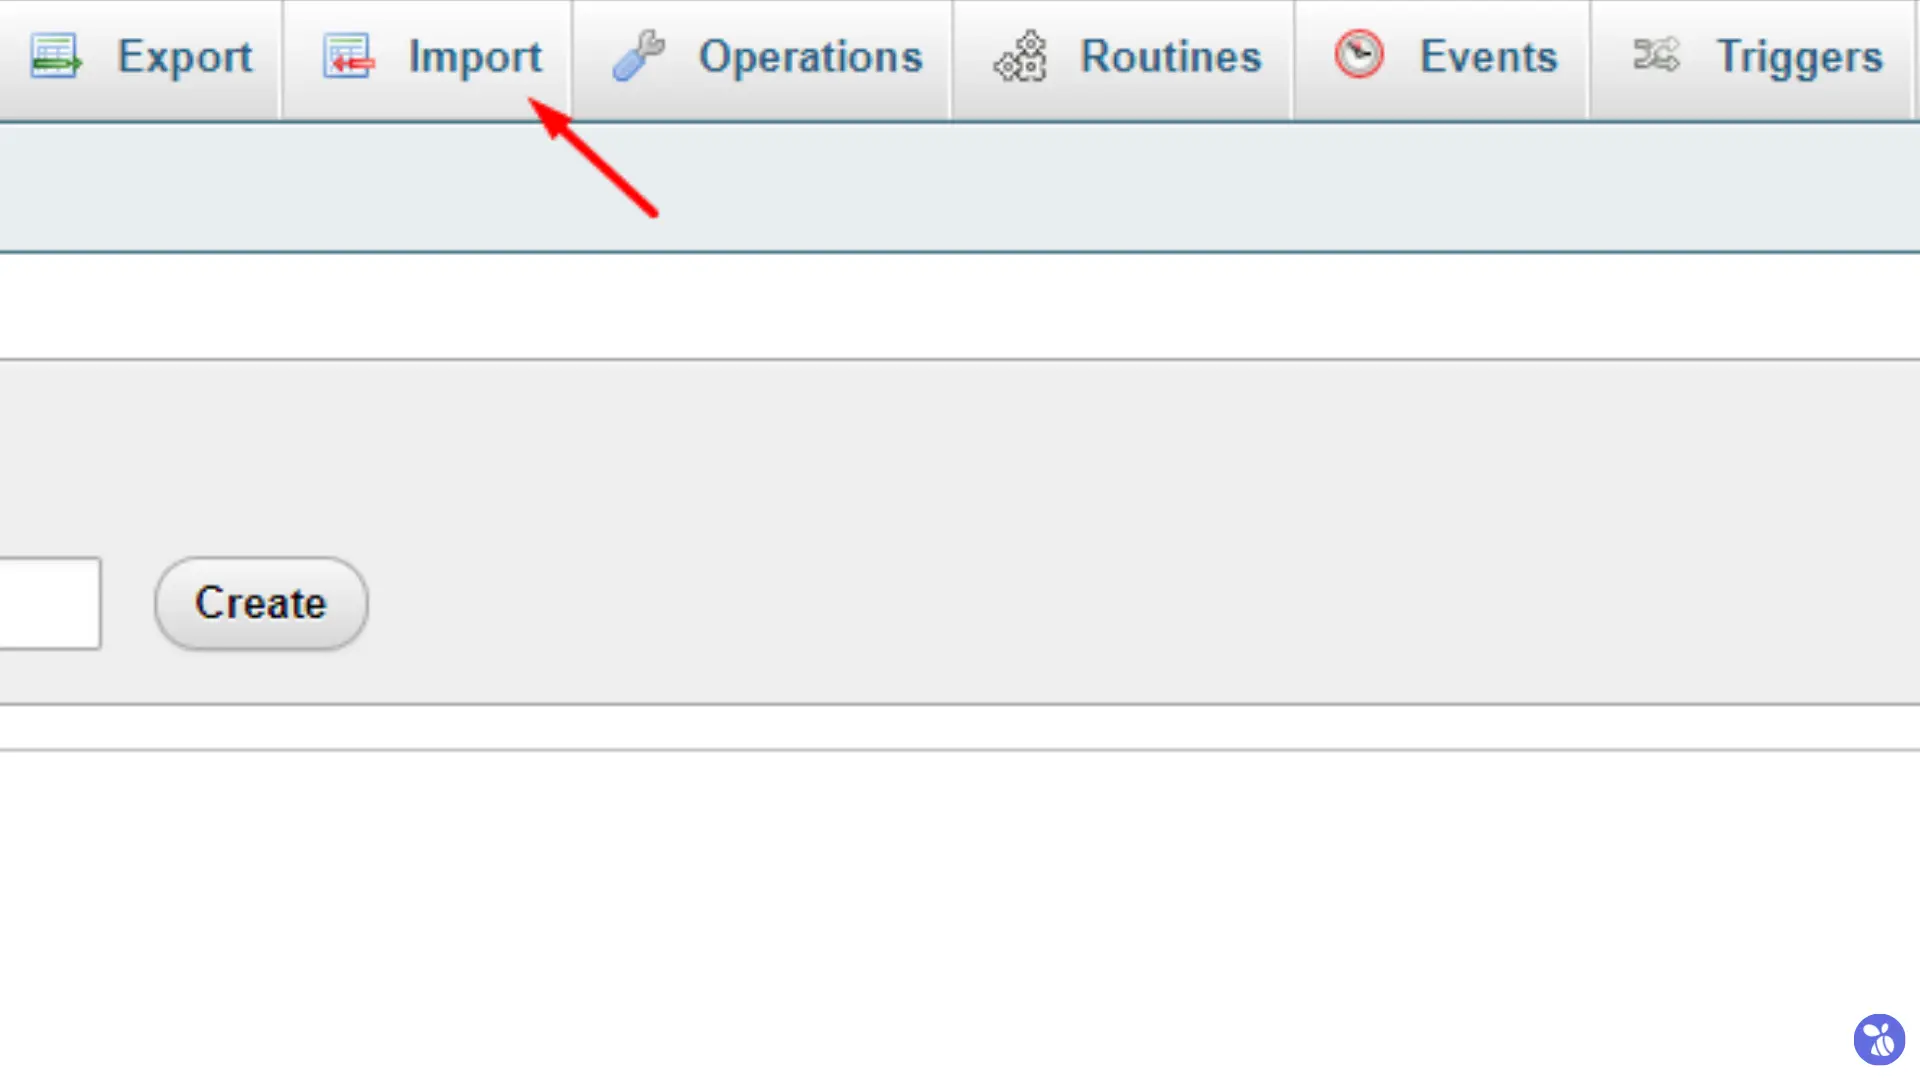
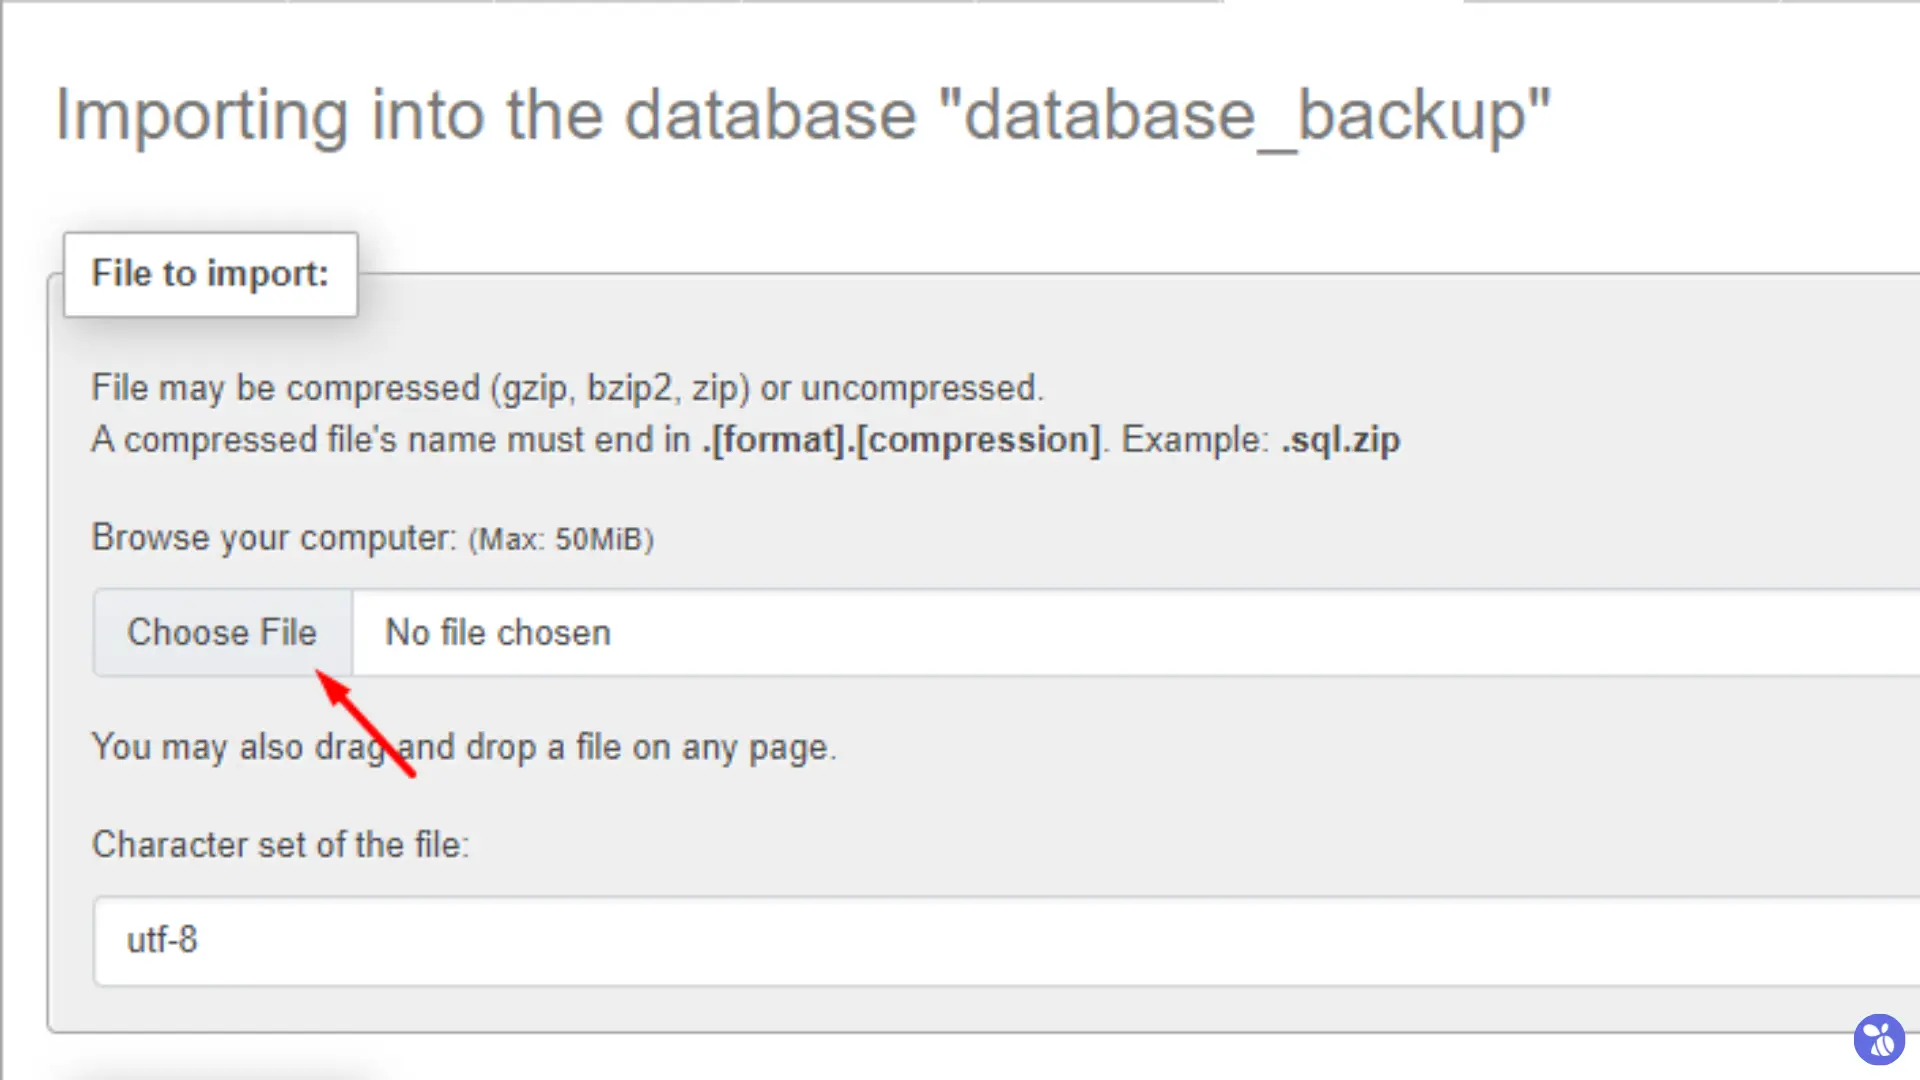
- Under File to import, click Choose File to import the backed-up (SQL file) database from your local machine.
- Click Import at the bottom of the page to begin the import process.
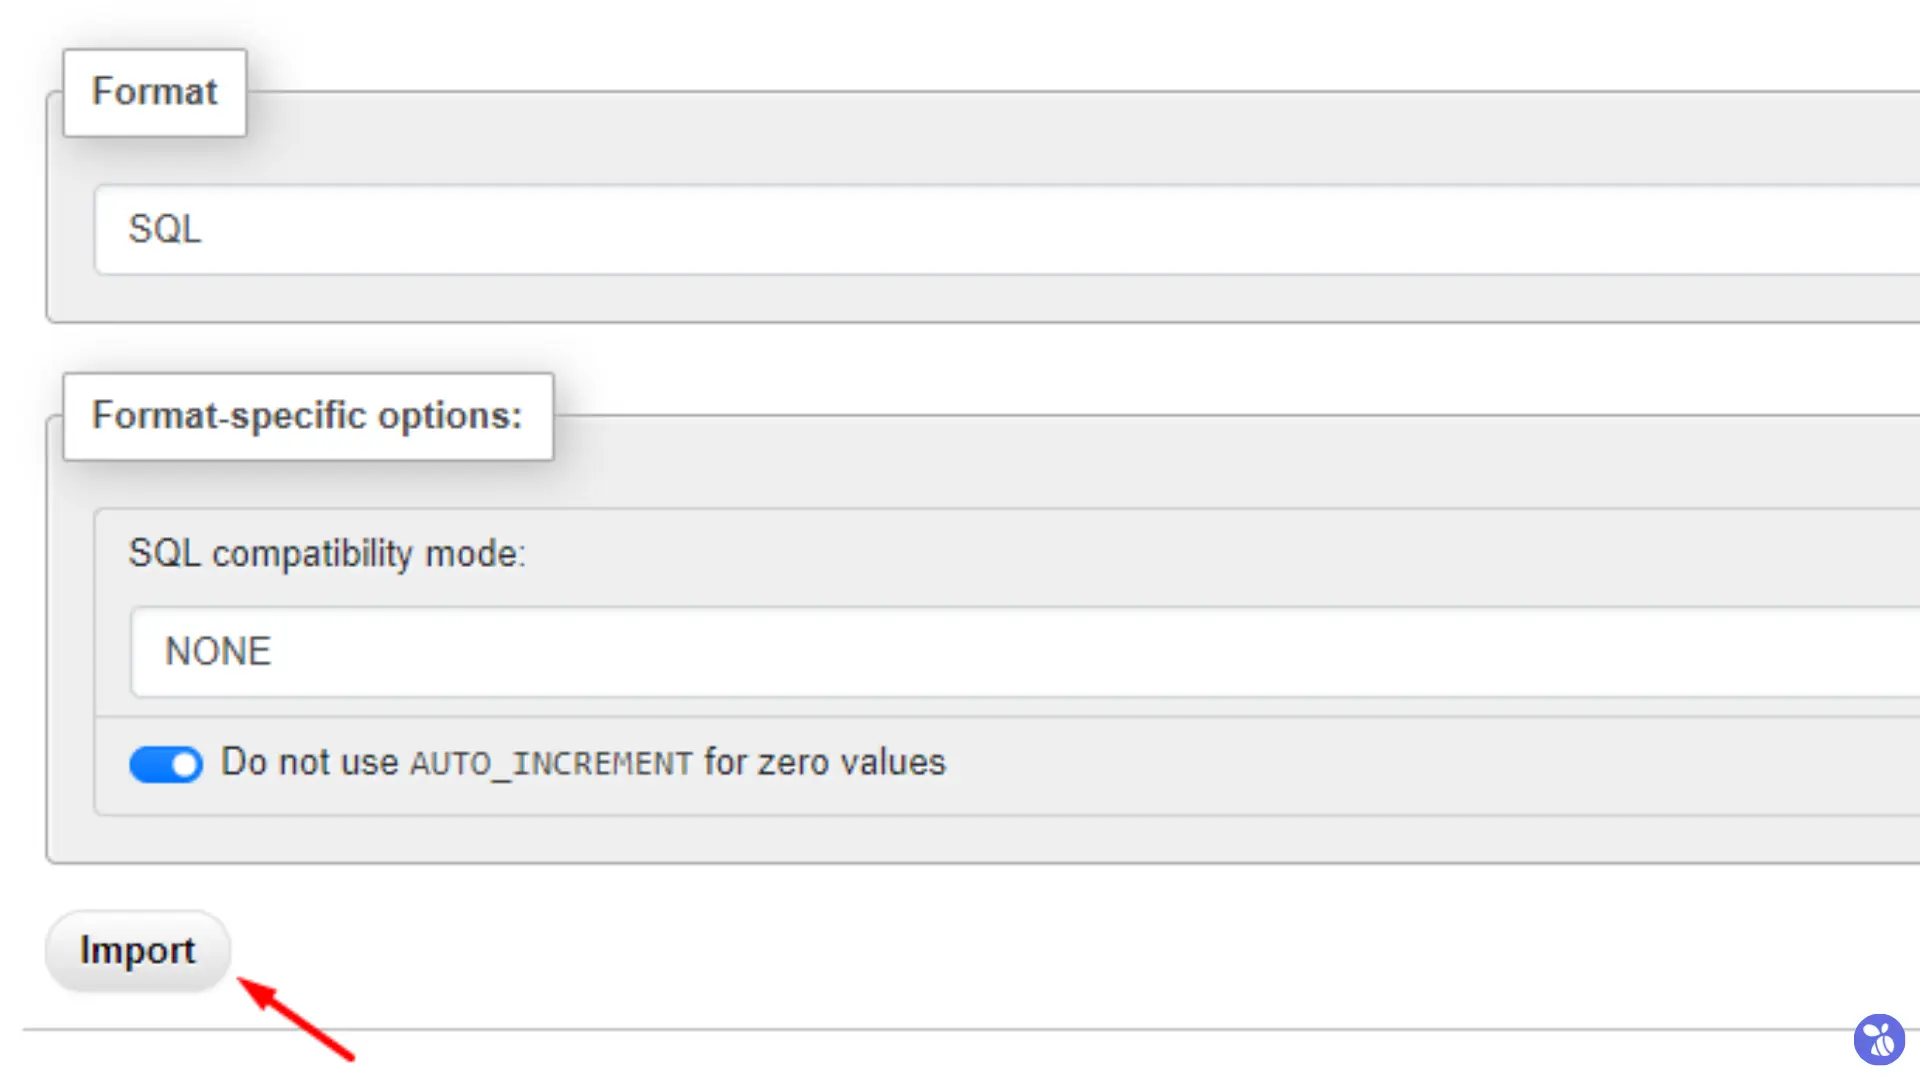
- Once the import is complete, you should see a message indicating a successful import.
- Return to the File Manager in cPanel or DirectAdmin and open the
wp-config.phpfile in your website’s root directory.
- Update the database name, username, and password to match the new database you just imported:
define('DB_NAME', 'user_newdb'); // Replace with actual database name
define('DB_USER', 'user_newuser'); // Replace with actual database user
define('DB_PASSWORD', 'password'); // Replace with actual database password
- Save and close the
wp-config.phpfile.
Finalizing the Restoration
After restoring both your website files and database, and updating your configuration files, your website should be up and running.
Automating Backups
Manually backing up your site on a regular basis can be time-consuming and prone to human error. That’s why automating the process is one of the best ways to ensure your data is consistently protected.
Being TheBeeHost customers, you can also take advantage of our free JetBackup service, which automates backups and allows you to easily restore your website with just a few clicks. This service is available to all clients, automatically creating regular backups of your website and storing them off-site, ensuring that your data is safe even if there’s an issue with your server.
You can follow this guide to restore TheBeeHost’s free generated backups for more information on using this service.
With automated backups in place, you can rest assured that your data is being consistently safeguarded without the need for constant manual intervention.
Storing Backups Off-Site (Cloud or External Drive)
Equally important as taking regular backups is storing them in a secure, off-site location. Relying solely on your website’s server or hosting provider for backup storage is risky. If your server experiences a failure, or if there’s a security breach, your backups could be compromised as well.
To prevent this, it’s best practice to store backups off-site, either on a cloud storage service like Google Drive, Dropbox, or Amazon S3, or on an external hard drive. By storing backups off-site, you ensure that they remain safe and accessible, even in the event of a total server failure or a hacking incident.
Final Thoughts
When it comes to backing up your WordPress website, there’s no one-size-fits-all solution. Your backup method should reflect the unique needs of your site. Having regular, automated backups that are securely stored off-site can save you from the irreversible damage caused by data loss, cyberattacks, or technical errors. With a solid backup strategy in place, you can safeguard your WordPress website from unexpected issues and keep your online presence secure.
Thank you for taking the time to follow this guide. If you encounter any issues or need further assistance, our TheBeeHost Technical Support team is always here to help. Feel free to reach out to us, and we’ll ensure your website remains safe, secure, and fully operational.