Email forwarding is a feature that automatically redirects emails sent from one email address to another specified address. For example, if you have multiple email addresses such as [email protected] and [email protected], you can forward all incoming emails to a single address like [email protected]. This makes it easier to manage your communications from one central inbox.
It is an invaluable tool for anyone managing multiple email addresses, allowing you to consolidate your communications, ensuring you never miss important messages and enhancing privacy by protecting your email using forwarding addresses.
In this guide, we’ll walk you through the steps to set up email forwarding for your domain.
Setting Up Email Forwarding For Your Domain
To set up email forwarding for your domain on TheBeeHost, you need to follow these steps:
Step 1: Configure DNS Records
Before setting up email forwarding, you need to configure the necessary DNS records for your domain so that your email forwarding service is correctly routed.
1. Log in to your TheBeeHost account.
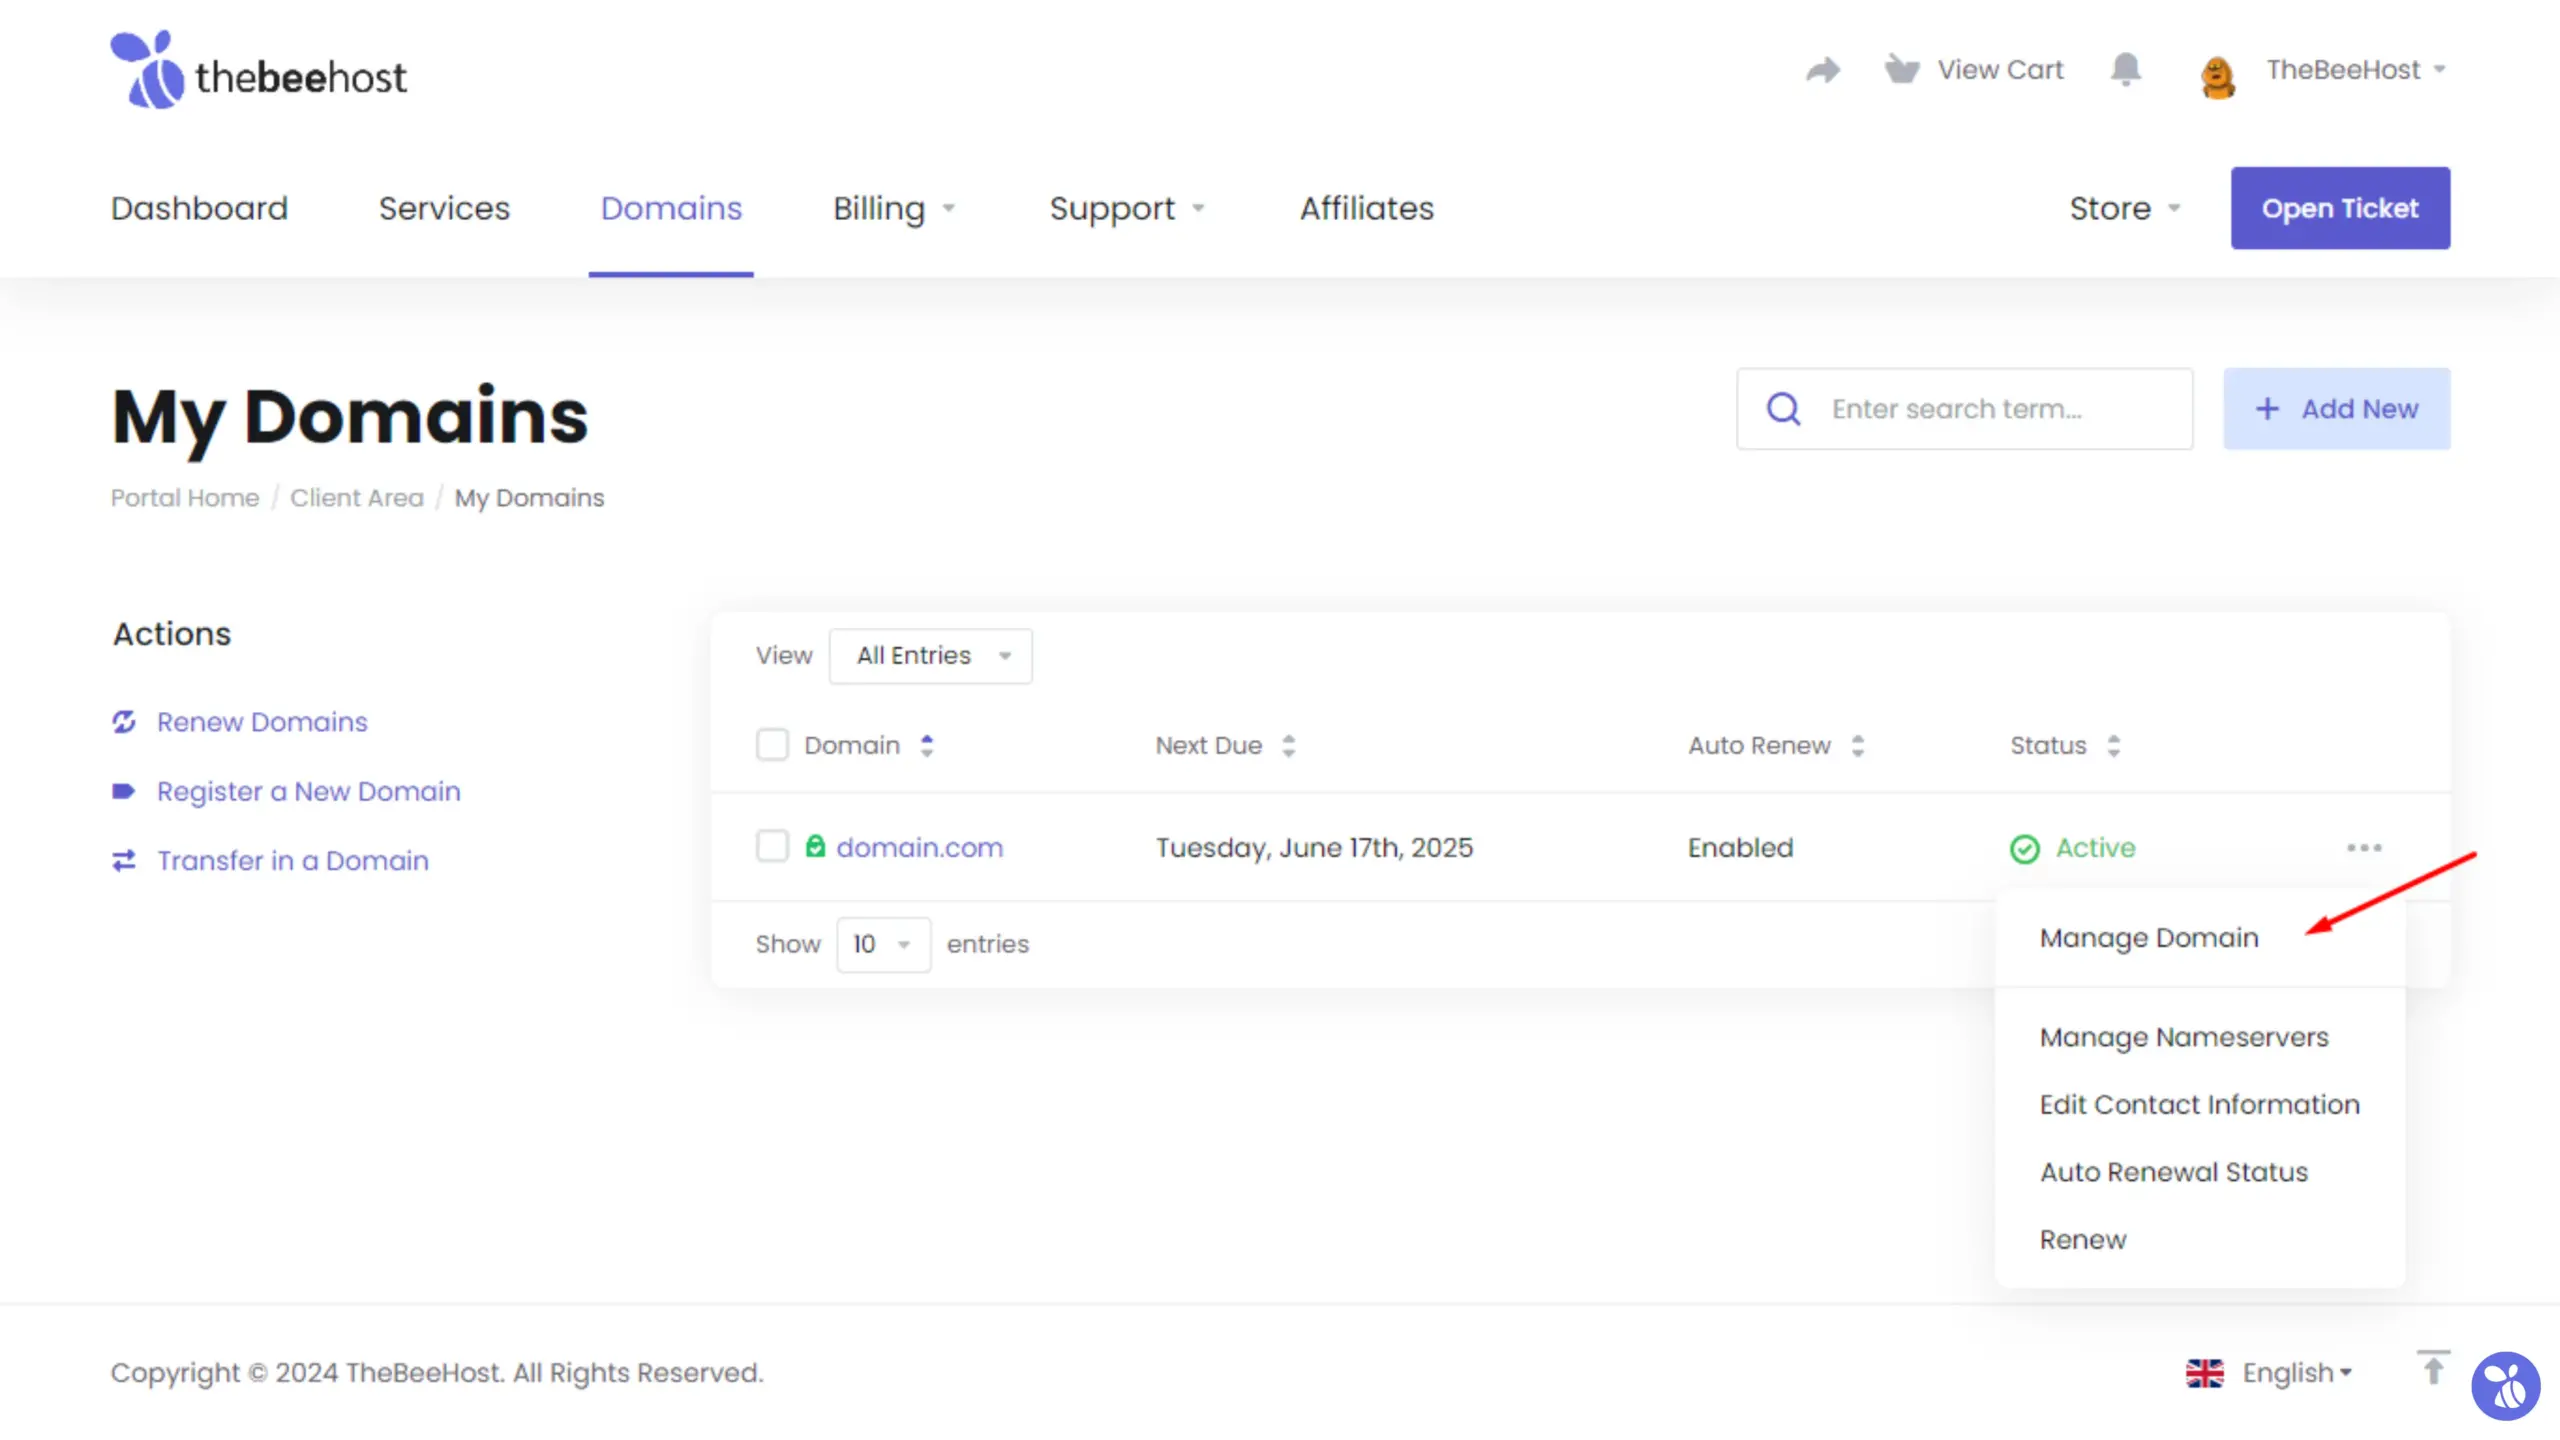
2. Navigate to the “Domains” tab, click on the ellipses (three dots) next to the domain name and select “Manage Domain” from the dropdown menu.
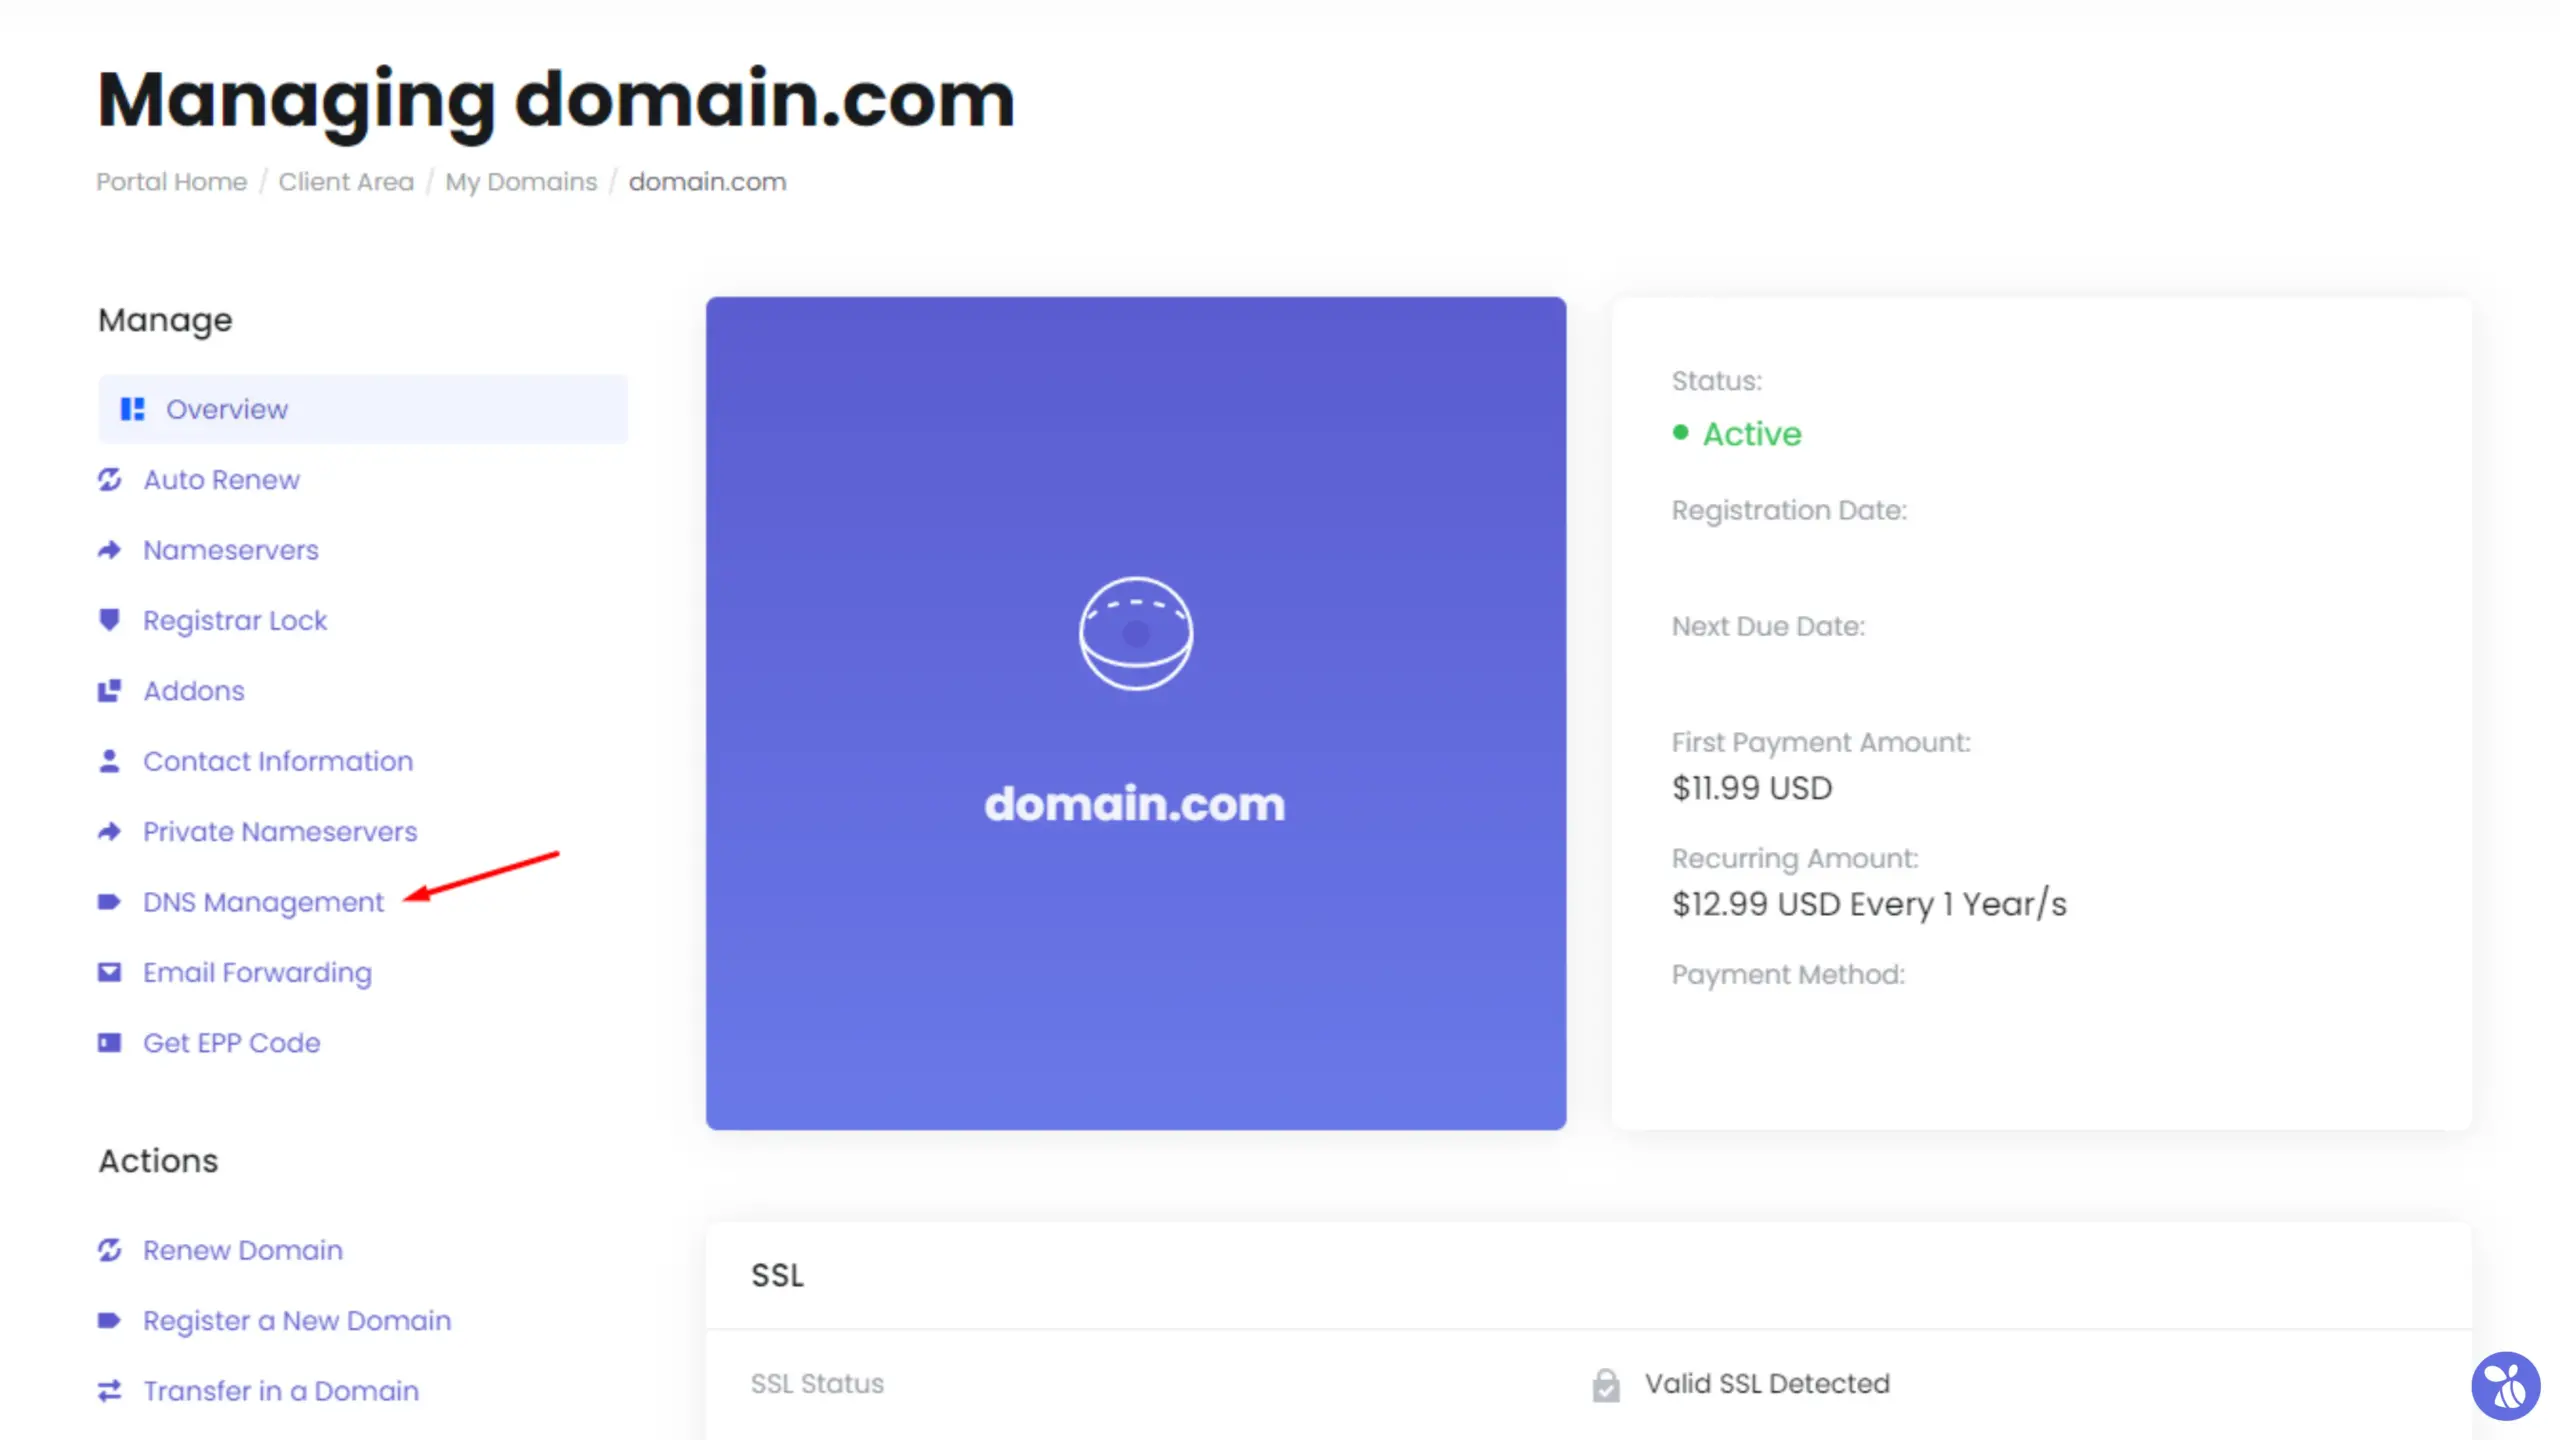
3. In the domain management section, click on “DNS Management” on the left sidebar.
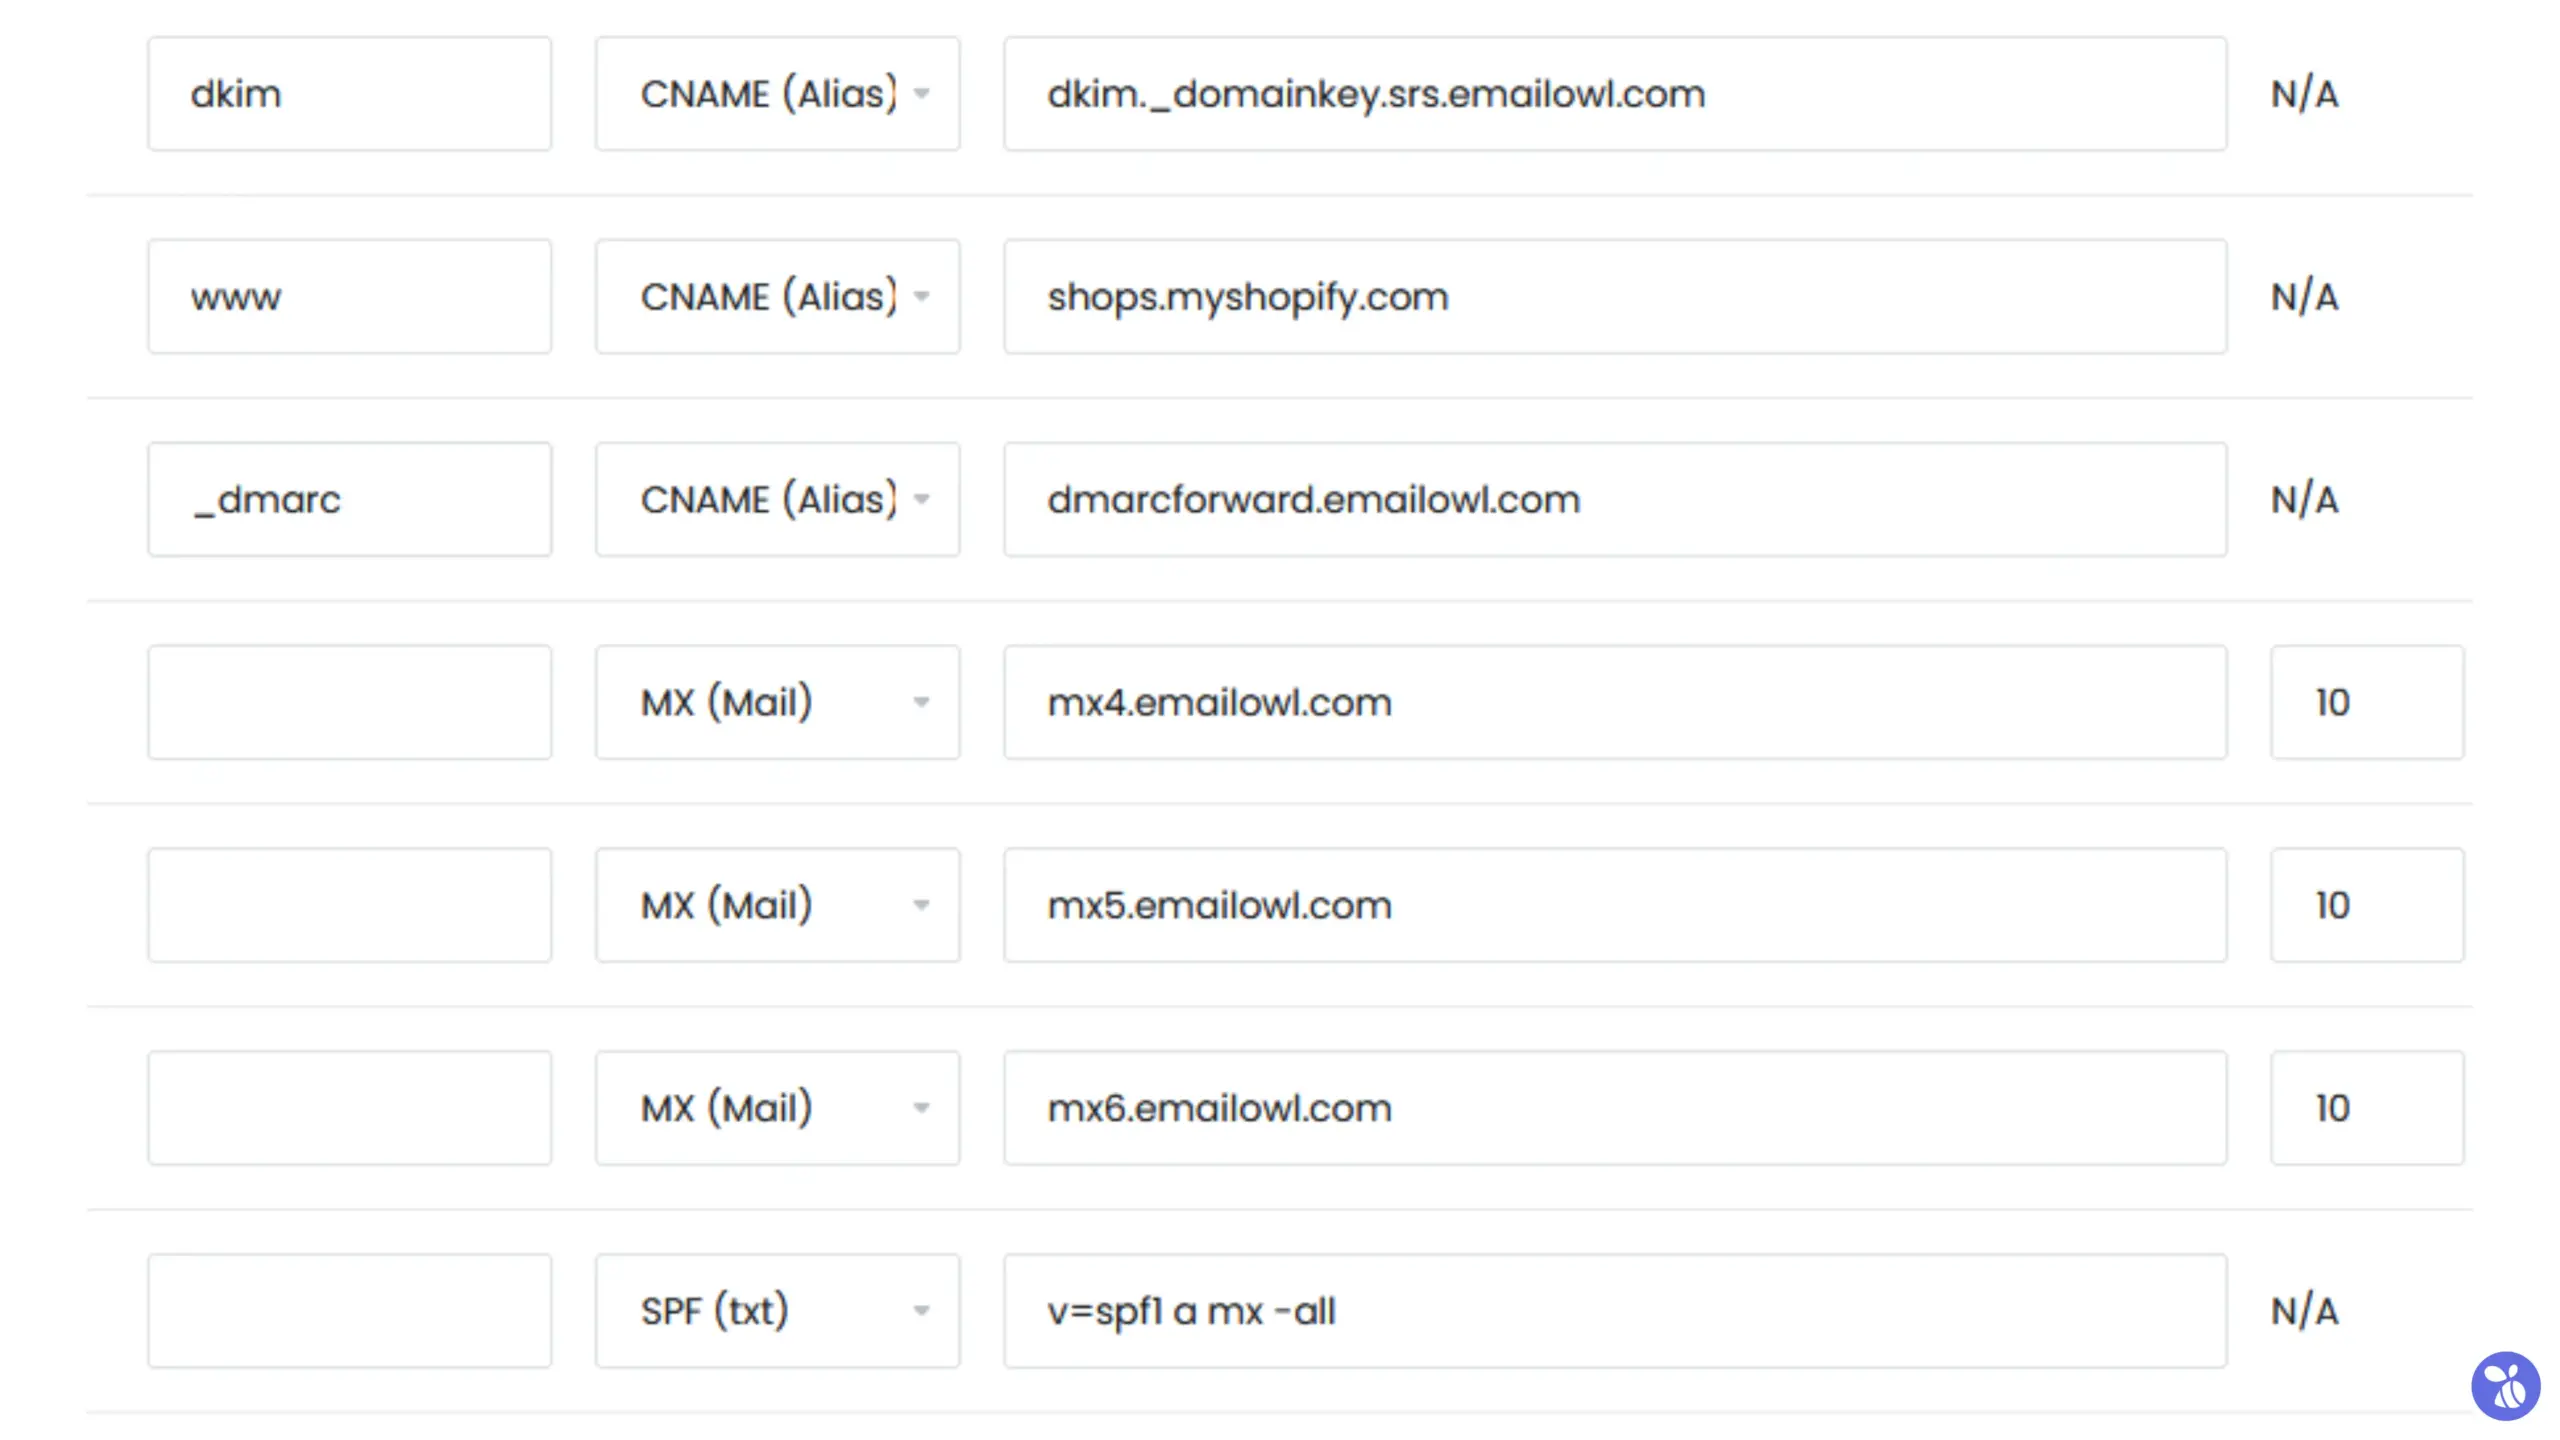
4. Add the following records to ensure proper email forwarding:
MX Records
| Hostname | Address/Value | Priority |
| mx4.emailowl.com | 10 | |
| mx5.emailowl.com | 10 | |
| mx6.emailowl.com | 10 |
CNAME Records
| Hostname | Address/Value |
| _dmarc | dmarcforward.emailowl.com |
| dkim | dkim._domainkey.srs.emailowl.com |
SPF Record
| Hostname | Address/Value |
| v=spf1 a mx -all |
Note: Leave the “Host” name field blank if using TheBeeHost Client Area DNS Management. For other providers, use “@” or your domain name.
Step 2: Set Up Email Forwarding
Once the DNS records are updated, configure the email forwarding settings:
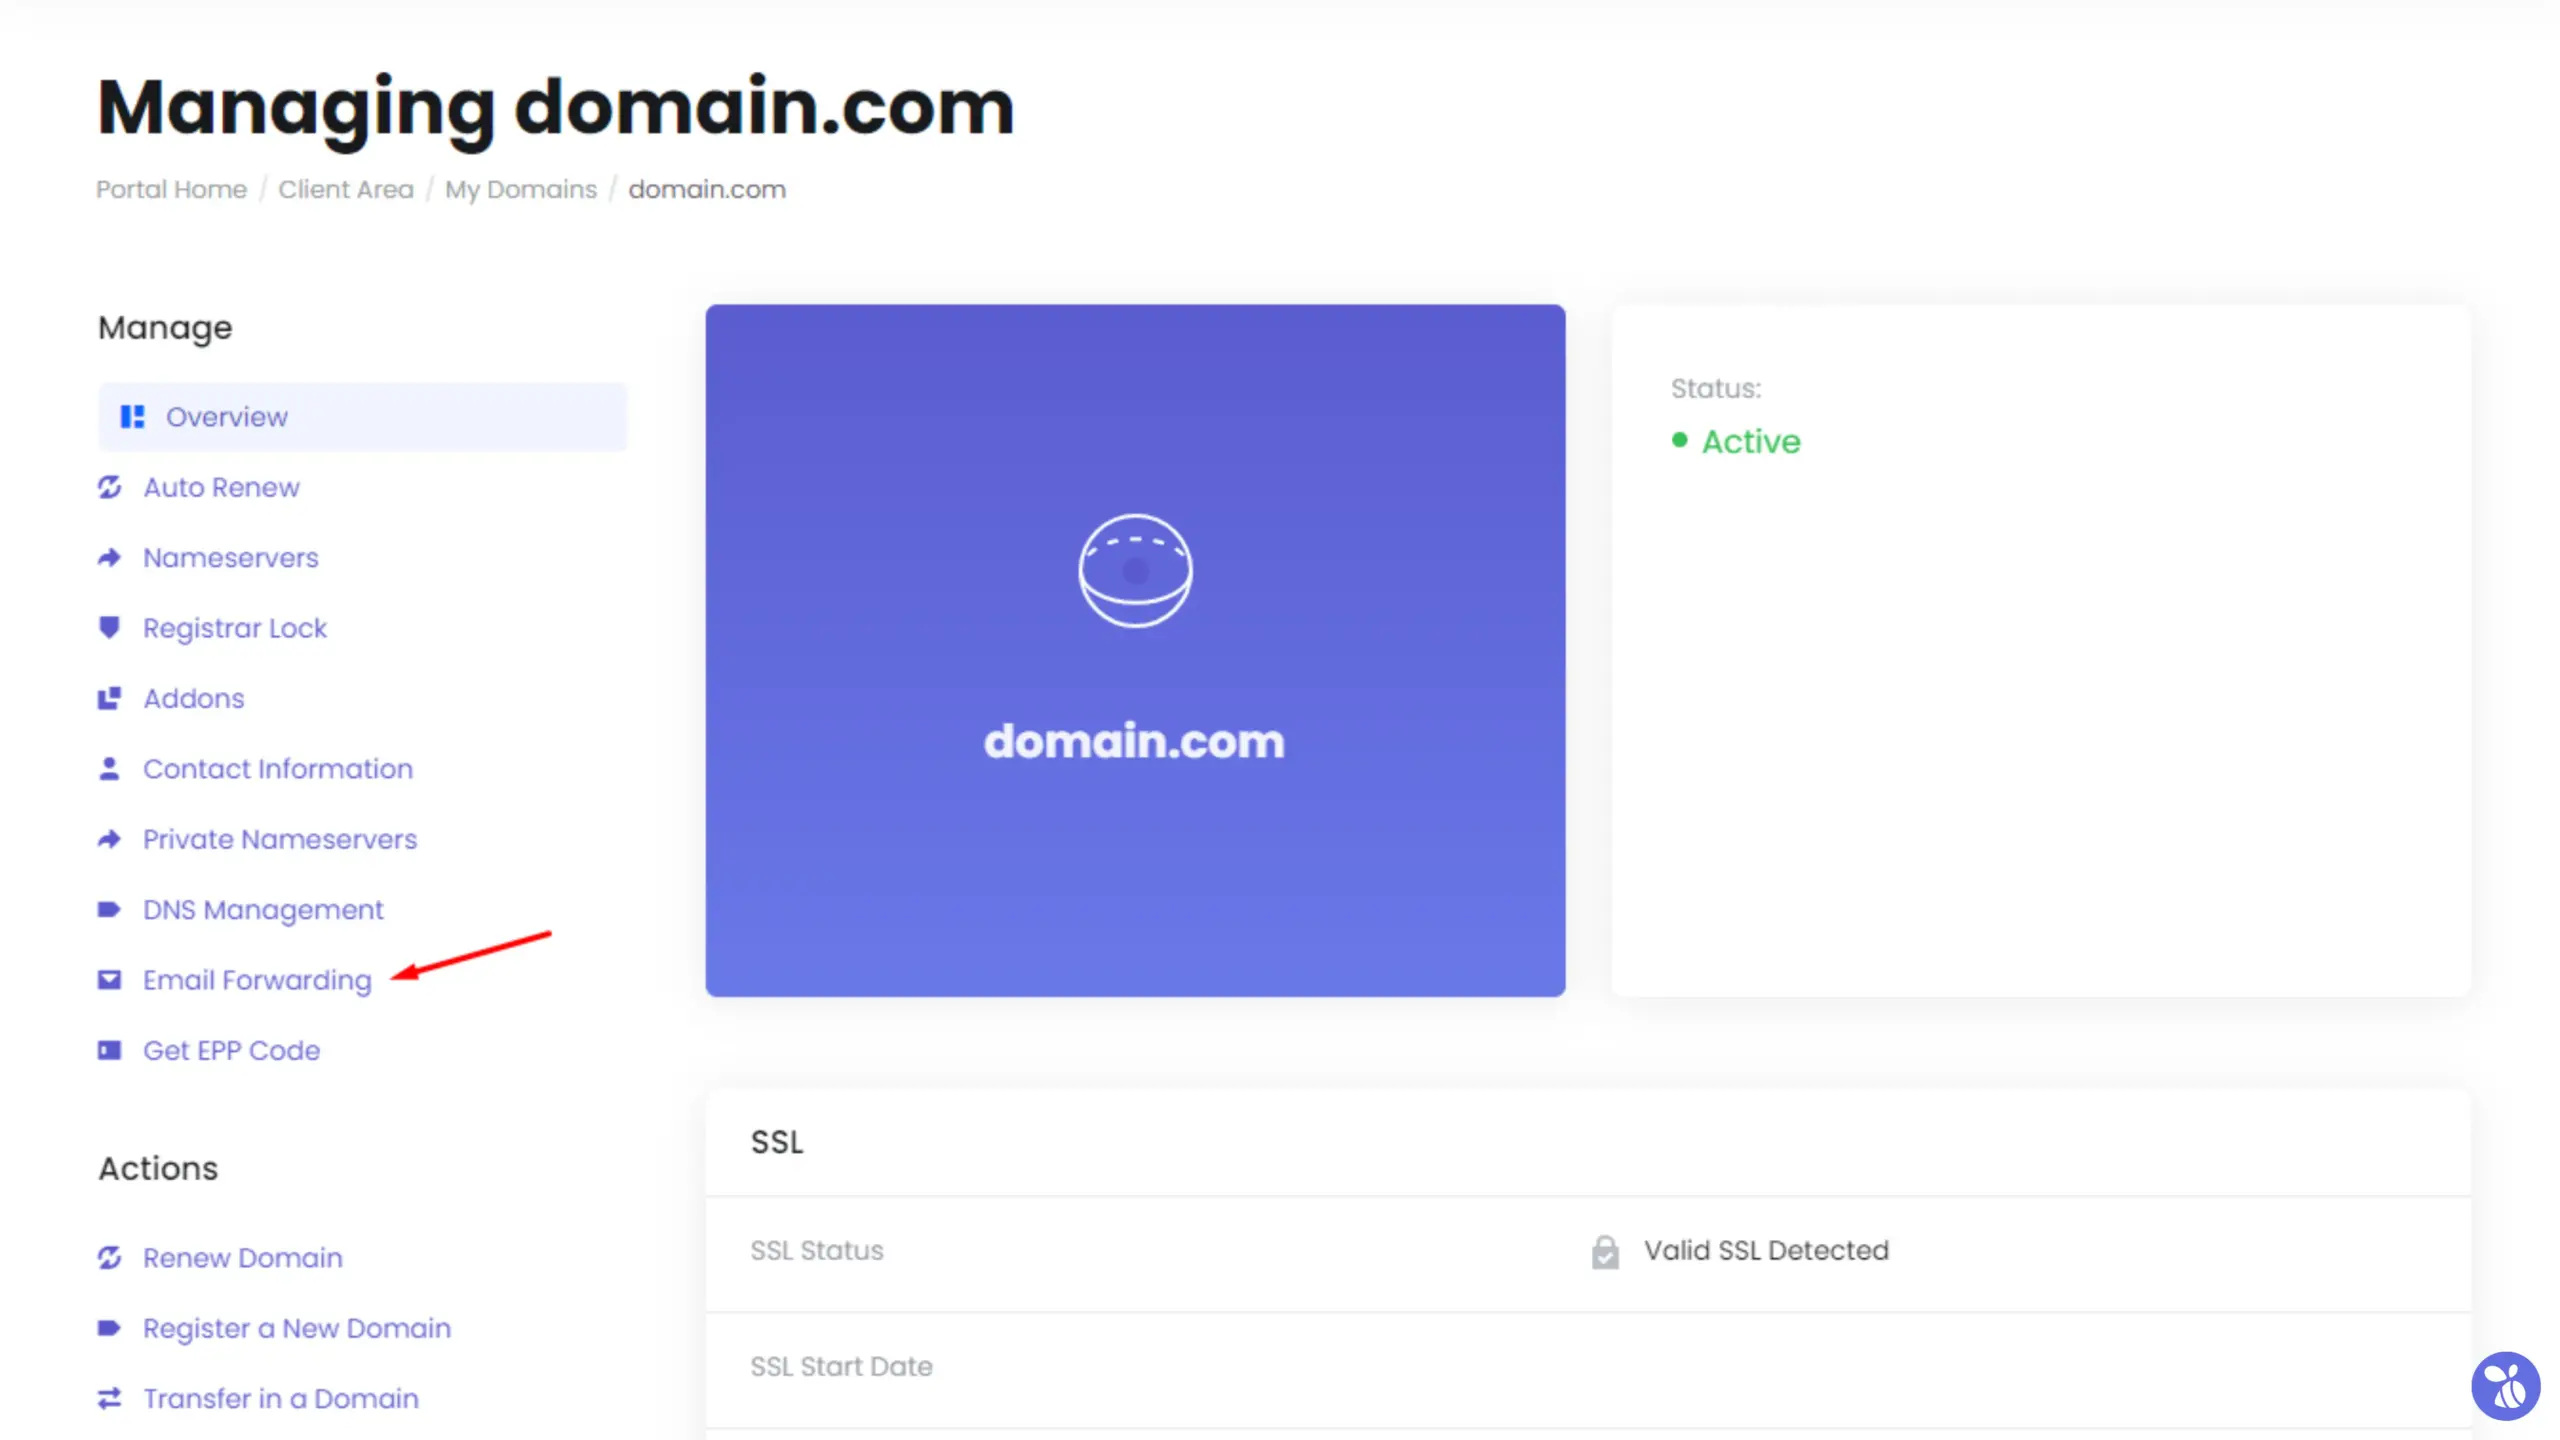
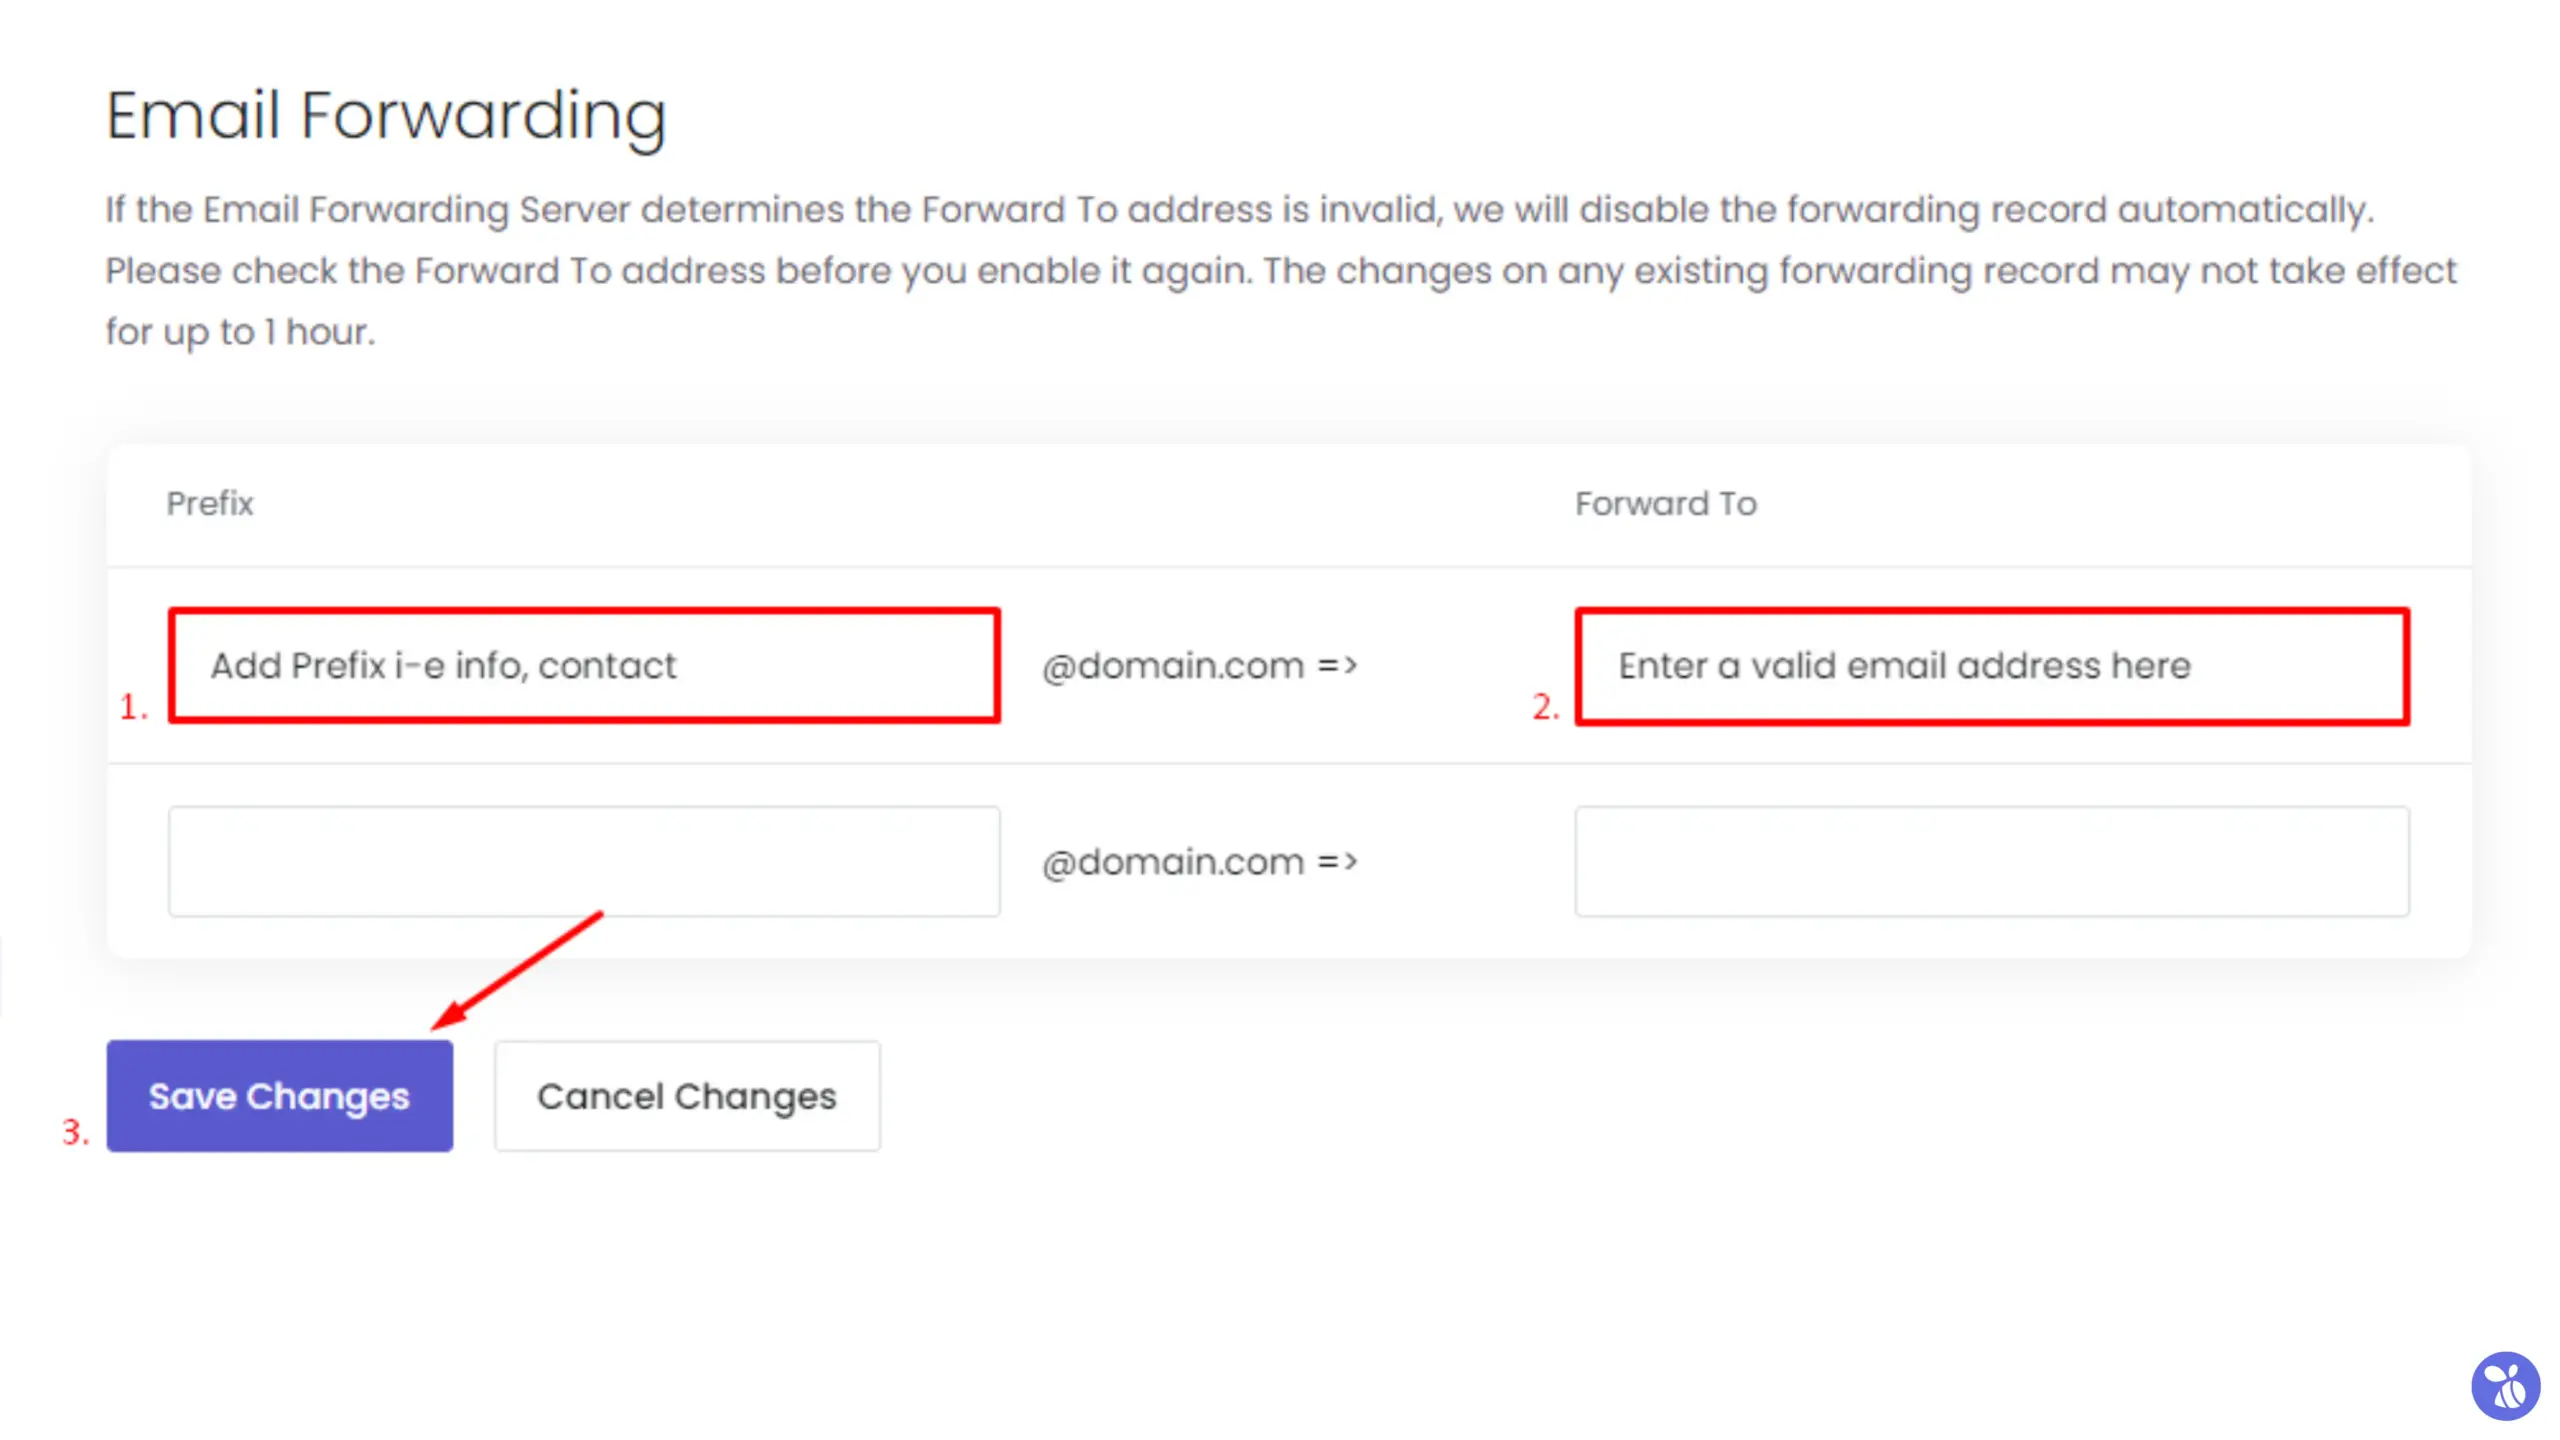
1. Return to the “Domain Management” under the Client Area, and click on the “Email Forwarding” option on the left sidebar.
2. Prefix: Enter the prefix for the email address (e.g., info, contact).
3. Forward To: Enter the destination email address where emails should be forwarded (e.g., [email protected]) and save the changes.
Example:
 Once you’ve set up the forwarder, please allow up to 1 hour for your virtual email account to be configured on the domain’s registrar server.
Wrapping It Up
By following this guide, You can easily set up email forwarding for your domain. This process ensures that you can manage all incoming emails efficiently, regardless of where they are originally sent. Remember to verify the correct configuration of DNS records and allow sufficient time for activation. With this setup, you can streamline your email communications and ensure that important messages are never missed.
If you encounter any issues during the process, please reach out to TheBeeHost Technical Support Team for assistance.