Connecting a domain to your hosting account is simple and involves just two steps:
- Update Nameservers:
- Update your hosting account’s nameservers in your domain settings. This directs your domain to your hosting server.
- Add Your Domain to the Hosting Control Panel:
- Add your domain through your hosting control panel.
Why Update Nameservers?
Updating nameservers tells the internet where to find your website’s hosting location. It ensures that when someone enters your domain name in their browser, they are directed to your hosting server.
Special Instructions for PK Domains
For PK domains (e.g., .pk or .com.pk), DNS/NS management must be done from the system core. Please open a support ticket. Our billing team will handle it for you, but it may take some time depending on the volume of tickets.
Updating Nameservers
If you have chosen TheBeeHost Web Hosting Company for registering your domain, you’ll have complete control over your domain and DNS for all domain TLDs except for .PK , .COM.PK domains.
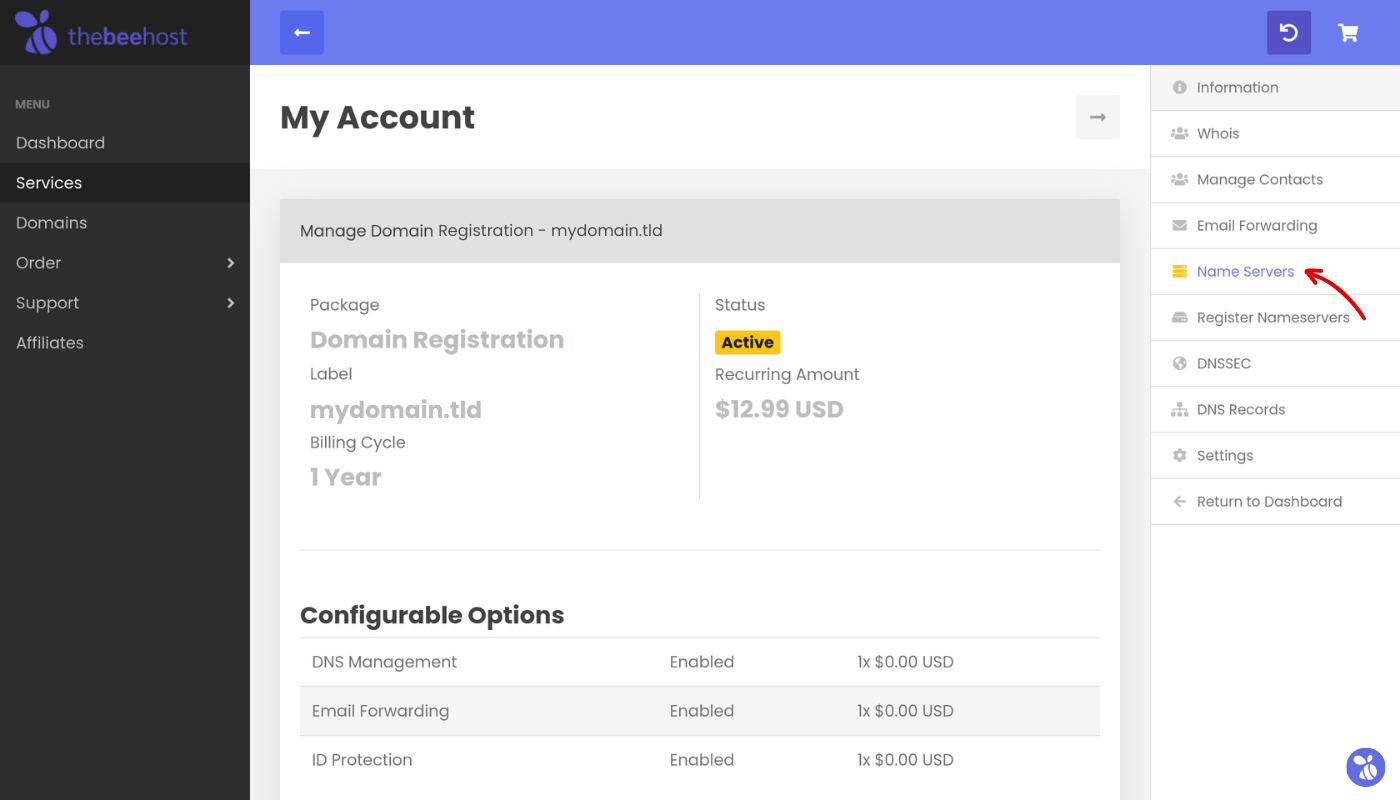
To update the Nameservers for your domain in TheBeeHost, follow these steps:
1. Log in to TheBeeHost’s Client Portal using your registered email and password.

2. Once logged in, navigate to the “Domains” section.

3. Click on the “Manage” button next to the domain that you’d like to manage.

4. Look for the “Nameservers” option located on the right sidebar to access the Nameservers management section.
5. In the Nameservers section, you should see the current Nameservers associated with your domain.
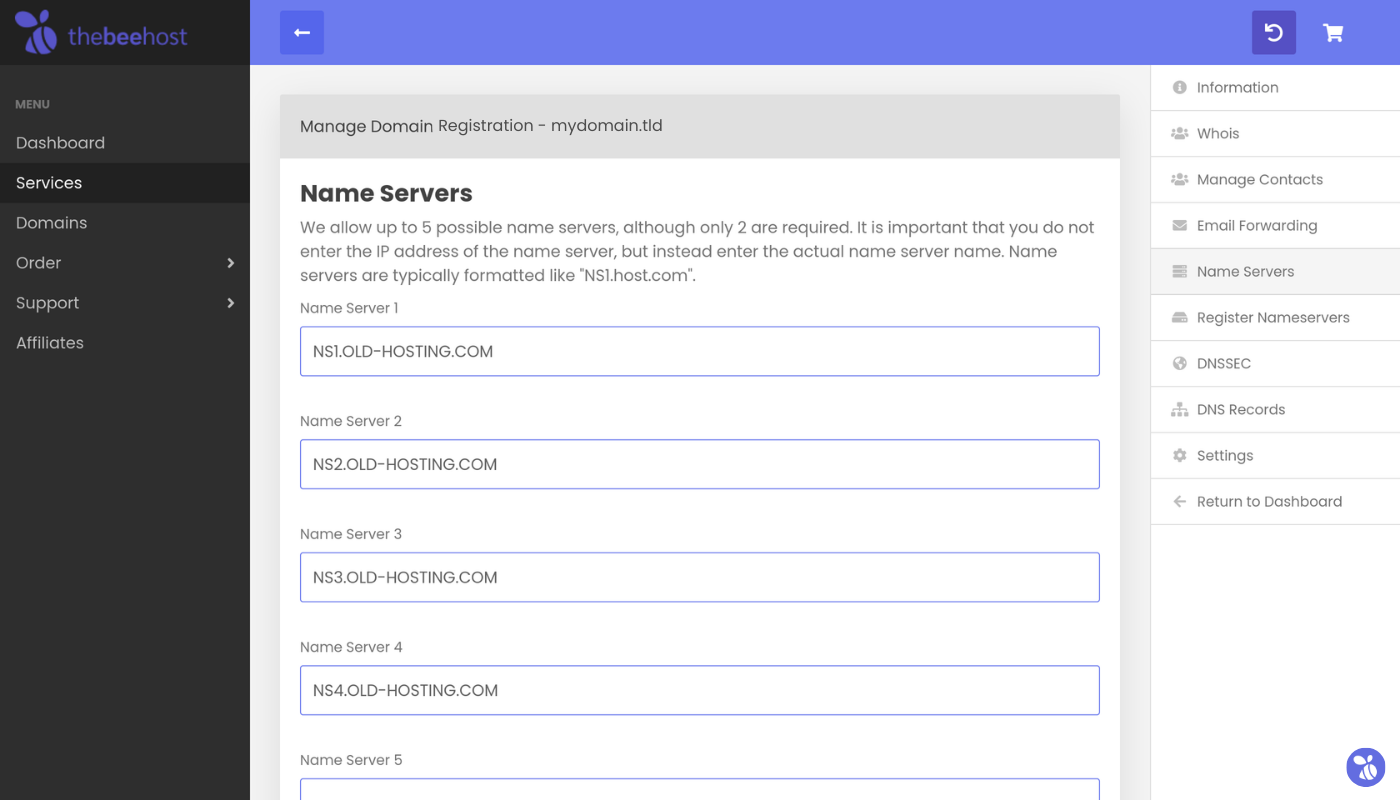
6. Replace the existing Nameservers with the new ones provided by your web hosting provider.
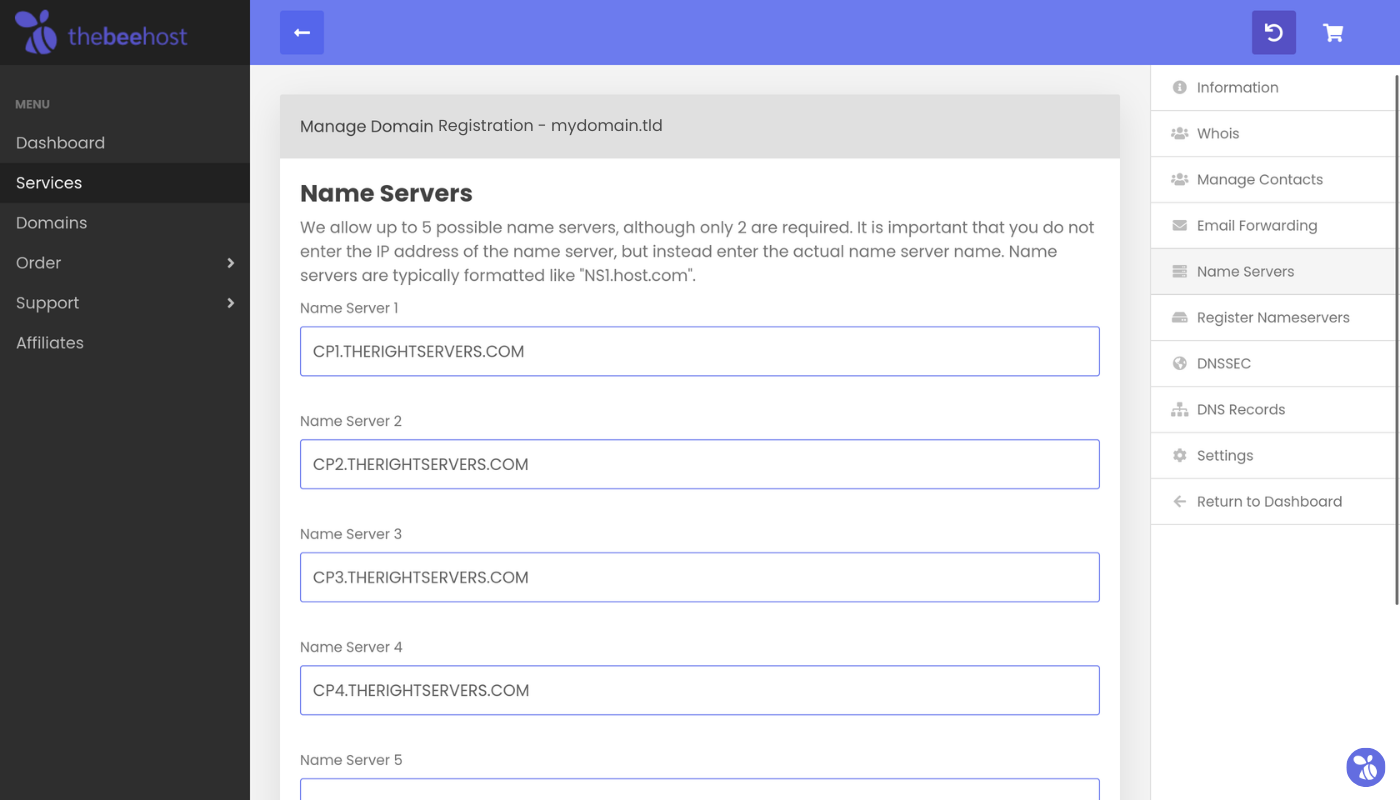
7. Save the changes by clicking on the Update Nameservers button or confirming the update. After updating the Nameservers, your domain will start pointing to the new hosting provider.
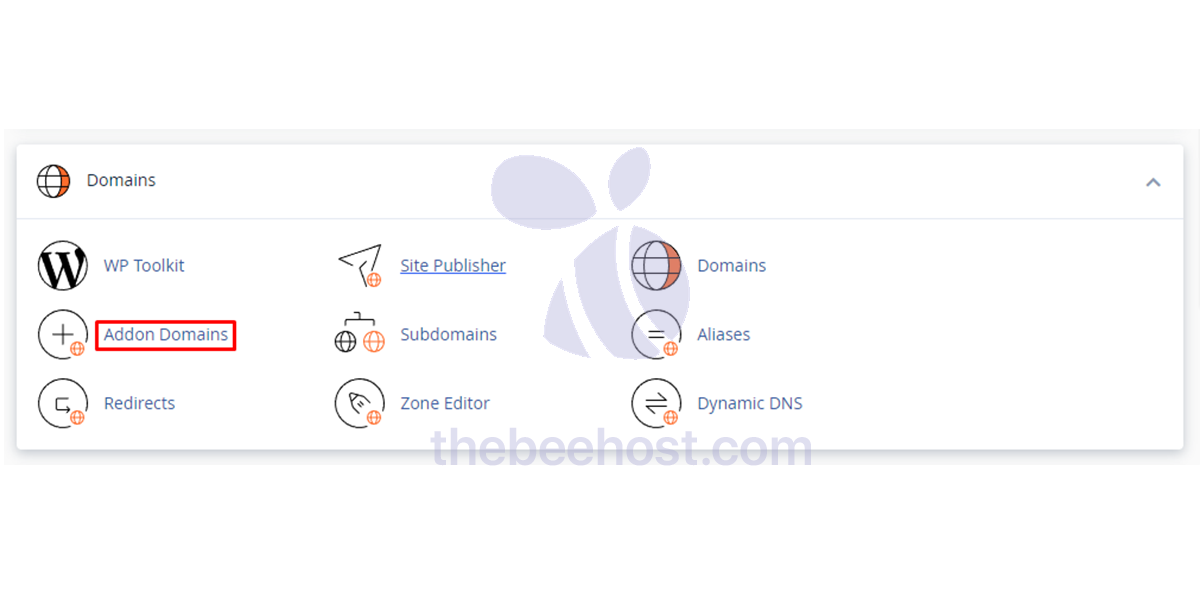
Add domain in Hosting Control Panel ( cPanel / DirectAdmin ).
cPanel
Log in to cPanel
First, Log in to cPanel whichever method you would like. ( via Client Area or Manually)
Scroll down to the Domains section and click on Addon Domains.
Addon Domains Tool is missing from cPanel?
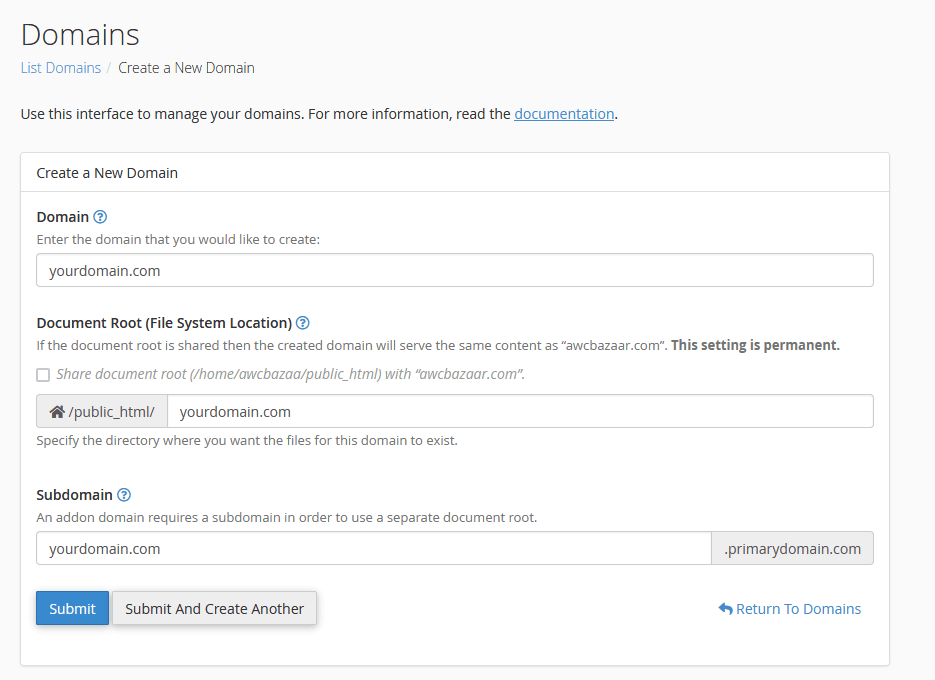
As of cPanel version 106 and beyond, the process to add a domain has been slightly modified. So, if you are unable to find Addon Domains. You should get into Domains ⇒ Create a New Domain.
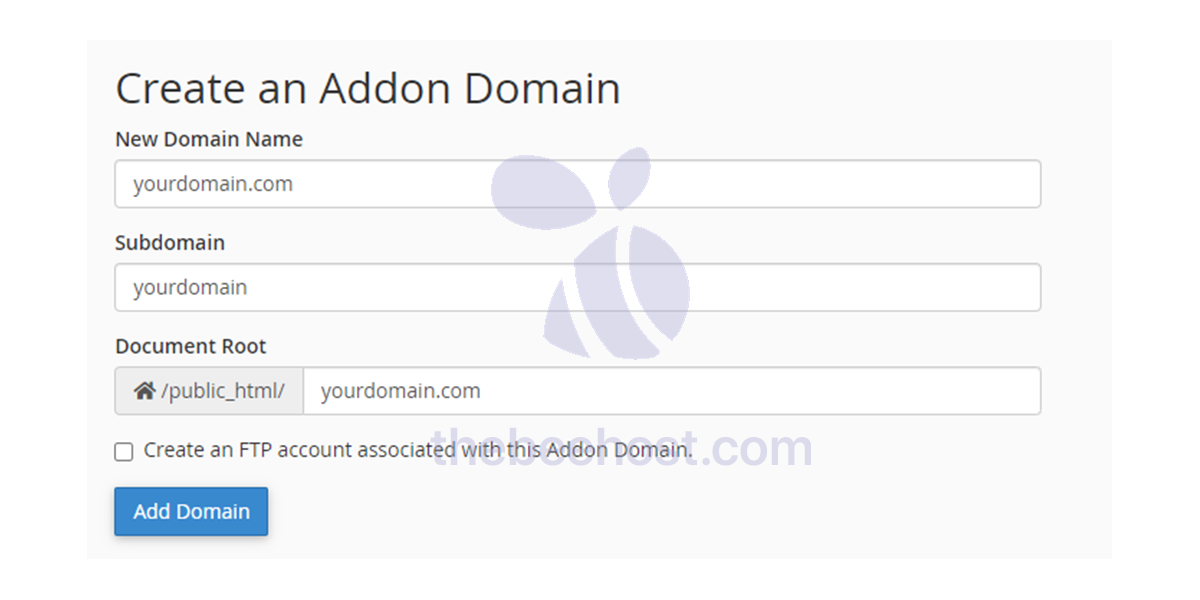
Adding domain
Type the domain name you want to add in the New Domain Name field. The other fields, such as the Subdomain and Document Root, will be automatically generated by cPanel based on the domain name you enter. If you want to use a different directory for the addon domain, you can customize that field.
Before cPanel 106 version release
cPanel ⇒ Domains ⇒ Addon Domains
In cPanel 106 and later version release
cPanel ⇒ Domains ⇒ Domains ⇒ Create a New Domain
FTP Account ( Optional )
It is not mandatory to check the “Create an FTP account associated with this Addon Domain” option when adding an addon domain in cPanel.
This option simply allows you to create a separate FTP account for the new domain, which can be useful if you want to give someone else access to the files on that domain without giving them access to your main cPanel account.
If you do not need a separate FTP account for the new domain, you can leave this option unchecked. However, if you do want to create an FTP account for the new domain, make certain to enter a password in the “Password” field before clicking on the Add Domain button.
Finally, You made it!
If you have encountered any technical errors or issues while performing the above steps. Please feel free to reach out to our TheBeeHost Technical Support team.
Stay blessed and Happy hosting journey with TheBeeHost!