This article mainly focuses on restoring Backups that we have generated on a daily/weekly basis for users as per our Backup Policy & must check the Terms and conditions.
Jetbackup is Linux-based software that is installed all over Hosting Servers whether the control panel is cPanel or DirectAdmin, you will find Jetbackup in both. Now, we should move to other aspects of the article.
At TheBeeHost, we understand the importance of safeguarding your valuable data.
While we always encourage our clients to take proactive measures and create backups on their own, we recognize that unexpected situations can arise. That’s why we offer JetBackup as a safety net for those who may have forgotten to back up their data or encountered issues with their existing backups. With JetBackup, you can rest assured that even in dire situations, there’s a last line of defense to restore your crucial information.
Why I didn’t take a backup manually, I lost my data!
The phrase “Why I didn’t take a backup manually, I lost my data.” often resonates as regret when data loss strikes.
Taking that extra step to manually create backups can prevent future remorse. Being proactive by consistently backing up your data ensures that you won’t find yourself in a situation where you’re left wishing you had taken that precaution. Embrace the opportunity to safeguard your information and avoid potential regrets down the line.
Ultimately, you can have the last hope from TheBeeHost Free Backup. But we don’t say that, skip the manual backup on our own and completely rely/depend on our Backups.
Can I restore TheBeeHost Free Backups without Submitting Tickets?
Absolutely! At TheBeeHost, we strive to make the process of restoring your free backups as seamless and efficient as possible. You no longer need to go through the hassle of submitting support tickets to initiate a backup restoration. We’ve implemented a user-friendly self-service approach to empower you with control over your backups inside your Hosting Control Panel.
Let’s start with how you can restore your free backups without the need to submit tickets.
1. Log in to your Hosting Control Panel (cPanel/DirectAdmin).
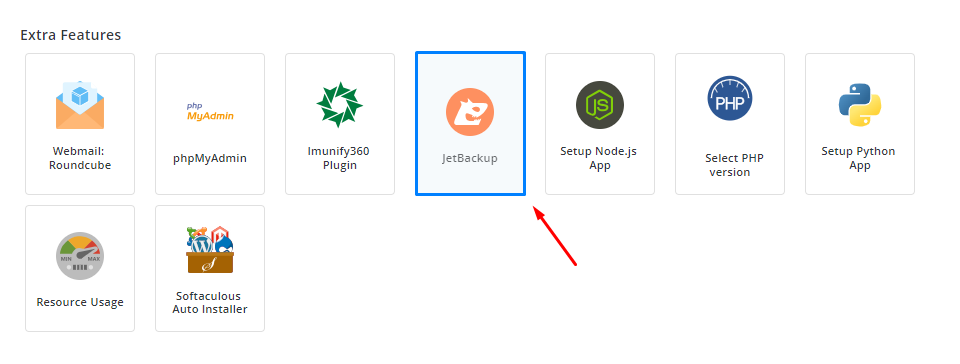
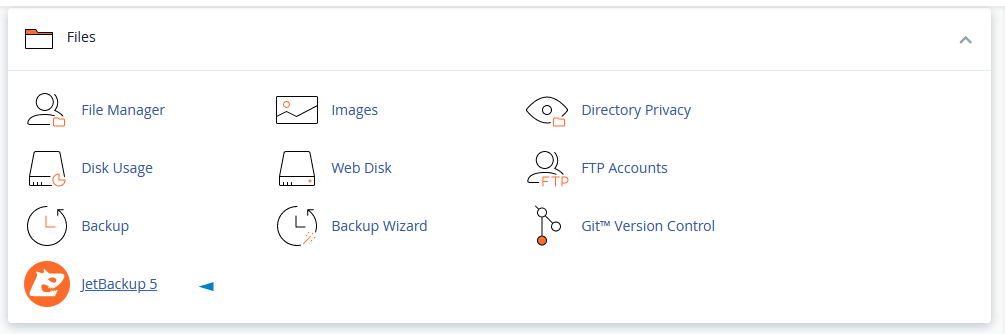
2. In DA, the Jetbackup Tool is located under the Extra Features section. On the other hand, it’s located within the Files Section of cPanel.
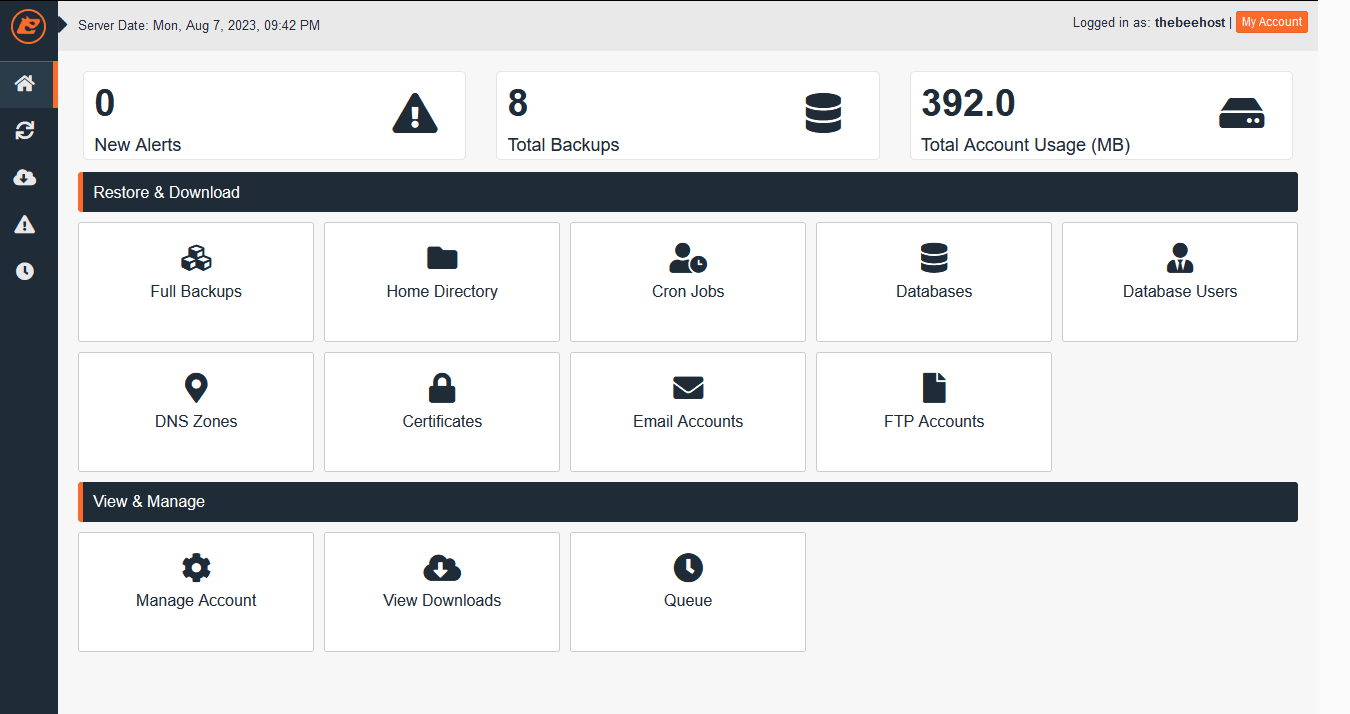
3. Inside the JetBackup Tool interface, you’ll find a range of powerful options for managing your backups and ensuring data security. Let’s explore each section:
Top Section:
- New Alerts: Stay informed about backup activities and important events.
- Total Backups: Number of backups you have.
- Total Account Usage: Monitor your storage space usage.
Restore & Download:
- Full Account Backups: Revert your entire account to a previous state or a backup date.
- Home Directory: Restore specific files and folders. (In the case of WordPress, restore the previous state/version of the plugin and theme )
- Cron Jobs, Databases, Database Users, DNS Zones, Certificates, Email Accounts, FTP Accounts: Manage and restore specific elements.
View & Manage:
- Manage Account: Inside it you can have only one option Notify me via email.
- View Downloads: Keep track of downloaded backups.
- Queue: Monitor ongoing backup and restore processes.
With these intuitive sections, JetBackup Tool puts you in command, enabling easy restoration and management of your data.
Restoring Full/Entire Account Backup.
Performing a Full Account Restore is like going back in time for your entire account. It brings back everything – your databases, files, folders, email accounts, and more – to a specific backup date that you choose.
But here’s the important part, Before you do this, it’s really smart to have a current data backup ready, just in case. This backup acts as a safety net in case something unexpected happens during the restoration process or somehow the backup you’re going to restore has issues. The fresh data backup will get you back to the previous state from where you intended to move to the last backup.
What are the steps to have a full account backup restored?
In the Jetbackup Tab, Get into Restore & Download ⇒ Full Backups. Select any of the created backups from the list. Click on the “Restore” button. | You may also Download the selected Backup and save it locally for the future.
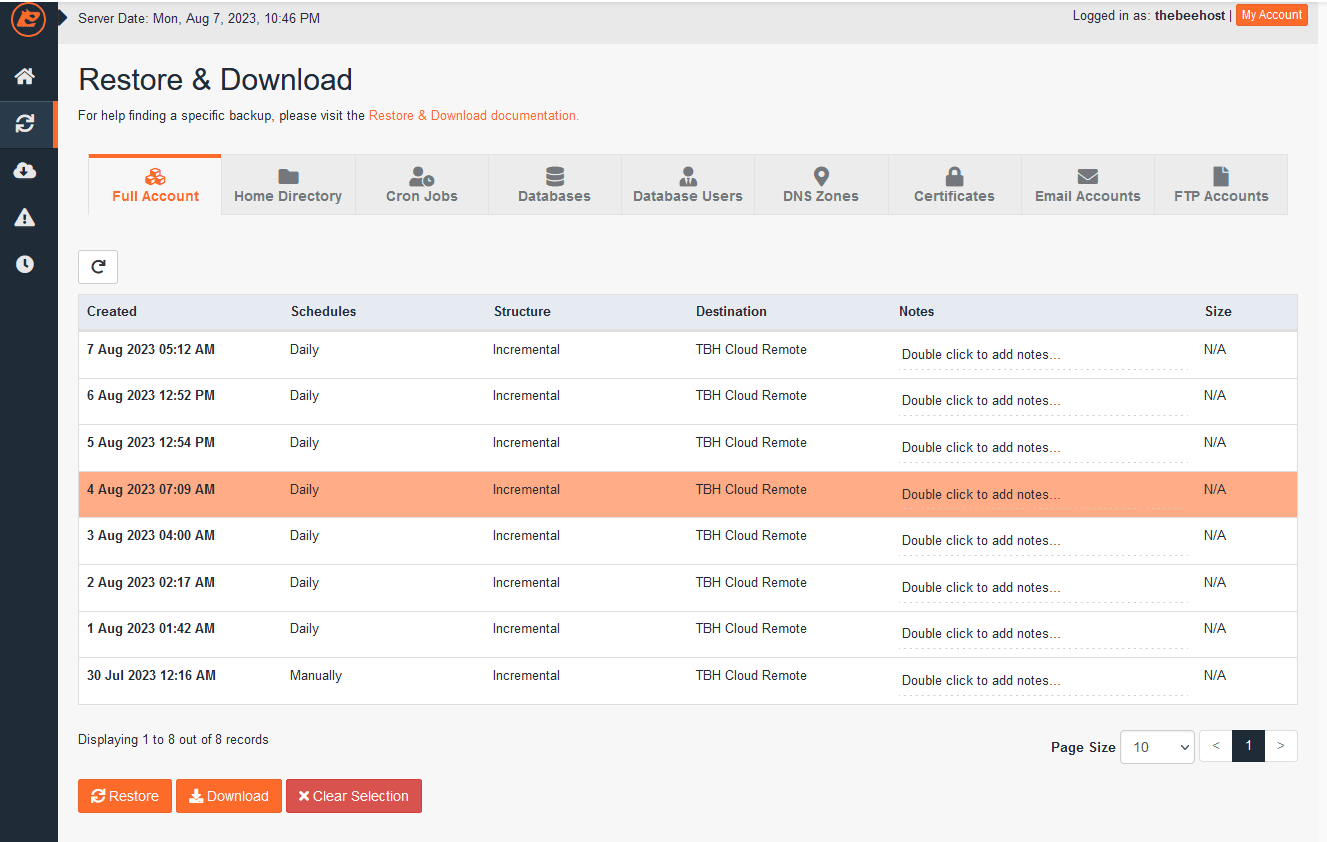
Jetbackup will still give you a chance to skip the item that you don’t like to restore. is it Awesome?
Once the full account restoration started. You may encounter some error as your account is going to full restore which means the root/administrator who received the restoration request will first Terminate or Delete this account and then will restore that selected previous full Account, and get it ready for you. You can close the Windows tab without getting worried about cancellation.

Restoring Files & Directories
Think of this as a superhero power for your website!
It’s here to help beginners who accidentally lose or mess up their website files. Imagine you’re decorating your room (your website), and suddenly your favorite toy (a website file) goes missing or breaks. Oh no!
Well, just like a magical time machine, the “Restoring Files & Directories” option can take you back to a time when everything was perfect. If you lose a file or something goes wrong with it, this tool can bring it back to how it used to be, fixing the problem.
For example, let’s say you’re working on your website, and you accidentally delete an important picture. Without that picture, your website doesn’t look right. But don’t worry! With the restore tool, you can go back to when that picture was still there, and your website will look great again.
This tool is like having a backup friend who can bring back things you thought were lost forever. So, if your website’s stuff ever goes missing or gets messed up, remember this superhero tool. It can save the day and make your website awesome again!
Can I restore only Files or Directories?
For that get into Restore & Download ⇒ Home Directory.
Select any of the created File backups from the list. move on to the restoration process, Hit the “Restore ” button. This step will start the restoration of All Files.
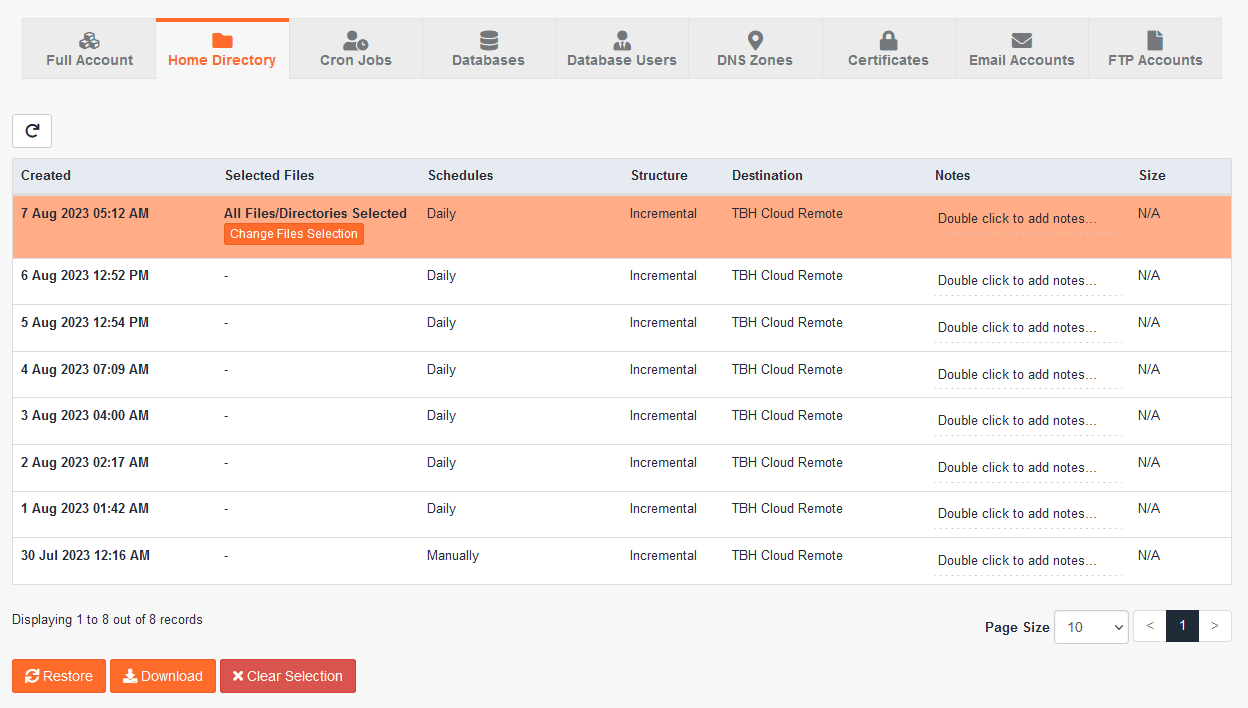
Also, you could choose a specific File or Directory from this type of backup by clicking the “Change Files Selection” button. After that, a new window will pop up. As shown below,
You can enter inside any directory or folder and select your ( plugin, theme, or PHP file ) preferred file, image, or folder recursively.

Restoring various types of backups, including Databases, DataBase_Users, SSL Certificates, and DNS Zones, using Jetbackup is quite straightforward.
Note: During the restoration process. Please hands off, don’t make any changes to your web content, and refrain from using Control Panel.
Becoming a pro at restoring backups with Jetbackup in cPanel, especially with TheBeeHost, is like unlocking a special skill for managing your website. Just by following the steps we’ve talked about in this blog, you can save the day by quickly bringing back lost or broken files. This keeps your website running smoothly without any hiccups.
Think of regular backups and knowing how to restore them as your website’s secret protectors, especially when you’re using TheBeeHost. They keep your site safe and powerful. With Jetbackup and cPanel, you’re in charge, like a superhero who can rescue your website when it needs help.
Got questions or need a hand? TheBeeHost team is here for you. Thanks for reading our guide, and good luck with your website management journey!
