 Are you looking to Connect your domain with Shopify DNS but don’t know how to do it? Don’t worry; you’re in the right place. In this article, we will guide you through the step-by-step process of connecting your domain with Shopify DNS.
If you have registered your domain with TheBeeHost Web Hosting Company, you have full control over your domain and DNS for all domain TLDs except .PK domains. In this article, we will show you how to configure or connect your domain with Shopify through TheBeeHost’s domain panel without contacting the support team.
Please note that if you have a .PK domain, you cannot connect it with Shopify through the domain panel or change nameservers. PK domains require manual configuration through the support team.
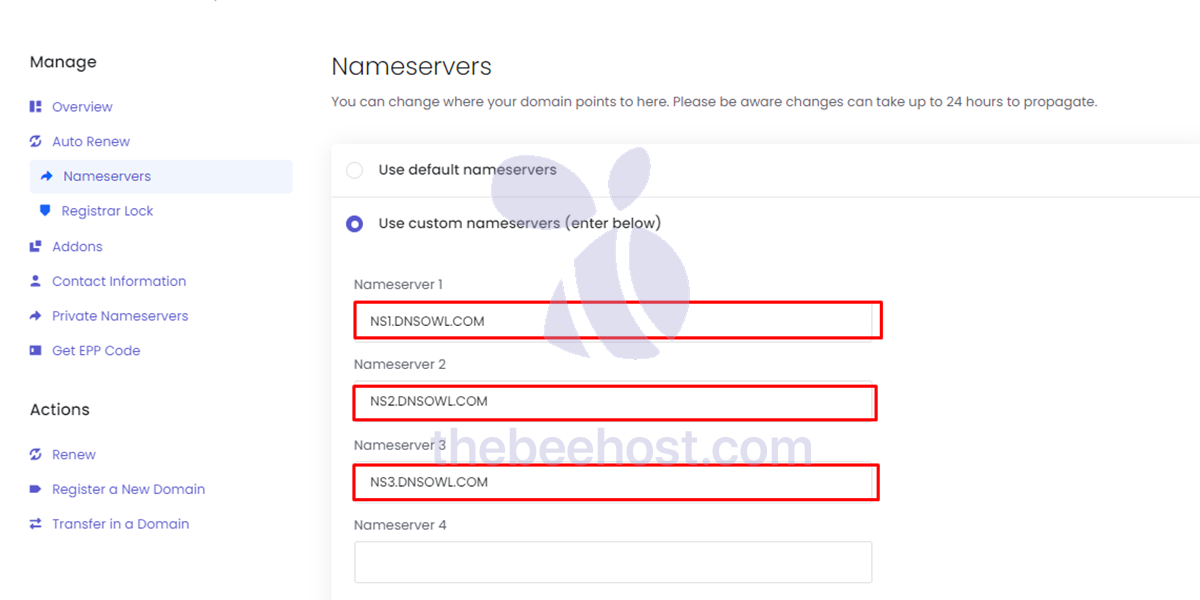
Step 1: Use the Correct Nameservers (Don’t Skip this step)
To connect your domain with Shopify, make sure you are using the following nameservers:
NS1.DNSOWL.COM
NS2.DNSOWL.COM
NS3.DNSOWL.COM
Wait for a few hours for propagation to complete.
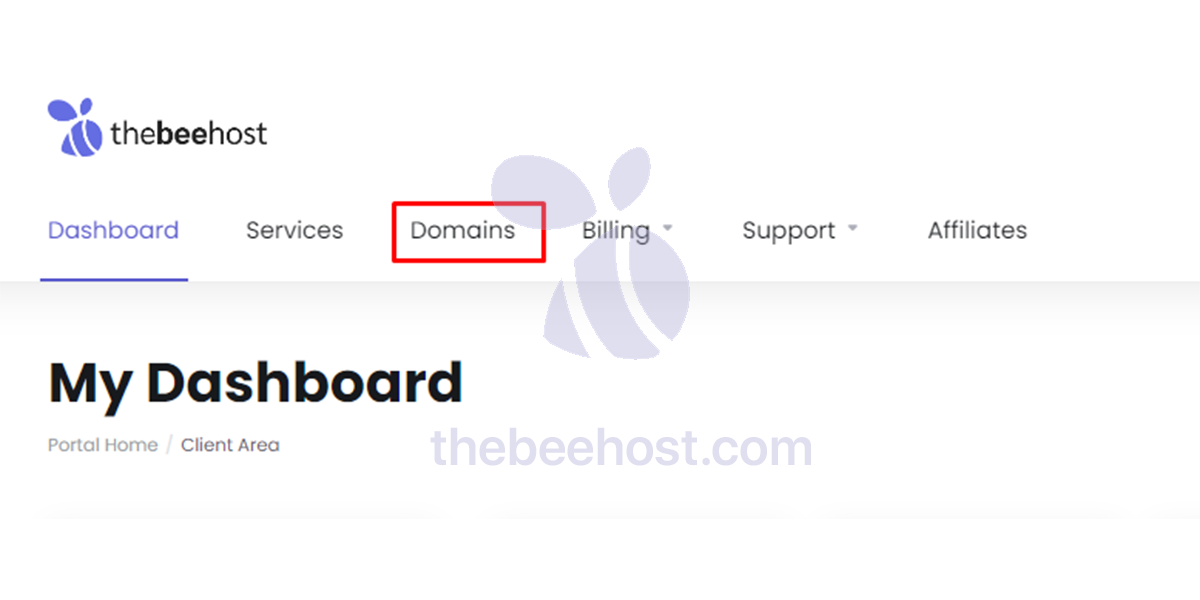
Step 2: Login to TheBeeHost Client Portal
Once the propagation is complete, log in to your account at TheBeeHost Client Portal. Click on “Domains” in the top navbar.
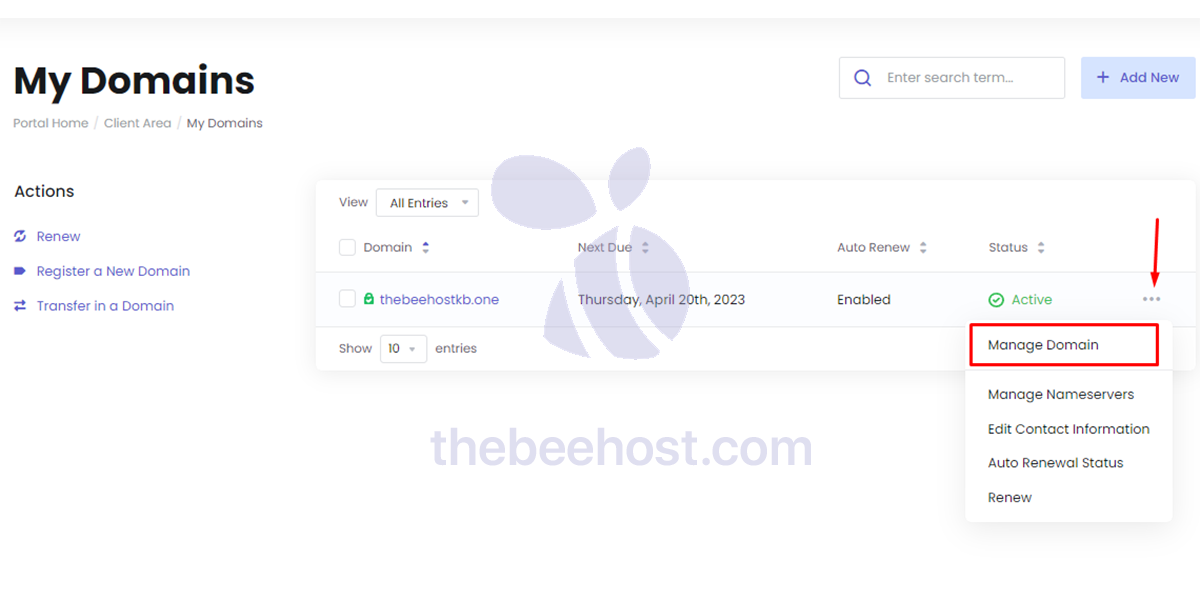
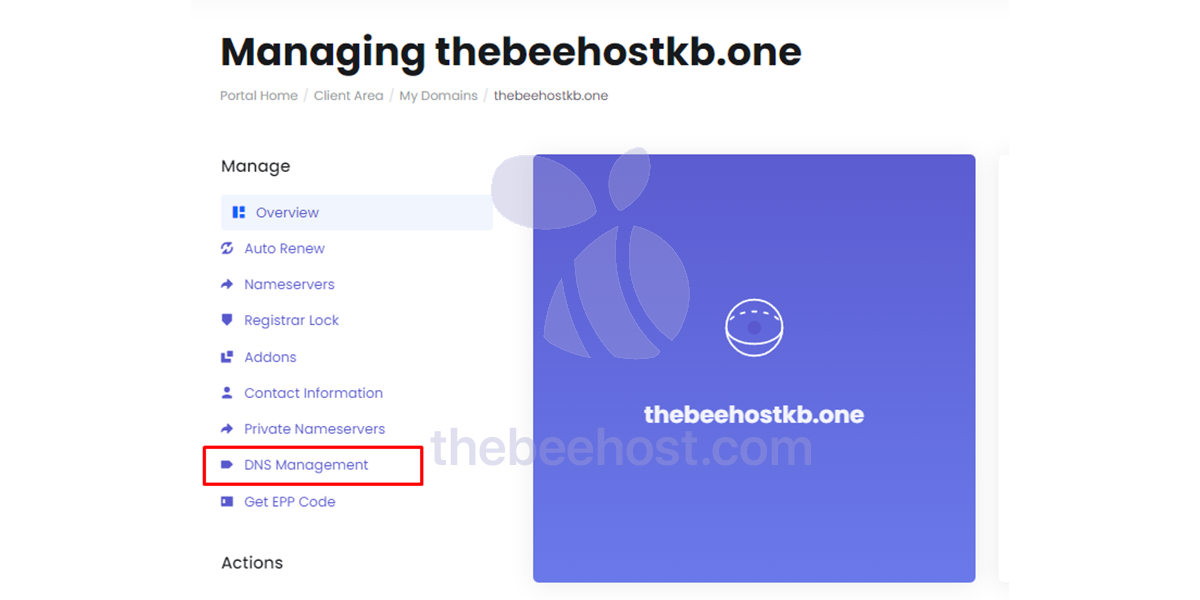
Step 3: Access Domain Management Menu
On the Domains Panel Screen, all of your domains will be listed. Click on the three dots “…” in front of the domain on the right side to open the Domain Management Menu. Move to the Manage Domain option from the drop-down list.
Step 4: Go to DNS Management
then from here Go to “DNS Management,” which is available in the left sidebar menu.
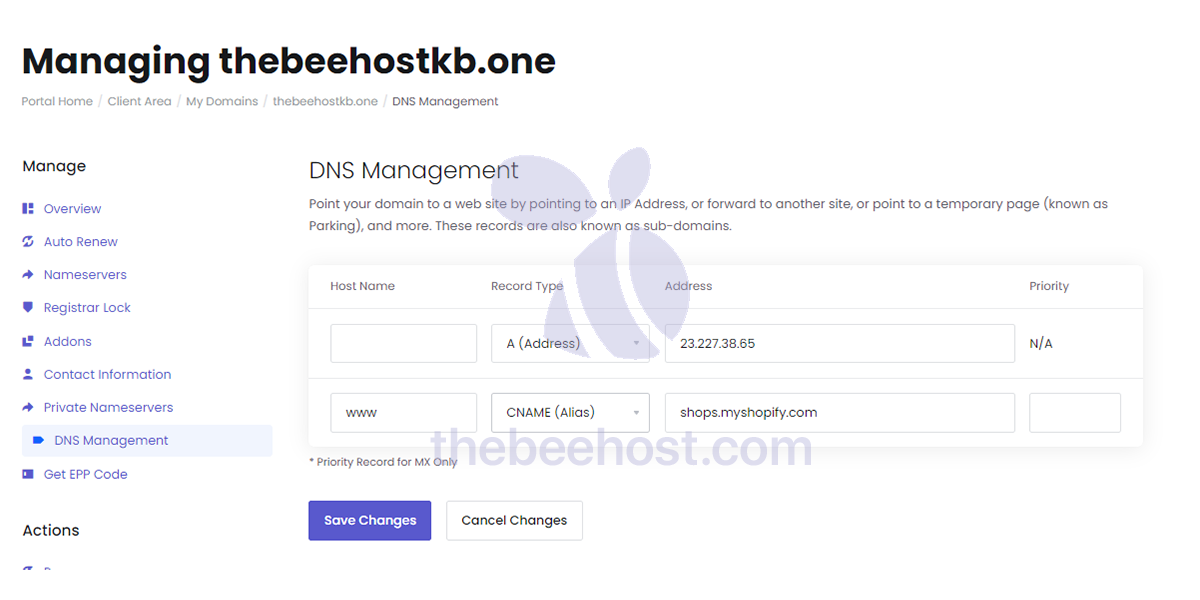
Step 5: Delete all the Records
On the Domain DNS Management screen, delete all the records by clearing the text from the records and holding the changes.
Step 6: Add Records
In the first section, type the below-given records in this order:
- Hostname: ( ‘ @ ‘ Symbol will not be acceptable so leave this field empty )
- Record Type:
A - Address:
23.227.38.65 - Priority:
No Changes Required
In the second section, type the below-given records in this order:
- Hostname:
www - Record Type:
CNAME - Address:
shops.myshopify.com - Priority:
No Changes Required
Please make sure that the rest of the fields and sections are empty, and hit the Save button.
Step 7: Wait for Propagation to Complete
If there are any errors, the configurations won’t save, but if everything is added correctly, the configuration will be saved. Once the settings are saved, allow a few hours for propagation to complete. No one can speed up the propagation, so you don’t have to send a ticket to support for this.
Step 8: If You Have a PK Domain
If you have a PK domain, you have to send a support ticket to get your DNS or nameservers added. These changes are made by the billing team and can get delayed depending on the ticket load and availability of staff members.
In conclusion, connecting your domain with Shopify DNS is a straightforward process if you follow the steps mentioned above. Make sure to use the correct nameservers and follow the instructions carefully to avoid any errors. If you have a PK domain, contact the support team for assistance. Good luck!
